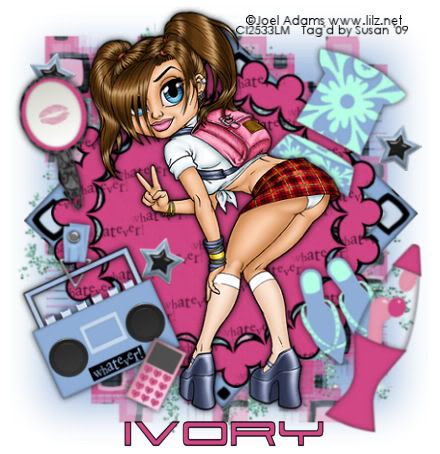
This tutorial was written on May 23rd 2009 by Susan aka Hippiedaze.
This was written off my own head lol, any resemblance is purely coincidence.
General Knowledge of psp is required, tutorial was written in psp 9 but will work in other versions.
Supplies Needed
Tube of Choice I used the artwork of Joel Adams, you need a proper license to use Joel's Artwork, pls visit CILM - HERE .
PTU Scrap Kit 'Whatever' by Ivory @ Ivory's Designs and you can purchase this kit by visitng Scrap Heaven Boutique - HERE .
Mask of Choice, am sorry i cant remember where i got the one i used so cant supply it.
Font of Choice.
(open supplies and save your chosen mask to psp folder before we start)
Lets Get Started....
Go to file, select new image and open a new image size 500x500, set the colour to white, click ok.
Choose one of the pads elements and paste as a new layer on your working canvas, resize by 50% smartsize and place in centre of your canvas,
Choose a frame element from the kit and paste as a new layer on your canvas, resize to 50% smartsize and then grab your deform tool to rotate it to the left slighty, when happy with this go to layers, select duplicate, go to image, select flip, back to image select mirror, move both these layers under the pad layer and position so you have parts of the frames showing behind the large pad, (see mine for example).
Activate your bottom white layer, paste a paper of choice as a new layer, go to layer, select load mask from disc and find the mask that you choose at the start, make sure the following settings are checked :-
Fit to canvas - checked .... Source luminace - checked .... Invert transparency - unchecked .... Hide Mask - checked, click ok, go to layers, merge group and then resize to suit your liking.
Now take your selection tool and draw out a rectangle shape in the middle of your canvas, go to layers, select add new raster layer, take your floodfill tool and choose a colour that matches your tube as the foreground colour, click inside the marching ants selection to fill with your colour, go to adjust, select blur, guassian blur and set to 20.00, click ok, move this layer below your mask layer.
Activate your top layer and paste your tube as a new layer, resize as needed and place where you like it, add a dropshadow.
Choose any elements you like from the kit and place around your tag to decorate, resize elements as needed and add a dropshadow to each layer.
Now crop & resize your tag if you wish to.
Add your name, artist info & copyright.
Save as jpeg or .png.
And I think thats us about done, lol.
Hope this was nice n easy for you .
Thanks for trying my tutorial and i hope you enjoyed it would love to see your results, hippiedaze@hotmail.com
Monday, 25 May 2009
Whatever
Posted by hippiedaze at 02:52
Labels: Tutorials - PTU
Subscribe to:
Post Comments (Atom)


0 comments:
Post a Comment