I will be gone for much of today as I have lots to do so wanted to post this new groovy template for you all, hope someone can use this, I posted a tut below as a wee example of using the template but I know how creative you all are so lets see what you can do with it & remember to send me your results, pls remember the preview is smaller than the actual template & the download link is as usual below the preview lol...
Happy tagging
Download - HERE.
Tuesday, 30 June 2009
Template 021
Boogie Nights

This tutorial was written on 16th June 2009 by Susan aka Hippiedaze.
The idea for this tag is off my own head lol and any resemblance is purely coincidence.
General Knowledge of psp is required, tutorial was written in psp 9 but will work in other versions
Supplies Needed
Tube of Choice I used the artwork of Joel Adams, you will need a proper license to use his work which you can get by visiting CILM - HERE.
No Scrap Kit Used.
Papers Used - Hippiedaze Paper Pack 011 by me which you can download from 4shared - HERE .
No Elements Used.
Template Used - Hippiedaze Template 021 by me which again can be downloaded from 4shared - HERE .
Masks Used - WSL Mask #99 & WSL Mask #84 by Chelle @ Wee Scots Lass Creations - HERE .
Plugin Used - Eye Candy 4000, Gradient Glow.
Font of Choice.
(open all supplies and place mask into your psp folder before we start)
Lets Get Started
Open the template, hit shift & d on your keyboard,this pastes the template as new image, close the original template. Delete info layer. Go to image, select resize and choose 90%, make sure smartsize is checked and resize all layers checked, click ok.
My template has a white background layer so no need to add one, activate this layer and go to image again and select canvas size and choose 500x500, click ok.
Activate the Pink Star layer, go to selections, select all, select float, select defloat then paste one of the papers from the pack as a new layer, resize a little if you want to then go to selections and select invert then hit delete on your keyboard, go to selections again and select none, you can delete the original layer now.
Repeat the step for the layers named Bars, Music Notes, Spiked Star & Peace Sign, use different papers for each layer and delete the original layers as you work.
Now go to effects and select eye candy 4000, gradient glow, use the following settings on all the above layers :-
Glow Width - 3.00 .... Soft Corners - 25 .... Overall Opacitiy - 100 .... Colour - Of Your Choice, move the slider half way along the the middle to give a bolder glow. Click ok.
Activate the Large Dark Star layer, go to adjust, select brightness/contrast and move the brightness slider to the right a bit so the layer is lighter, click ok, go to adjust again, select hue/saturation/lightness, select colourise and choose a colour of choice, click ok.
Add the same gradient glow as above to this layer.
Activate the Swirl 1 layer, on these layer i choose to colourise each a different colour but have added plain papers if you wish to use them for the swirls, work through each swirl layer and delete the originals if your using the papers.
Add the gradient glow to all swirl layers but change colour to black and move the 2nd colour slider all the way back to the left so the glow is thinner than the other layers.
Activate the Groovy Word layer, go to selections, select all, select float, select defloat then paste a plain paper from the pack as a new layer, go to selections and select invert then hit delete on the keyboard, go back to selections again and select none, delete the original layer and add the lighter gradient glow to the new layer you just created.
Repeat that step for the other 3 word layers using different papers from the pack, delete the original layers and add the same glow to each layer.
Activate the bottom white layer now, paste a paper of choice from the pack as a new layer, go to layers, select load mask from disc and use the first mask you saved at the start (WSL Mask #99) use the following settings :-
Fit to canvas - checked .... Source luminace - checked .... Invert transparency - unchecked.... Hide Mask - checked. Click ok, go to layers, merge group. Click ok, I duplicated this layer and then mirrored.
Activate the bottom white layer again and go to layers, select add new raster layer, grab your floodfill tool and choose a bright colour then click canvas to fill, now go to layers again, select load mask from disc and find the 2nd mask you saved at the start (WSL Mask #84) repeat the settings for the mask from the step above but do not duplicate this layer, i used the deform tool to stretch it out a bit.
Activate the top layer of your canvas and paste your tube as a new layer, resize as needed and place in centre or where you like it, add a dropshadow.
I didnt use any other elements on this tag.
Crop or resize if you wish to now.
Add your name, I used a paper for my name fill and added the bolder glow settings, also added a dropshadow to my name.
Add artist info & copyright info.
Save as jpeg or .png. and we're done lol.
Thanks for trying my tutorial and i hope you enjoyed it would love to see your results,
hippiedaze@hotmail.com
Monday, 29 June 2009
Template 020
Good Morning All,
Today I have another template for you, just a simple lil one lol but as always I hope some of you will use it, I have posted a simple lil tut below as an example with no scrap kit used just this template and a few papers from my freebie paper pack 008..
Download link for the template is posted below the preview, a ty is always nice to read
Download - HERE .
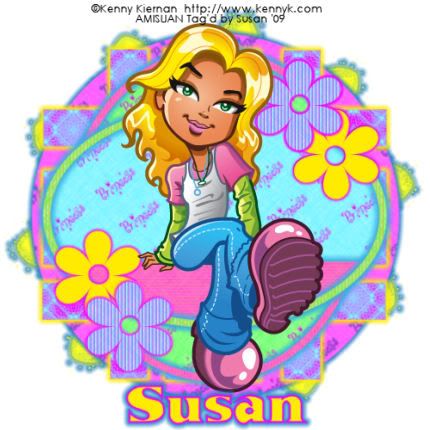
Sitting Pretty
This tutorial was written on June 14th 2009 by Susan aka Hippiedaze.
The idea for this tag is off my own head lol and any resemblance is purely coincidence.
General Knowledge of psp is required, tutorial was written in psp 9 but will work in other versions.
Supplies Needed
Tubes of Choice I used the artwork of Kenny Kiernan, you must have a proper license to use his work please visit Artistic Minds Inc - HERE .
No Scrap Kit Used, just a few papers from my paper pack 008 by me which you can d/l from 4shared - HERE .
No other Elements Used.
Template Used - Hippiedaze Template 020 by Me - HERE .
Mask Used - WSL Mask #311 by Chelle @ Wee Scots Lass Creations - HERE .
Plugin Used - Eye Candy 4000, Gradient Glow.
Font of Choice.
(save mask to psp folder before you start)
Lets Begin...
Open your template, hit shift & d on the keyboard to duplicate, now you can close the original template.
Delete info layer.
I resized here, go to image, resize and make sure resize all layers is checked, resize by around 90% smartsize and check the box that says resize all layers, click ok. (This depends on the size you like your tags).
Activate the bottom white layer and go to image,select canvas size and choose 500x500, click ok, if you have any transparent image showing grab your floodfill tool and fill with white.
Activate the large circle layer, go to selections, select all, select float, select defloat and paste paper of choice as a new layer, resize it till your happy with it then selections, invert & hit delete on the keyboard, selections, select none. Delete the original layer now.
Go to effects, select eye candy 4000, gradient glow and use the following settings :-
Glow Width - 6.00 .... Soft Corners - 25 .... Overall Opacity - 100 .... Colour - Blue, click ok
Repeat the step on the layers named horizontal slats, vertical slats, black oval & grey oval & white oval part, use different papers for each layer and delete the original layers as you go along.
On your slats layers add the same gradient glow as above but change the colour to yellow.
On the white oval part layer you created add the glow again using blue.
Activate the oval frame 1 layer, go to selections, select all, select float, select defloat and paste paper of choice as a new layer, go to selections, select invert the hit delete on your keyboard, go to selections again and select none, delete the original frame layer and add the gradient glow used before with same blue colour.
Do the same step on the oval 3 layer using one of the other papers and add the gradient glow to this layer too, blue colour again.
For flower layers 1 & 2 I repeated the above step and used a stripe paper, gradient glow was added on these layers with same settings as before and colour pink.
For flower layers 3 & 4 i colourised by going to adjust, choose hue/saturation/lightness, choose colourise and pick a nice bright colour to match the rest of your tag, add the pink gradient glow to these 2 layers also and delete the originals.
Activate the bottom white layer, paste a paper from the pack as a new layer, go to layers, select load mask from disc and use the mask that you saved at the start (WSL Mask #311), use the following settings :-
Fit to canvas - checked .... Source luminace - checked .... Invert transparency - unchecked .... Hide Mask - checked, click ok, go to layers, merge group.
I also added the gradient glow to the mask layer with colour blue.
Now crop or resize your tag in the usual way if you want to.
Add your name, artist info and copyright info.
Save as jpeg or .png.
and we're done i think lol.
Thanks for trying my tutorial and i hope you enjoyed it
would love to see your results,
hippiedaze@hotmail.com
Saturday, 27 June 2009
Template 019
Another Template for you all to create from, hope you like this one and I would love to see anything you make from it, download link is below the preview
Download - HERE .
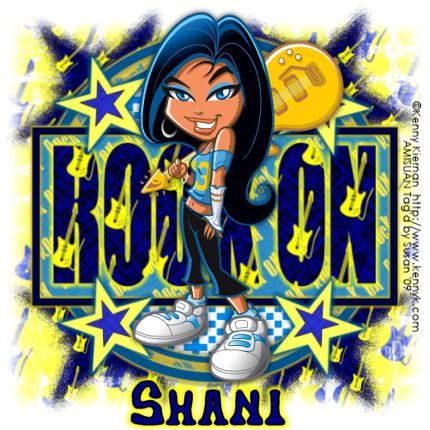
Rock On
This tutorial was written on June 14th 2009 by Susan aka Hippiedaze.
The idea for this tag is off my own head lol and any resemblance is purely coincidence.
General Knowledge of psp is required, tutorial was written in psp 9 but will work in other versions.
Supplies Needed
Tubes of Choice I used the artwork of Kenny Kiernan, you must have a proper license to use his work please visit Artistic Minds Inc - HERE .
No Scrap Kit Used, just a few papers from my paper pack 007 by me which you can d/l from 4shared - HERE .
No Elements Used.
Template Used - Hippiedaze Template 019 by Me - HERE .
Masks Used - WSL Mask #313 & WSL Mask #290 by Chelle @ Wee Scots Lass Creations - HERE .
Plugin Used - Eye Candy 4000, Gradient Glow.
Font of Choice.
(place mask into your psp folder before we start)
Lets Get Started
Open the template, hit shift & d on your keyboard,this pastes the template as new image, close the original template. Delete info layer. Go to image, select resize and choose 90%, make sure smartsize is checked and resize all layers checked, click ok.
My template has a white background layer so no need to add one, activate this layer and go to image again and select canvas size and choose 500x500, click ok..
Activate the layer named Big Circle, go to selection, select all, select float, select defloat then paste one of my papers as a new layer, resize if you want to but not smaller than the marching ants lol, go to selections again and select invert then hit delete on your keyboard, go to selections once more and select none, delete the original circle layer.
Repeat that step on the layer named Rectangle using a different paper and delete the original layer.
Activate the Rock On word layer, go to image, select resize and choose to resize by 90% smartsize, click ok then repeat the step above with the darker paper. On this layer add a gradient glow by going to effects, select eye candy 4000, gradient glow and use the following settings :-
Glow Width - 4.00 .... Soft Corners - 25 .... Overall Opacitiy - 100 .... Colour - Yellow. Click ok.
Activate the layer named Big Circle Frame, go to adjust, select brightness/contrast and move the brightness slider along to the left to lighten the frame just a little bit, go to adjust again select hue/saturation/lightness. choose colourise and pick a blue colour that matches the rest of your tag, click ok, add the same gradient glow as before to this layer and i also added a small dropshadow.
Repeat that step for the layer named Smaller Circle Frame, add the gradient glow & dropshadow to this layer too.
Activate the Checks layer, go to adjust, select hue/saturation/lightness, choose colourise and pick a blue colour to match your tag, click ok.
Activate the Rectangle Frame layer, colourise in the same way as step above, i choose to darken this layer after colourising but this is up to you, add the gradient glow & dropshadow.
Both Stars layers were colourised in the same way as before, i added the gradient glow on the larger stars layer but changed the width to 3.00 and colour to blue.
Activate the bottom white layer now, paste a paper of choice from the pack as a new layer, go to layers, select load mask from disc and use the first mask you saved at the start (WSL Mask #313) use the following settings :-
Fit to canvas - checked .... Source luminace - checked .... Invert transparency - unchecked.... Hide Mask - checked. Click ok, go to layers, merge group. Click ok.
Still on the mask layer go to image, select resize and choose to resize by 50%, smartsize and make sure resize all layers is unchecked, move the star to top left of your canvas and position like mine, go to layers, select duplicate, go to image, select mirror, go to layers again, select duplicate again lol, go to image, select flip, and one more back to layers, duplicate, image, mirror, now you should have 4 stars, one in each corner of your tag, position them as you like them.
Activate the bottom white layer again and paste another paper from the pack as a new layer, repeat the step above for the 2nd mask (WSL Mask #290) but do not resize or duplicate this one.
Activate the top layer now and paste you main tube as a new layer, resize as needed and place where you like it then add a dropshadow to it.
I didnt use any other elements on this tag.
Crop or resize if you wish to now.
Add your name, Add artist info & copyright info.
Save as jpeg or .png. and we're done lol.
Thanks for trying my tutorial and i hope you enjoyed it would love to see your results,
hippiedaze@hotmail.com
Friday, 26 June 2009
Beach Day

This tutorial was written on June 13th 2009 by Susan aka Hippiedaze.
The idea for this tag is off my own head lol and any resemblance is purely coincidence.
General Knowledge of psp is required, tutorial was written in psp 9 but will work in other versions.
Supplies Needed
Tubes of Choice, I used the artwork of Lix, you must have a proper license to use his work please visit CILM - HERE
FTU Scrap Kit 'Splish Splash Splosh' by Seachell - HERE .
No Template Used.
No Mask Used.
Effects Used - Textured Effects, Blinds.
Font of Choice.
(open all supplies and place mask into your psp folder before we start)
Lets Get Started
Go to file, select New, choose canvas size 500x500, white image, click ok.
Take the element 52 from the kit and paste as a new layer on your canvas, go to image, select resize and choose to resize frame by 50%, smartsize, click ok, place frame in centre of your canvas.
Grab your magic wand from the tool palette and click inside the frame so the marching ants are blinking around it, go to selections, select modify and choose 3, click ok, now take a paper from the kit and paste as a new layer, resize a little if needed but not smaller than the marching ants, go to selections, select invert then hit delete on your keyboard, do not deselect yet & take the wave element from the kit, paste this as a new layer and resize as needed, when happy with size and placement hit delete again on your keyboard, go to selections again and select none.
Activate the paper layer you created and go to effects, select textured effects, blinds and use the following settings :-
Width - 4 .... Opacity - 56 .... Colour - of Choice .... Horizontal - Unchecked .... Light from Top - Checked, click ok.
Add a dropshadow to the frame layer.
Take the element 53 from the kit and paste as a new layer, go to image, select resize and resize down as needed till it fits just nicely around the frame, when happy with size move this layer right down to the bottom of your canvas (see mine).
Take the sand element and paste as a new layer, resize this till its how you want it and move to bottom of canvas, make sure layer is below the frame layer.
Activate the top layer of your canvas now and paste your tube as a new layer, resize as needed, place where you like it and add a dropshadow.
Take the tree element from the kit and paste as a new layer, resize as needed and move layer down to below your tube layer, droshadow.
Activate the top layer of your canvas a gain and add any other elements you wish from the kit, paste each element as a new layer and place where you want them, add a dropshadow to each element layer.
Time to crop & resize your tag if you wish to, if you didnt at the start .
Add your name, artist info & copyright.
Save as jpeg or .png.
And I think thats us about done, lol.
Would love to see your results.
Thursday, 25 June 2009
Fairy

This tutorial was written on June 25th 2009 by Susan aka Hippiedaze.
The idea for this tag is off my own head lol and any resemblance is purely coincidence.
General Knowledge of psp is required, tutorial was written in psp 9 but will work in other versions.
Supplies Needed
No Tubes were used in this one, the Fairy is part of the kit.
PTU Scrap Kit Used - 'Fairy Otelia' by Shani aka Wicked Princess @ Wicked Princess Tutorials & you can purchase this Scrap Kit from P4S - HERE .
Template Used - Missy Template #18 by Missy @ Divine Intentionz - HERE .
Mask Used WSL Mask #79 by Chelle @ Wee Scots Lass Creations - HERE .
Plugin Used - Eye Candy 4000, Gradient Glow.
Font of Choice.
(Open all supplies and save mask to psp folder before you begin)
Lets Get Started
Open the template, hit shift & d on your keyboard,this pastes the template as new image, close the original template. Delete the info layer.
Go to image and choose resize, select width & height to 77%, smartsize checked and make sure the tab resize all layers is checked, click ok.
Click on the bottom white layer and go to image, select canvas size then choose 500x500, click ok, if there is any transparent image showing grab your floodfill tool and fill with white.
Activate the Circle layer, go to selections, select all, select float, select defloat then paste a paper from the kit as a new layer, resize if needed then go to selections again and select invert then hit delete on your keyboard, back to selections and select none, delete the original layer.
Add a gradient glow by going to effects, select eye candy 4000, gradient glow, use the following settings :-
Glow Width - 8.00 .... Soft Corners - 25 .... Overall Opacity - 100 .... Colour - Yellow or Green, click ok.
Repeat that step for All the other template layers using different papers & delete the original layers as you go along. Add the same gradient glow to all these layers, delete the original layers.
Choose either flower 13 or 13 from the kit and paste as a new layer, resize this as needed and move to the left of your canvas, move the layer right down to the bottom layer, just above your white background, position so its showing from behind the template layers, when happy with placement go to layers and select duplicate then go to image and select mirror so the flowers are showing from both sides of your tag.
Activate the bottom white layer and paste a paper of choice, go to layers, select load mask from disc, find the mask you saved at the start (WSL Mask #79) and use the following settings :-
Fit to canvas - checked .... Source luminace - checked .... Invert transparency - unchecked .... Hide Mask - checked, click ok, go to layers, merge group.
Go to layers and select duplicate then go to image and select mirror so the mask layers are both showing from behind all other layers, you may need to reposition a little.
Activate the top layer of your canvas now and choose one of the glitter flowers from the kit, paste as a new layer then go to image and select rotate, choose free rotate left or right by 90 degrees, resize this so it fits nicely inside the rectangle.
Choose a different glitter flower and paste as new layer, leave this one vertical and resize as needed till it fits inside the circle layer, see mine as example.
Paste your fairy tube element as a new layer, resize a little if needed and place where you like it.
Choose a name plate from the kit and paste as a new layer, resize as needed and place just below the tube.
Decorate your tag with any other elements you wish from the kit, its a huge kit and plenty to choose from, resize each element layer as needed and add a dropshadow to each layer.
Crop or resize your tag now if you want to or didnt at the start.
Add your name, artist info and copyright info.
Save as jpeg or .png.
and we're done i think lol.
Thanks for trying my tutorial and i hope you enjoyed it
would love to see your results,
hippiedaze@hotmail.com
Wednesday, 24 June 2009
Summertime Brights Sampler Kit Freebie
Finally lol, just wanted to post this before bed, its bright and cheery and has the colours of summer fun, hope some of you like this and can use it, this is just the mini version which i mentioned earlier, I just picked out a few papers & elements to give you a taster of the full kit which will be available later in the week once i decide whether to put in the store or not lol as im still not sure if my works good enough but hey lol we all gotta start somewhere eh....
Ok enought of my blabbering
Click on the preview below to download from 4shared
Relax

This tutorial was written on June 11th 2009 by Susan aka Hippiedaze.
The idea for this tag is off my own head lol and any resemblance is purely coincidence.
General Knowledge of psp is required, tutorial was written in psp 9 but will work in other versions.
Supplies Needed
Tubes of Choice I used the artwork of Keith Garvey, you must have a proper license to use his work please visit MPT - mypsptubes - HERE .
FTU Scrap Kit - 'Happy Place' by Miss Kim - HERE .
Template Used - Template #7 by Alyssa @ Alyssa's Tutorials - HERE .
Mask Used - WSL Mask 330 by Chelle @ Wee Scots Lass Creations - HERE .
Plugin Used - Eye Candy 4000, Gradient Glow.
Font of Choice.
(save mask to psp folder before you start)
Lets Begin...
Open your template, hit shift & d on the keyboard to duplicate, now you can close the original template.
Delete info layer.
I resized here, go to image, resize and make sure resize all layers is checked, resize by around 75% smartsize and check the box that says resize all layers, click ok. (This depends on the size you like your tags).
Activate the pink background layer, grab your floodfill tool and then select white as your foreground colour in the colour palette, click on the pink area to fill layer white.
Activate the Large Circle layer, go to selections, select all, select float, select defloat and paste paper of choice as a new layer, resize it till your happy with it then selections, invert & hit delete on the keyboard, selections, select none. Delete the original layer now.
Repeat the step on the Small Circle, Left Bars, Right Bars & Rectangle layers, use different papers for each layer and delete the original layers as you go along.
Go to effects, select eye candy 4000, gradient glow and use the following settings to add a glow to all the above layers :-
Glow Width - 3.00 .... Soft Corners - 25 .... Overall Opacity - 100 .... Colour - Black. click ok.
Repeat step again on the thin circle & also the circle frame layers, i used 2 different bright papers for these layers, delete the original layers and add the same gradient glow to both new layers.
Activate the bottom white layer, paste a paper from the kit as a new layer, go to layers, select load mask from disc and find the mask that you saved at the start (WSL Mask #330) and use the following settings :-
Fit to canvas - checked .... Source luminace - checked .... Invert transparency - unchecked .... Hide Mask - checked, click ok, go to layers, merge group.
Now take your selection tool and draw out a largish rectangle just a bit bigger than the rectangle layer, go to layers, select add new raster layer, transparent, click ok, choose a bright colour in your foreground colour palette and then click inside the marching ants to fill with colour, go to adjust, select blur, guassian blur and set to 20.00, click ok, go to layer properties and lower the opacity to around 60.
Now activate the top layer of your canvas and paste your tube as a new layer, resize as needed and place over the circle in the centre, take your eraser tool and erase any parts hanging over the bottom of the circle.
Activate the layer you created with the left bars, take your draw tool and set line style to dots, width 5.00, colour i choose was the pnik to match the circle frame layer, now hold down the shift key and draw a straight line with your mouse over one of the bars from top to bottom, go to layers and convert to raster layer, add a dropshadow to this layer, go to layers again and select duplicate, go to image and select mirror so you have the dotted lines on either side.
Now change the colour to black and draw another dotted line over a different bar in the same way as before, duplicate this layer and mirror then add the dropshadow to both layers again.
Back on your top layer take any other elements you wish from the kit, paste each element as a new layer and resize as needed, i only used a few elements on this one.
Now crop or resize your tag in the usual way if you want to.
Add your name, artist info and copyright info.
Save as jpeg or .png.
and we're done i think lol.
Thanks for trying my tutorial and i hope you enjoyed it
would love to see your results,
hippiedaze@hotmail.com
Working on a new Scrap Kit
Well now the scrap kit making bug has caught me lol & I have a new kit on the go just now, the colours in this kit are bright and summery so decided to call this one Summertime Brights, its tagger sized & papers are 600x600, sampler freebie kit has 6 papers and 15 elements including some frames and wordart, the full tagger sized kit has 32 papers and 81 elements (this includes most of whats in the sampler) im just putting the finishing touches to the full kit preview so will be ready soon....
anyways here is a preview of the sampler kit and I will have the kit uploaded later tonight so if you like what you see be sure to check back later....
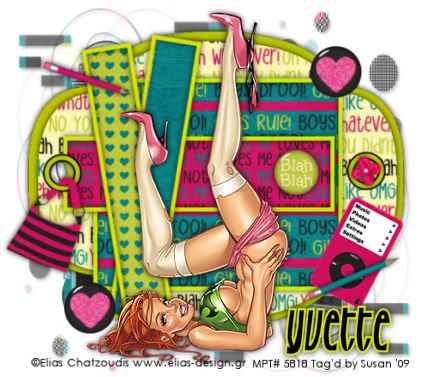
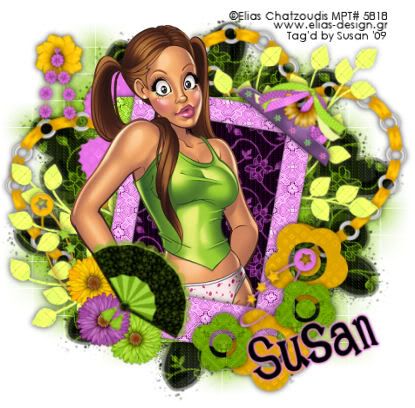
Bit Of An Attitude
This tutorial was written on June 11th 2009 by Susan aka Hippiedaze.
The idea for this tag is off my own head lol and any resemblance is purely coincidence.
General Knowledge of psp is required, tutorial was written in psp 9 but will work in other versions.
Supplies Needed
Tubes of Choice I used the artwork of Elias Chatzoudis, you will need a proper license to use his work and you get that by visiting MPT - mypsptubes - HERE .
FTU Scrap Kit 'Bit of an Attitude' by Yvette @ Misfits Scrapz - HERE .
Template Used - MC Template #29 by Melissa @ Melissaz Creationz - HERE .
Mask of Choice.
Font of Choice.
(Save mask to your psp folder before you begin and open all other supplies you need)
Lets Get Started
Open the template, hit shift & d on your keyboard,this pastes the template as new image, close the original template.
Delete info layer, I resized mine a little at this point, go to image, resize, change width & height to 85%, choose smartsize and make sure resize all layers is checked, click ok.
Or if you prefer you can skip the resizing and can resize later, i just find it easier working with it at this size.
Go to layers, select add new raster layer, click ok, go to your colour palette and choose white for the foreground, click ok, then click the canvas to fill new layer with white, move this layer all the way to the bottom of your canvas and this will be the background layer, go to image, select canvas size, choose 500x500, click ok & fill any trasparent canvas white.
Activate raster 1 layer, go to selection, select all, select float, select defloat then paste a paper from the kit as a new layer, i choose the words papers, resize a little if needed then go to selections again and select invert then hit delete on your keyboard, selections again select none, delete the original layer now.
Repeat that step on the layers - raster 3 & raster 8, i used different words papers for these layers.
Repeat again for the layers named - raster 6 & copy of raster 6, i used lain papers for these 2 layers.
Activate raster 2 layer, go to adjust, select brightness/contrast and move the brightness slider to around 120, this should lighten the layer a little, click ok, now go to adjust again and select hue/saturation/lightness, select colourise and choose a bright colour that blends with your tube, click ok, add a droshadow to this layer.
Repeat that step on the layers named - raster 7, raster 4 & copy of raster 4, add the dropshadow to each layer.
Activate raster 5 layer, go to adjust, select hue/saturation/lightness, select colourise and choose the same colour you used for the frame layers, add the dropshadow.
Repeat that for copy of raster 5 layer.
Activate the bottom white layer, paste a paper from the kit as a new layer, go to layers, select load mask from disc and find the mask that you saved at the start, use the following settings :-
Fit to canvas - checked .... Source luminace - checked .... Invert transparency - unchecked/checked depending on the mask you choose ....Hide Mask - checked. Click ok. go to layers select merge group.
Activate the top layer now and paste your tube as a new layer, resize a little if you need to and place where you like it, add a dropshadow.
Take any elements you want from the kit, paste as new layers on your canvas and resize each element as needed, remember elements should be resized smartsize, add a dropshadow to each element layer.
Crop or resizeyour tag if you want to or didnt at the start lol.
Add your name, for my name i choose a bold fond with black background colour and the same bright colour used on the frames for the foreground, add the dropshadow to the name layer.
Add artist info and copyright info.
Save as jpeg or .png.
and we're done lol.
Thanks for trying my tutorial and i hope you enjoyed it
would love to see your results,
hippiedaze@hotmail.com
Tuesday, 23 June 2009
New List
I have added a list over >>>>> with links to tuts that have been written with my templates/ kits etc, thank you Shani for using them so brilliantly and if any of you use the templates or kits in your tutorials pls do send me the link and i will add to the list
hugs Susan
A New Award

Woohooo am doing a lil happy dance and have a huge smile here lol, I've been given this awesome award by Sizzel over @ Sizzels Designs
Thanks so much for thinking of me Sizzel & I will pass this on to 4 blogs now
Am sending this award to ...
Shani @ Wicked Princess Tuts - HERE .
Laura @ Cinamon Scrapz - HERE .
Melissa @ Melissa'z Creationz - HERE .
Alyssa @ Alyssa's tutorials - HERE .
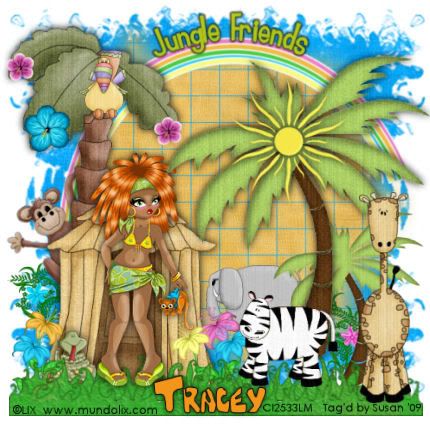
Jungle Friends
This tutorial was written on June 21st 2009 by Susan aka Hippiedaze.
The idea for this tag is off my own head lol and any resemblance is purely coincidence.
General Knowledge of psp is required, tutorial was written in psp 9 but will work in other versions.
Supplies Needed
Tube of Choice, I used the artwork of Lix, you must have a proper license to use his work please visit CILM - HERE .
Scrap Kit Used - 'Jungle Fever' by Tracey @ Soxsational Scrapz, you can purchase this awesome kit from P4S - HERE .
No Template Used.
2 Masks of Choice.
Font of Choice.
(open all supplies and save mask to psp folder before beginning)
Lets Start ....
Go to file in your psp tabs, select new and choose a white image whichever size you prefer to work with, i use 500x500 but select yours to suit yourself, click ok.
Take the hut element from the kit and paste as a new layer, resize this whichever size suits and remember resize by smartsize, make sure resize all layers is unchecked and click ok, move the hut to the left of your canvas and add a small dropshadow.
Take the grass 2 element and paste this as a new layer, resize as needed and move down to bottom of your canvas, i dulicated the grass and moved the duplicate layer down slightly to make the grass look thicker.
Take the palm tree element from the kit, paste as a new layer and resize to your liking, move to the right side of your canvas, then go to layers, select duplicate and then go to image, select resize, i resized the 2nd tree around 75%, smartsize, click ok, add a dropshadow to both tree layers.
Take the sun element from the kit, paste as a new layer and resize as needed, place this on top of the large tree layer and position in the middle (see mine), add the dropshadow to this layer.
Paste the rainbow element from the kit as a new layer and resize as needed, move this layer down to the very bottom layer of your canvas and postion, i rotated mine very slightly so the trees were covering the edges of the rainbow.
Grab your eclipse tool from the tool palette and check background colour tab to null, any colour will do for the foreground as it will be deleted later, draw out a largish circle in line with the top of the rainbow, now take your text tool and choose a font & size, check your text to floating selection, choose a colour for the foreground & background and then move your mouse over the circle till you see a text icon with a lil half moon shape beside it, click to enter your choosen text, i choose 'Jungle Friends', click apply, the marching ants will be blinking around the text now, go to layers, select new raster layer, click ok, move the new raster layer to under the floating selection layer, now activate the floating selection and go to selections, select none, the text should now be on its own layer, delete the circle layer & postition the text above the rainbow like mine.
Choose some animals from the kit and paste each as a new layer, resize layers as needed and add a dropshadow to each animal, place around your tag where you like.
Take your tube and paste as a new layer, resize as neede and add a dropshadow, place where you like it, i put mine in front of the lil hut lol.
Take some flower elements and paste each as a new layer, resize quite a bit and place each flower along the grass at the bottom, move the layers behind the grass if you want to. I also put a few flowers in the tree.
Activate the bottom white layer and paste a paper of choice from the kit as a new layer, resize a little if needed, go to layer, select load mask from disk and find the first mask you choose at the start, I choose an edge mask for this one, make sure the following settings are checked :-
Fit to canvas - checked Source luminace - checked Invert transparency - unchecked .... Hide Mask - checked. go to layers, merge group & you can use the deform tool to resize to suit your tag.
Now take another paper from the kit and paste as a new layer, resize a little if needed, go to layer, select load mask from disk and find the 2nd mask you choose at the start, use the same settings as above and after merging group, fit to suit your tag.
Activate the top layer now and add any other elements from the kit that you want.
Now crop or resize if you want to.
Add your name, add artist info and copyright info.
Save as jpeg or .png.
and we're done i think lol.
Thanks for trying my tutorial and i hope you enjoyed it
would love to see your results,
hippiedaze@hotmail.com
$1.00 Sale At P4S

Today is $1.00 Tuesdays over at P4S so hurry over and grab some awesome bargains, also there is a good few kits which I've used in ptu tuts all on sale for just $1.00 so if you wanted the kit but couldn't afford it todays the day to treat yourself lol
Click on the image to go to the store and start shopping
Monday, 22 June 2009
Give Peace A Chance Scrap Kit
Hi All, Sorry its taken me till now to get this posted for you today, its been a long long day for me but wanted to post before i head to bed...
Hope you like my first scrap kit, if you didnt see the preview last night then here it is again, please be sure to let me know if you use it and would love to see any creations you make from it,
its tagger size remember and the download link is posted under the preview
enjoy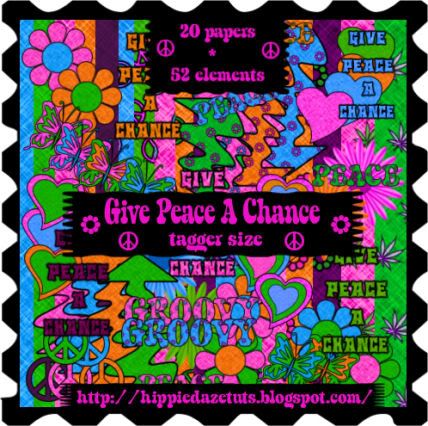
Download - HERE .
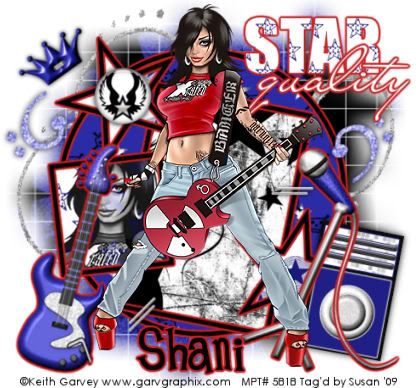
Rock Star Quality
This tutorial was written on June 10th 2009 by Susan aka Hippiedaze.
The idea for this tag is off my own head lol and any resemblance is purely coincidence.
General Knowledge of psp is required, tutorial was written in psp 9 but will work in other versions.
Supplies Needed
Tubes of Choice I used the artwork of Keith Garvey, you must have a proper license to use his work please visit MPT - mypsptubes - HERE .
PTU Scrap Kit 'Sweet Rock' by my good friend Shani @ Wicked Princess Tutorials, you can purchase this kit at P4S - HERE .
Template Used - MC Template #32 by Melissa @ Melissaz Creationz - HERE .
Mask Used - WSL Mask #84 by Chelle @ Wee Scots Lass Creations - HERE .
Plugin Used - Eye Candy 4000, Gradient Glow.
Font of Choice.
(save mask to psp folder before you begin)
Lets Get Started
Open the template, hit shift & d on your keyboard,this pastes the template as new image, close the original template.
Go to image, select resize, resize by 85% smartsize and make sure resize all layers is checked, click ok. Activate the bottom raster layer which is closed off, unhide layer, activate this layer and now go to image again, select canvas size and choose 500x500, click ok, this will give you a little extra room to work, delete the info layer.
Activate the square background layer, go to selections, select all, select float, select defloat then paste a paper of choice from the kit as a new layer, you may want to resize it a little, now go to selections again, select invert then hit delete on your keyboard but do not deselect yet....take your close up tube and paste as a new layer, i used the same tube as my main one, i resized the tube by 120%, bicubic, click ok, place it so its fitting how you want it inside the frame & when happy with placement hit delete on your keyboard so now your tube should be above the paper layer and both neatly inside the frame, go to selections and select none, delete the original square bg layer now.
Activate the tube layer and go to layer properties, change the blend mode to luminacy legacy, click ok.
Activate the circle background layer, go to selections, select all, select float, select defloat then paste a paper from the kit as a new layer, resize again if needed then go to selections and select invert then hit delete on your keyboard, go to selections again and select none, delete the original layer.
Repeat the same step for the rectangle background layer and the star backgrounds layer, use different papers of your choice.
Activate the circle frame layer, go to adjust, select brightness/contrast and move the brightness slider all the way to the left (-255) your frame should now be black, click ok, go to effects, select eye candy 4000 gradient glow and use the following settings :-
Glow Width - 3.00 .... Soft Corners - 25 .... Overall Opacitiy - 100 .... Colour - Red .... move the slider to half way so the glow is bolder, make sure both sliders are the same colour though.
Repeat that step for the star frames layer, square frame layer and rectangle frame layer, add the same gradient glow to these layers as well.
Activate the Star word layer, fill with a paper using the same step as before then add the gradient glow to this layer.
Activate the quality word layer, go to adjust, select brightness/contrast and move the brightness slider all the way to the right this time (255) your word layer should now be white, add the gradient glow to this layer too.
Activate the bottom white layer, paste a darker paper from the kit as a new layer, resize a little if needed but not smaller than the canvas, go to layers, select load mask from disc then find the mask you saved at the start (WSL Mask #84) use the following settings :-
Fit to canvas - checked .... Source luminace - checked .... Invert transparency - Unchecked
Hide Mask - checked, click ok.
Go to layers, merge group & resize to suit your tag using the deform tool if needed till you get it how you want it.
Take a swirl from the kit and paste as a new layer, resize if you want to and place where you like it just above the mask layer, use the deform tool to rotate it slightly, once happy with this go to layers, select duplicate, go to image, select mirror, go to image again and select flip, positon how you like it on opposite side.
Activate the top layer now and paste your tube as a new layer, resize a little then add a dropshadow.
Add any other elements you want from the kit as new layers, i added the glow to some elements and a dropshadow to others, the choice is yours to decorate as you like.
Crop or resize your tag now if you wish.
Add you name, i added the gradient glow to my name on this one.
Add artist info and copyright info.
Save as jpeg or .png.
and we're done lol.
Thanks for trying my tutorial and i hope you enjoyed it
would love to see your results,
hippiedaze@hotmail.com
Last Summer
This tutorial was written on June 10th 2009 by Susan aka Hippiedaze.
The idea for this tag is off my own head lol and any resemblance is purely coincidence.
General Knowledge of psp is required, tutorial was written in psp 9 but will work in other versions.
Supplies Needed
Tube of Choice I used the artwork of Elias Chatzoudis, you must have a proper license to use his work, visit MPT - HERE .
FTU Scrap Kit 'Last Summer' by Fantasy Moments - HERE .
Template Used - #27 by Vivi's Designs - HERE .
Masks Used - WSL Mask #311 & WSL Mask #84 by Chelle @ Wee Scots Lass Creations - HERE .
Plugin Used - Eye Candy 4000, Gradient Glow, for name only.
Font of Choice.
Dropshadow layers throughout.
(open all supplies and save mask to psp folder before beginning)
Lets Start ....
Open the template, hit shift & d on your keyboard,this pastes the template as new image, close the original template. Delete info layer, go to image, select resize, choose resize 80%, choose smartsize and make sure the box resize all layers is checked, click on the bottom white layer, go to image again and select canvas size and choose 500x500 to give a little extra room to work or if you prefer you can resize later.
Activate the layer named leaves 1, go to selections, select all, select float, select defloat then paste a paper from the kit as a new layer, go back to selections, select invert then hit delete on your keyboard, back to selections again and select none, delete the original layer. Add a small dropshadow to the layer you created.
Repeat the same step for the leaves 2 layer. Add the same dropshadow to this layer.
Now activate the flower 1 layer and repeat step again, use a different paper for this layer and add the dropshoadow.
Do this again lol on flower layers 2,3,4 &5, i used 2 different papers for these layers. Add the dropshadow to all layers created.
Activate the Frame 1 layer, again do the same step with a different paper, delete the original layer and add the dropshadow.
We will add the tube before we do the top frame layer, so click on your top layer, paste your tube as a new layer now and resize as needed, place in centre of the canvas & when happy with how placement go to layers, select duplicate and move the original tube layer down to just above the frame 1 layer, activate the top tube layer, grab your eraser tool and erase any parts of the tube thats hanging over the bottom (see mine).
Now activate the frame 2 layer, repeat the same step for all other layers with a different paper, delete the original layer then add the dropshadow to new layer.
Fill the background frame with another paper from the kit using the same methods as all above layers.
Activate the bottom white layer, paste a paper of choice from the kit, go to layers, select load mask from disc, find the first mask you saved at the start (WSL #311) then use the following settings :-
Fit to canvas - checked .... Source luminace - checked .... Invert transparency - unchecked .... Hide Mask - checked, click ok, go to layers, merge group.
Now paste another paper, i used a darker one this time and add the 2nd mask that you saved (WSL Mask #84) use the same settings as before, you can use the deform tool on this layer to make it fit better around your tag.
Take the element #13 from the kit, paste as a new layer, go to image, select rotate and rotate to around 20.00 left, go to layers, select duplicate and positon on opposite side of your tag, i mmoved the left one down a little and the right one up a bit lol,add the dropshadow to both layers.
Now click on the top layer and add any elements you want from the kit, resize each layer and place where you like then add the dropshadow.
Now crop & resize your tag if you wish to.
Add your name, I added a gradient glow to my name, you can do this by going to effects, select eye candy 4000, gradient glow and use the following settings :-
Glow Width - 3.00 .... Soft Corners - 25 .... Overall Opacitiy - 100 .... Colour - Choose a bright Colour.
Add artist info & copyright.
Save as jpeg or .png.
And I think thats us about done, lol.
Thanks for trying my tutorial and i hope you enjoyed it
would love to see your results,
hippiedaze@hotmail.com
Sunday, 21 June 2009
Preview of My First Ever Scrap Kit
Well Well lol the last few days that I have had time to sit and play in psp I've been playing with bits n pieces from ding fonts and shapes one thing led to another lol and I started saving them, eventually today i choose a few colours and decided to try my hand at putting them all together into a kit, I get carried away with it all and am not even sure if its any good but am being brave and showing the preview before I head off to bed tonight,its tagger sized with the papers at 600x600, I'm still learning with sizes etc, if you drop by the blog tonight pls leave a wee msg and let me know what you think of the kit, the preview is resized and its a bit squashed up looking lol but hope someone likes it, tmw I will finish up the tou and stuff then get it zipped and post the link
ok here is the preview, remember I'd love to know what you think
Template 018
Hi Everyone, hope the weekend has been kind to you all, I had a busy one with it being our local childrens day yst, the weather held out not too badly and it stayed dry for the kids procession which was a big difference to last years washout lol, anyways I was playing with bits n pieces again and came up with this template for you all, this one was fun to make and hope some of you will use it,
Ive added a tut below as a wee example tho I would love to see anything you make with it,
Download link is under the preview
Download - HERE .
50's Blast

This tutorial was written on June 10th 2009 by Susan aka Hippiedaze.
The idea for this tag is off my own head lol and any resemblance is purely coincidence.
General Knowledge of psp is required, tutorial was written in psp 9 but will work in other versions.
Supplies Needed
Tube of Choice I used the artwork of Popeye Wong, this artwork is FTU and you can grab Popeye's awesome tubes from - HERE .
PTU Scrap Kit 'Lost in the 50's' by Southern Scrapz and you can purchase this kit from P4s - HERE .
Template Used - Hippiedaze Template #018 by me - HERE .
Mask Used - WSL Mask #314 by Chelle @ Wee Scots Lass Creations - HERE .
Plugin Used - Eye Candy 4000. Gradient Glow.
Effects Used - Textured Effects, Weave.
Font of Choice.
(open all supplies and save mask to psp folder before beginning)
Lets Start ....
Open the template, hit shift & d on your keyboard,this pastes the template as new image, close the original template. Delete info layer, go to image, select resize, choose resize 90%, choose smartsize and make sure the box resize all layers is checked, click on the bottom white layer, go to image again and select canvas size and choose 500x500 to give a little extra room to work or if you prefer you can resize later.
Activate the layer named large backing star, go to selections, select all, select float, select defloat then paste a paper from the kit as a new layer, you will need to resize this quite a bit if using the same kit as me as its huge, once resized and happy with it go to selections again, select invert then hit delete on the keyboard, go back to selections and select none, delete the original layer now.
Go to effects, select eye candy 4000, gradient glow and use the following settings :-
Glow Width - 5.00 .... Soft Corners - 25 .... Overall Opacitiy - 100 .... Colour - Pink or whatever matches your tube.
Activate the layer named large dashed circle, go to adjust, select brightness/contrast and move the brightness slider all the way to the left (-255) this will change the dashes to black.
Add the gradient glow to this layer but change the width to 3.00 and colour to white, also add a small dropshadow to the dashed circle.
Activate the layer named 'its a blast' go to adjust, select hue/saturation/lightness, select colourise and choose a colour of your choice, click ok, add the gradient glow to this layer but this time move the colour slider along to half way and make the first slider white, 2nd slider pink, now grab your magic wand from the tool palette and click inside each letter of the wording so the marching ants are blinking round all words. go to effects, select textured effects, weave and use the following settings :-
Gap Size - 2 .... Width - 4 .... Opacity - 2 .... Weave Colour - Black .... Gap Colour black ... Fill Gaps - Checked, click ok.
Activate the layer named speaker fronts, grab your magic wand and click inside both grey areas on fronts of speakers, paste a paper of choice from the kit as a new layer, remember to resize by quite a lot, when happy with this go to selections, select invert then hit delete on your keyboard, back to selections and select none, you can delete the original speaker fronts layer now.
Activate the layer named record player fills, go to adjust, select hue/saturation/lightness and then choose colourise, pick a colour of your choice then click ok.
Colourise the speaker rounds layer in the same way.
Activate the music player outline layer and simply add the gradient glow, this time remove the 2nd slider tab so you just have a single white, click ok.
Activate the bottom white layer now and paste a paper from the kit as a new layer, resize this a bit but not smaller than the canvas, go to layers, select load mask from disc and find the mask you saved at the start (WSL Mask #314) use the following settings :-
Fit to canvas - checked .... Source luminace - checked .... Invert transparency - unchecked .... Hide Mask - checked
go to layers, merge group & you can use the deform tool to resize to suit your tag. I simple stretched it out a bit.
Back to your top layer now and paste your tube as a new layer, resize a little and place where you want it, add a dropshadow to the tube.
Choose any other elements from the kit, decorate how you wish, resize elements as needed and place where you like them, add a dropshadow to each element layer.
Now crop & resize your tag if you wish to.
Add your name, artist info & copyright.
Save as jpeg or .png.
And I think thats us about done, lol.
Thanks for trying my tutorial and i hope you enjoyed it
would love to see your results,
hippiedaze@hotmail.com
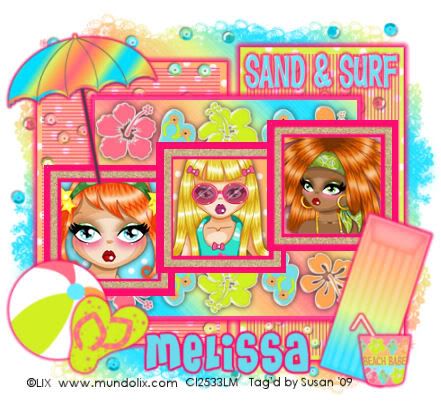
Surf 'n' Sand
This tutorial was written on June 9th 2009 by Susan aka Hippiedaze.
The idea for this tag is off my own head and any resemblance is purely coincidence.
General Knowledge of psp is required, tutorial was written in psp 9 but will work in other versions.
Supplies Needed
Tube of Choice I used the artwork of Lix, you must have a proper license to use his artwork, to get this visit CILM - HERE .
FTU Scrap Kit - 'Beach Babe Freebie' by Melissa @ Melissaz Creationz - HERE .
Template Used - BP Template #21 by BeckyP @ Becky's Creations - HERE .
Mask Used - WSL Mask #282 by Chelle @ Wee Scots Lass Creations - HERE .
Plugin Used - Eye Candy 4000, Gradient Glow.
Font of Choice.
(open all supplies and save mask to psp folder before beginning)
Lets Start ....
Open the template, hit shift & d on your keyboard,this pastes the template as new image, close the original template. Delete info layer, go to image, select resize, choose resize 80%, choose smartsize and make surethe box resize all layers is checked, click on the bottom white layer, go to image again and select canvas size and choose 500x500 to give a little extra room to work or if you prefer you can resize later.
Activate the Rectangle 1 layer, go to selection, select all, select float, select defloat then paste a paper of choice from the kit as a new layer, resize a bit if needed, go to selections, select invert then hit delete on your keyboard, selections once more and select none. Delete the original layer.
Repeat the step for the layers named Rectangle 2 & Centre Square, use different papers for each layer.
Go to effects, select eye candy 4000, gradient glow and give each of the above layers the glow with the following settings :-
Glow Width - 5.00 .... Soft Corners - 25 .... Overall Opacitiy - 100 .... Colour - #fb0e6e. Now add a small dropshadow to each layer using the same colour as the gradient glow.
Activate the Rectangle 1 Stripe layer, go to adjust, select hue/saturation/lightness and then select colourise, choose a bright pink to match your glow.
Repeat that step for the Rectangle 2 Stripe layer & also the Centre Square Background layer.
Activate the Frame 1 Background layer, grab your magic wand and click inside the white area so the marching ants are blinking, paste one of your tubes as a new layer, resize if needed and when happy with plcement go to selections again and select invert then hit delete on your keyboard.
Repeat that step on the other 2 frame background layers, remember to activate each frame layer before selecting with magic wand.
Add a small dropshadow to each new tube layer.
Now click back on the Frame 1 background layer, click with magic wand again and this time paste a paper of your choice as a new layer, resize as needed then go to selections, select invert then hit delete on your keyboard go to selections again and select none.
Repeat that step on the other 2 frame background layers with different papers then delete the original layers.
Activate Frame 1 layer, go to adjust, select brightness/contrast then move the brightness slider a bit to the right to lighten a little then go to adjust again and select hue/saturation/lightness, select colourise and choose the same pink colour as before.
Repeat that step on the other 2 Frame layers now.
Activate the Frame 1 trim layer, go to selections, select all, select float, select defloat then paste another paper of choice as a new layer, resize as needed then go to selections, select invert then hit delete on the keyboard, go to selections again and select none.
Using the same paper repeat that step on the other 2 frame trim layers.
Activate the bottom white layer. paste a paper from the kit as a new layer, go to layers, select load mask from disc and find the mask you saved at the start (WSL Mask #282) and use the following settings :-
Fit to canvas - checked .... Source luminace - checked .... Invert transparency - unchecked .... Hide Mask - checked. go to layers, merge group, click ok.
Take the sequins layer from the kit and paste as a new layer on your canvas, resize a bit if you want to and move layer up to just above the rectangle stripes layers, duplicate a few times and place around your tag.
Activate the top layer of your canvas and paste some other elements you wish from the kit, add each element as a new layer and add the gradient glow to each element, use the width setting at 3.00 for these layers.
Now crop or resize if you want to.
Add your name, I added the gradient glow with a different colour on my name.
Add artist info and copyright info.
Save as jpeg or .png.
and we're done i think lol.
Thanks for trying my tutorial and i hope you enjoyed it
would love to see your results,
Saturday, 20 June 2009
Template 017
Hope you all like this one, I have included a tut for this one and the
download link is below the preview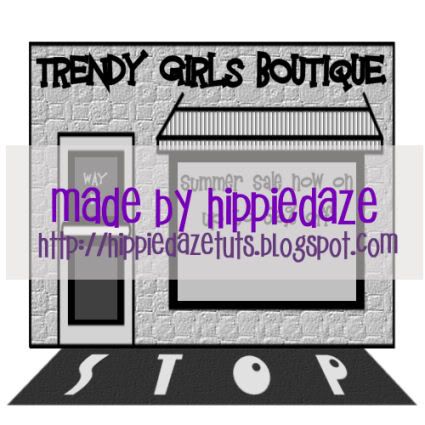
Download - HERE .
Trendy Girls Boutique

This tutorial was written on June 9th 2009 by Susan aka Hippiedaze.
The idea for this tag is off my own head lol and any resemblance is purely coincidence.
This tutorial resembles my Garv Auto's, some slight changes so decided to write the tut.
General Knowledge of psp is required, tutorial was written in psp 9 but will work in other versions.
Supplies Needed
Tubes of Choice I used the artwork of Kenny Kiernan, you must have a proper license to use his work please visit Artistic Minds Inc - HERE .
FTU Scrap Kit 'Trendy' by Lacarolita @ Lacarolita's Designs - HERE .
Template Used - Hippiedaze Template #017 by me - HERE .
Plugin Used - Eye Candy 4000, Gradient Glow.
Effects Used - Textured Effects, Blinds.
Font of Choice.
(save mask to psp folder before you begin)
Lets Get Started
Open the template, hit shift & d on your keyboard,this pastes the template as new image, close the original template. Go to image, select resize, resize by 90% smartsize and make sure resize all layers is checked, click ok. Activate the bottom white layer then go to image again, select canvas size and choose 500x500, this will give you a little extra room to work.
Activate the Road layer, go to adjust, choose hue/saturation/lightness, select colourise, choose a colour that matches your tube, click ok.
Activate the Stop words layer, go to adjust, hue/saturation/lightness, select colourise and choose a colour that matches your tube/s, click ok.
Go to effects, select eye candy 4000, gradient glow and use the following settings to add a glow to the word :-
Activate the Backing Outline layer, go to effects, select eye candy 4000, gradient glow and use the following settings :-
Glow Width - 3.00 .... Soft Corners - 25 .... Overall Opacitiy - 100 .... Colour - White . click ok.
Activate the backing layer ( i have included 2, one is plain and the 2nd is texturised to make it look more like a wall lol) choose which one you want to use, I choose the texturised layer, go to selections, select all, select float, select defloat then paste a paper of choice from the kit as a new layer, go to selections, select invert then hit delete on your keyboard, go to selections again and select none, go to layer properties and lower the opacity down to around 60% so the textured layer is showing through, you can also brighten the layer by going to adjust, select brightness/contrast then move the brightness slider a bit to the right intil its how you like it, click ok.
Activate the door backing layer, go to selections, select all, select float, select defloat then paste a different paper of choice as a new layer, resize as needed then go to selections, select invert and hit delete on the keyboard, back to selections, select none.
Activate the door handle bar, click inside with your magic wand, go to layers, add new raster layer then grab your floodfill tool and choose a colour in your foreground tab then click inside the marching ants to fill handle with colour.
Activate the top canopy layer, go to adjust, select hue/saturation/lightness, select colourise and choose a colour that matches your tube, click ok.
Do the same step again for the thin canopy layer.
Activate the main outline layer, i left this black and added the gradient glow we used before to this layer.
Activate the front window layer, go to adjust, select brightness/contrast then move the brightness slider all the way to the left (255) to make the layer white, click ok, now grab your magic wand and click the white area so the marching ants are blinking, go to layers, select add new raster layer, choose a colour in your foreground tab and fill layer with colour, go to layer properties and reduce the opacity down to around 50%.
Activate the door fills layer, go to adjust, select hue/saturation/lightness, select colourise and choose a colour of your choice, click ok, go to effects, select textured effects, blinds and use the following settings :-
Width - 8 .... Opacity - 49 .... Colour - of your choice .... Horizontal - Unchecked .... Light from Top - Checked, click ok.
Activate the Trendy Girls Boutique layer, colourise this by going to adjust, select brightness/contrast and move the brightness slider to the left to lighten the layer first, now go to adjust, hue/saturation/lightness, select colourise and choose a bright colour that matches your tag/tube, add the gradient glow to this layer but change the width to 5.00 and the colour to black.
Colourise the window words layer in the same way, i changed the glow to white for this layer.
On the way in words layer i changed to white by going to adjust, select brightness/contrast and moved the brightness slider all the way to the right (255).
Now close off the tinted window layer you created for now, its easier to work with the elements while this is hidden, take any elements you wish from the kit and paste as new layers, resize quite a lot to make them small for the window, place where you like them and remember to sharpen if resizing by a lot, once your window is decorated you can unhide the window tint layer.
Activate the bottom white layer, go to the colour palette and choose a bright colour for the background colour, foreground set to null, grab your rectangle tool from the tool palette and then draw out a large square just bigger than the main outline frame (see mine), once happy with size and placement go to layers and select convert to raster layer, go to effects, select textured effects, blinds and use the same settings as before, click ok.
Activate the top layer of your canvas now and paste your tube/s of choice, i used 2 by the same artist, resize as needed and place where you like them then add a dropshadow to both layers.
Add any other elements you want to from the kit, resize each element as needed and place where you want them, add a dropshadow to each layer.
Crop or resize your tag now if you wish.
Add you name, artist info and copyright info.
Save as jpeg or .png.
and we're done lol.
Thanks for trying my tutorial and i hope you enjoyed it
would love to see your results,
hippiedaze@hotmail.com
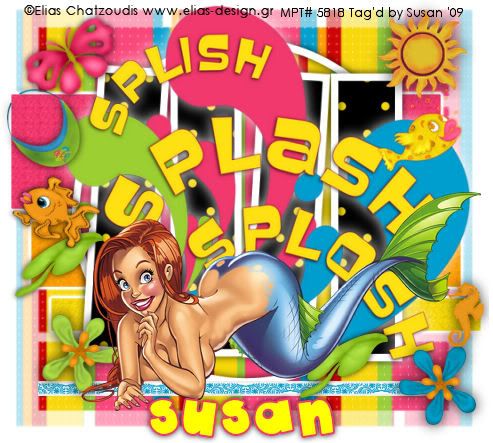
Splish Splosh
This tutorial was written on June 19th 2009 by Susan aka Hippiedaze.
The idea for this tag is off my own head lol and any resemblance is purely coincidence.
General Knowledge of psp is required, tutorial was written in psp 9 but will work in other versions.
Supplies Needed
Tubes of Choice I used the artwork of Elias Chatzoudis, you will need a proper license to use his work and you get that by visiting MPT - mypsptubes - HERE .
FTU Scrap Kit 'Splash' Tagger Size by JoDesignz, you can download this kit free for a limited time only @ Twilight Scraps - HERE .
Template Used - Template #5 by Gypsy Scraps - HERE .
Mask Used - Vix Mask #250 by Vix - HERE .
Plugin Used - Eye Candy 4000, Gradient Glow.
Font of Choice.
(Save mask to your psp folder before you begin and open all other supplies you need)
Lets Get Started
Open the template, hit shift & d on your keyboard,this pastes the template as new image, close the original template.
Delete info layer, I resized mine a little at this point, go to image, resize, change width & height to 80%, choose smartsize and make sure resize all layers is checked, click ok.
Or if you prefer you can skip the resizing and can resize later, i just find it easier working with it at this size.
Close off the bottom layer of the template and go to layers, select add new raster layer, grab your floodfill tool and choose white for the foreground colour then click on the canvas to fill layer white, go to image, select canvas size and choose 500x500, click ok, if theres any transparent image showing grab your floodfill tool, using white for the foreground again and click canvas to fill white.
Activate raster 1 layer, go to selection, select all, select float, select defloat then paste a paper from the kit as a new layer, resize a little if needed then go to selections again and select invert then hit delete on your keyboard, selections again select none, delete the original layer now.
Repeat that step for copy 2 raster layer, copy of raster 1 layer, raster 2 layer & raster 4 layer using different papers for each layer, resize papers as needed and delete the original layers.
Activate raster 3 layer, go to adjust, select brightness/contrast and move the brightness slider all the way along to the right (255) the frame will now be white.
Raster 5 layer is already white so i left this as it was.
Activate rater 1 layer that you created, go to effects, select eye candy 4000, gradient glow and use the following settings :-
Glow Width - 3.00 .... Soft Corners - 25 .... Overall Opacity - 100 .... Colour - White ... move the colour slider half way along to the centre to give a bolder glow effect. click ok.
Add the same gradient glow to the copy 2 of raster 1 layer and also the copy of raster 1 layer.
Activate your bottom white layer, paste a paper of your choice as a new layer, go to layers, select load mask from disc and choose the mask you saved at the start (Vix Mask #250) and use the following settings :-
Fit to canvas - checked .... Source luminace - checked .... Invert transparency - unchecked .... Hide Mask - checked, click ok, go to layers, merge group, use your deform tool to stretch the mask lyer out a little till its how you want it.
Activate the top layer now and take the splish, splash, splosh wordart from the kit, paste as a new layer, resize just a little, i left mine quite big, add a white dropshadow to this layer.
Paste your tube as a new layer, resize as needed, i resized mine around 85%, bicubic and placed near bottom, add a dropshadow.
Add any other elements from the kit that you wish, place each element as a new layer and resize as needed, elements should be resized smartsize, add a dropshadow to each layer, i used a darker shadow on the elements layers.
Crop or resize your tag now if you want to or didnt at the start.
Add your name, artist info and copyright info.
Save as jpeg or .png.
and we're done i think lol.
Thanks for trying my tutorial and i hope you enjoyed it
would love to see your results,
hippiedaze@hotmail.com
Friday, 19 June 2009
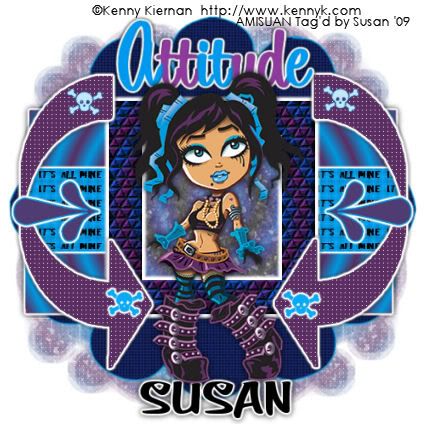
Attitude Is All Mine
This tutorial was written on June 8th 2009 by Susan aka Hippiedaze.
The idea for this tag is off my own head lol and any resemblance is purely coincidence.
General Knowledge of psp is required, tutorial was written in psp 9 but will work in other versions.
Supplies Needed
Tubes of Choice I used the artwork of Kenny Kiernan, you must have a proper license to use his work please visit Artistic Minds Inc - HERE .
No Scrap Kit Used.
Template Used - Attitude Skulls by Marie (part of the Misfits Template Challenge #2) - HERE .
Mask Used - WSL Mask #99 by Chelle @ Wee Scots Lass Creations - HERE .
Plugin Used - Eye Candy 4000, Gradient Glow.
Effects Used - Textured Effects, Weave.
2nd Effects Used - Textured Effects, Tiles.
Preset Flower Shape & preset Arrow Shape of Choice. (optional)
Font of Choice.
(save mask to psp folder before you start)
Lets Begin...
Open your template, hit shift & d on the keyboard to duplicate, now you can close the original template.
Delete info layer.
I resized here, go to image, resize and make sure resize all layers is checked, resize by around 80% smartsize and check the box that says resize all layers, click ok. (This depends on the size you like your tags).
Now click on the bottom white layer and go to image, select canvas size then choose 500x500, click ok, this will give you room to work and we can crop later.
Activate the layer named Lines, grab you floodfill tool from the tool palette then go to your colour palette, choose 2 colours that match your tube for foreground & background colours, now click the foreground tab and choose gradient, look for the tab that says foreground/background and select this, change the repeats tab to 19, click the sunburst style to select, horizontal & vertical should be set to 50, click ok, now click inside the lines layer to fill with gradient.
Do the same for the layer named copy of lines then add a gradient glow to both these layers by going to effects, select eye candy 4000, gradient glow and use the following settings :-
Glow Width - 5.00 .... Soft Corners - 25 .... Overall Opacity - 100 .... Colour - White, click ok.
Now adda dropshadow to both layers.
Activate the layer named BG Behind layer, grab the magic wand and click inside the shape so the marching ants are blinking around it, go to layers, select add new raster layer, transparent, click ok, click the foreground tab on the colour palette and choose the same gradient we used before but this time change the number of repeats to 3, on the texture tab click to tick it and find the texture named Asphalt (should be included with your psp programme) now click ok then click inside the marching ants to fill layer with texturised gradient, go to adjust, select brightness/ contrast and move the brightness slider a little to left to darken just a bit, click ok.
Activate the layer named Frame, grab your floodfill tool and again click foreground tab, gradient and this time uncheck the texture box so the fill will be solid, go to the frame and click to fill with solid gradient, now go to effects, select textured effects and choose tiles, use the following settings :-
Tile Shape - Triangle, Colour to match your tube, click ok.
Add the same gradient glow used before on this layer.
Activate the layer named arrow 1, go to selections, select all, select float, select defloat then go to layers and choose add new raster layer, transparent, click ok, grab your floodfill tool and click the foreground tab colour (no gradient this time) choose a colour of your choice then click in side the arrow to fill with choosen colour, go to selections, select invert then hit delete on the keyboard, delete the original arrow layer and on the layer you just created go to effects, select textured effects, weave and use the following settings :-
Gap Size - 1 .... Width - 4 .... Opacity - 2 .... Weave & Gap Colour - White ... Fill gaps - Checked, click ok, now go to effects again and select eye candy to add the gradient glow to this layer.
Do the step again on the arrow 2 layer.
Activate the Skulls layer, grab your colour to target brush from the tool palette and then choose a colour in your foreground tab, drag the mouse over the skulls to change to choosen colour, do this for all skull layers and i added the gradient glow to the bottom skulls.
Activate the Attitude wordart layer and repeat the colour to target brush step, i changed alternate letters using both colours from the gradient, add the gradient glow to this layer too.
Activate the bottom white layer, go to layers, select add new raster layer, go to colour palette and choose the foreground/background gradient we used before, tick the texture box and use the asphalt texture, click ok, now click on the canvas to fill layer with texturised gradient, go to layers, select load mask from disc and find the mask that you saved at the start (WSL Mask #99) make sure the following settings are checked :-
Fit to canvas - checked .... Source luminace - checked .... Invert transparency - unchecked .... Hide Mask - checked, click ok, go to layers, merge group, go to layers, select duplicate, go to image, select mirror.
Grab your preset shape tool from the tool palette, go to the colour palette and choose your colours for the background & foreground, draw out a large flower shape in the centre of your canvas, when happy with size & shape go to layers and convert to raster layer, this layer shoyd be just above your duplicate mask layer.
Now grab your rectangle tool, change the colours if you wish and then draw out a rectange that fits nicely between the 2 lines layers, when happy with this go to layers and choose convert to raster layer, move this layer down to just below the lines layers (see mine).
Now go to file and open a new image, 500x500 transparent, click ok.
Grab your text tool and set foreground to null, background to black, make the font size fairly small and type out the words 'It's All Mine', go to objects, choose align in centre then go to layers and choose convert to raster layer, go to effects, select mura meister, copies and in the settings box choose tiling, change tile gap to 2 and leave all other settings as they are, click ok.
Click back to your working canvas, make sure your on the rectangle layer you created and grab your magic wand, click in the middle of the rectangle so the marching ants are blinking then take the wordart layer you just created and paste as a new layer, go to selections, select invert then hit delete on your keyboard.
Now add the gradient glow to the rectangle layer.
Select your preset shape tool and choose an arrow, go to the colour palette and choose 2 colours for the arrow, draw out a small arrow on your canvas (see mine) when happy with size go to layers and choose convert to raster layer, now go to layers again and select duplicate, go to image and select mirror. I added the gradient glow to both arrow layers.
Whewww lol hope all that made sense.
Activate the top layer of your canvas and paste your tube as a new layer, resize a little if needed and place in middle of your tag, add a dropshdow.
Now crop or resize if you want to in the usual way.
Add your name, artist info and copyright info.
Save as jpeg or .png.
and we're done i think lol.
Thanks for trying my tutorial and i hope you enjoyed it
would love to see your results,
hippiedaze@hotmail.com
Subscribe to:
Posts (Atom)


