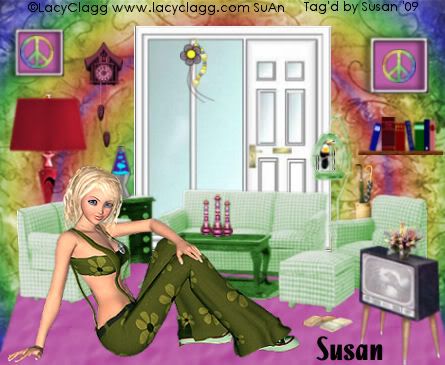
This tutorial was written on May 12th 2009 by Susan aka Hippiedaze.
The idea for this tag is off my own head lol and any resemblance is purely coincidence.
General Knowledge of psp is required, tutorial was written in psp 9 but will work in other versions.
Supplies Needed
Tube or Tubes of Choice, I used the artwork of Lacy Clagg, you must have a proper license to use her work please visit - HERE .
Scrap Kit of Choice - I used a PTU kit 'Those Sweet Seventies' but cannot find the site anymore, it may be gone but if anyone knows it pls drop me the link. (any groovy papers will do)
Other Room Supplies - HERE .
Various Plant/Flower Tubes - HERE .
Effects Used - Textured Effects, Texture, paper standard.
(open all supplies and minimise in your psp workplace before we start)
Lets Get Started ... Go to File, select new, choose 550x485, change colour to white for your new canvas. Grab your Rectangle tool from the tool palette, go to your colour palette, select null for the foreground, click the background colour tab, go to patterns and look for the tile with your paper of choice, select this then click ok.
Draw out a large rectangle almost the whole size of your canvas, go to layers and select convert to raster layer.
Now back to your colour palette and keep foreground to null, change background to a solid colour of your choice, click ok.
Draw out another rectangle, this time make it just under half the size in height but same width. (see mine as example), convert to raster layer then click your deform tool so the nodes are around the rectangle, while holding shift key down drag in from the left with your mouse, make sure your still holding the shift key and do the same on the right hand side of the rectangle, now release the shift key and pull down the middle node so it looks kind of flat lol.
Go to effects, choose textured effects, texture, choose the texture named 'paper standard' and use the default settings, click ok.
Add the same textured effect once more for a more ruffled carpet style look.
Paste the Door tube as a new layer in the centre of the 'wallpaper' , resize a bit if needed.
Paste the 3 piece suite as a new layer, click your deform tool and then pull the nodes in at each side and the top middle node down a bit so it fits nicely in your 'room'.
I choose to colourise mine on this one, go to adjust, select hue/saturation/lightness,choose colourise and pick a colour that matches your tube.
Lets make the picture frames .... Grab your rectangle tool once more and choose white as your background colour in the colour palette, foreground null, draw out a small square shape. when happy with it, go to layers and choose convert to raster layer, go to your tool palette and choose selection tool, draw out a square shape just slightly smaller than the white square we just made, go to layers, add new raster layer, go to floodfill tool and choose a different colour as your background fill, foreground still set to null, click inside the marching ants and fill with your choosen colour. Add a dropshadow to both layers.
Duplicate both these layers you just made and move to opposite side of your tag, (see mine as example).
Take one of the peace signs from the kit and paste as a new layer, resize this if needed and place inside the picture frames, add dropshadow, duplicate this and place copy inside the other frame. (if you dont have the kit you can use my supplies which includes a lava lamp and peace sign.
Paste the lamp as a new layer and place where you like, move layer below the sofas though.
Paste the Umbrella stand as a new layer, resize and move below sofa layer .
I also used a lava lamp from the kit and placed on the drawer unit.
Paste some flowers or vases on the table to decorate, resize as needed.
Paste the TV as a new layer, resize if needed and place where you like it, add some flowers to sit on the top if you wish.
Decorate the rest of the room how you want it. i added the bookshelf, some books and a few bits from the kit, resize each element as needed and place where you want them.
Add your tube, paste as a new layer, resize as needed and place where you like.
Crop or resize your tag if you want to to your prefered size in the usual way. I cropped mine a little.
Add your name, artist info & copyright info.
Save as jpeg or .png. and we're done lol.
Thanks for trying my tutorial and i hope you enjoyed it would love to see your results, hippiedaze@hotmail.com
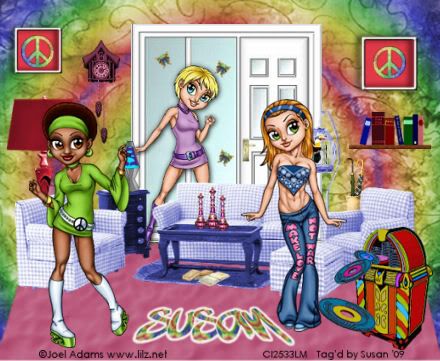
here is another version using different tubes.
Tuesday, 2 June 2009
My Groovy Room
Posted by hippiedaze at 14:22
Labels: Tutorials - PTU
Subscribe to:
Post Comments (Atom)


0 comments:
Post a Comment