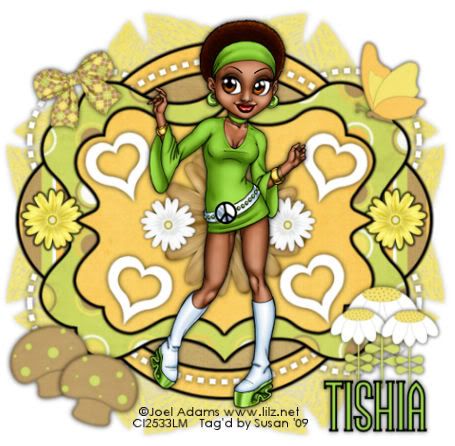
This tutorial was written on June 4th 2009 by Susan aka Hippiedaze.
The idea for this tag is off my own head lol and any resemblance is purely coincidence.
General Knowledge of psp is required, tutorial was written in psp 9 but will work in other versions.
Supplies Needed
Tube of Choice I used the artwork of Joel Adams, you must have a proper license to use his work please visit CILM - HERE .
PTU Scrap Kit 'Daisy Dayze' by Tishia @ Designs by Tishia - HERE . .
Template Used - Hippiedaze Template #14 by Me - HERE .
Mask of Choice.
Effects Used - Eye Candy 4000, Gradient Glow.
Font of Choice.
(Save mask to your psp folder before you begin and open all other supplies you need)
Lets Get Started
Open the template, hit shift & d on your keyboard,this pastes the template as new image, close the original template. Delete info layer, I resized mine a little at this point, go to image, resize, change width & height to 90%, choose smartsize and make sure resize all layers is checked, click ok. Or if you prefer you can skip the resizing and can resize later, i just find it easier working with it at this size.
The template has a white background so no need to add one, click on it and go to image, select canvas size and choose 500x500, click ok, You will have a little more room to work with this size.
Activate the layer named large circle, go to selections, select all, select float, select defloat then paste a paper from the kit as a new layer, resize a little if needed then go to selections, select invert then hit delete on your keyboard, go back to selections and select none, delete the orginal layer.
Repeat the step for the layers named black circle, small left circle, small right circle. outer bracket shape & inner bracket shape, use different papers for each layer, remember to resize papers a little and delete the original layers as you go along.
Go to effects, select eye candy 4000, gradient glow and use the following settings to give all the above layers a gradient glow :-
Glow Width - 5.00 .... Soft Corners - 25 .... Overall .... Opacitiy - 100 .... Colour - Black.
Activate the dotted circle layer, go to adjust, select brightness/contrast and move the brightness slider all the way to the right (255) the dots should now be white, click ok, add a small dropshadow.
Repeat the above step on the large dotted circle layer & also the hearts layer, add the same dropshadow to these layers.
Activate the bottom white layer, paste a paper from the kit as a new layer, go to layers, select load mask from disk and find the mask you choose at the start, use the following settings :-
Fit to canvas - checked .... Source luminace - checked .... Invert transparency - unchecked?checked (depending on the mask you choose) ....Hide Mask - checked. Click ok. go to layers select merge group.
Activate the top layer of your canvas now and paste your tube as a new layer, resize as needed and place where you like it, add a dropshadow to this layer.
Take some elements from the kit and paste as new layers, resize as needed and place around your tag, add the dropshadow to each element layer.
Crop and resize now if you wish to.
Add your name, Add artist info and copyright info.
Save as jpeg or .png. and we're done lol.
Thanks for trying my tutorial and i hope you enjoyed it would love to see your results, hippiedaze@hotmail.com
Friday, 5 June 2009
Daisie Girl
Posted by hippiedaze at 11:08
Labels: Tutorials - PTU
Subscribe to:
Post Comments (Atom)


0 comments:
Post a Comment