
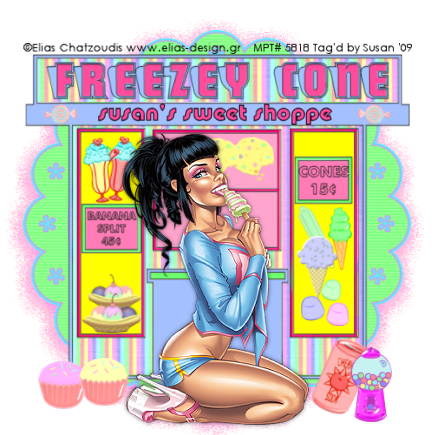
It's arrived and here is my portion of the Mission Heatwave Blog Train, many talented ladies have taken part in this awesome train, be sure to stop at all the blogs below to collect everyones parts and be sure to leave some love when you download, a little thanks goes a long way.
Download my part - HERE.
Sticky Kisses Designs - http://stickykissesdesigns.blogspot.com/
Gothic Inspirations - http://gothicinspirations.blogspot.com/
Candy Kisses Designz - http://candykissesdesignz.blogspot.com/
Alyssas Scraps & Such - http://alyssas-scrapsnsuch.blogspot.com/
TracyDidIt - http://tracydiditagain.blogspot.com/
Ziggy Fan Creations - http://ziggyfanscraps.blogspot.com/
Melissaz Creationz - http://melissazcreationz.blogspot.com
Wicked Princess - http://wickedprincesstuts.blogspot.com/
KittenScraps - http://kittenscraps.blogspot.com
Dazzling Scraps - http://www.dazzlingscraps.com
Creations By Laura - http://ladyyunacreations.blogspot.com
GF Designz - http://girlfrienddesignz.blogspot.com/
Pspgirl - http://pspgirlplace.blogspot.com/
Hippie Daze Tuts - http://hippiedazetuts.blogspot.com/
Crazy Lady Scraps - http://crazyladyscraps.blogspot.com/
Please note that not all designers live in the same time zone so if a part hasn't been posted be sure to check back a little later.
Enjoy
hugs Susan
Friday, 31 July 2009
Mission Heatwave Blog Train
Thursday, 30 July 2009
Extended Sale & Upcoming Sale

At both store I sell in.. links to P4s & Katelynns Designs are over there on the right >>>>
Starts tomorrow at midnight in Katelynns and sale extended in P4s, everything new I post during the month of August will automatically be marked down 25% so grab yourself a bargain lol
Bed time for me for sure now whewww that was a lotta posting and need to get my head down before the typos set in hehehe
night all
hugs Susan
Sweet Treat Shoppe Tut preview
I have new tut for you all sorry its been so long since i wrote one but been busy getting ready for the blog train and taking part in a collaboration kit over at P4s .
Sweet Treat Shoppe was made using my 'Sweet Tooth' kit and will be posted tomorrow morning, the kit is available in stores at P4S and Katelynn Designs, my sale at p4s is extended for the whole month of August and same goes for katelynn designs the sale will satart 1st August and run for the whole month there too
Almost bedtime lol
have a good one ladies
hugs Susan
Mission Heatwave Blog Train - 2 days to take off
Time's getting nearer to take off for this fabulous blog train
'Mission Heatave' takes off from the station in just 2 days
My portion will be posted tomorrow night so check back then to start downloading
August 1st, 2009 for take off & here is a list of the designers taking part -
Sticky Kisses Designs - http://stickykissesdesigns.blogspot.com/
Gothic Inspirations - http://gothicinspirations.blogspot.com/
Candy Kisses Designz - http://candykissesdesignz.blogspot.com/
Alyssas Scraps & Such - http://alyssas-scrapsnsuch.blogspot.com/
TracyDidIt - http://tracydiditagain.blogspot.com/
Ziggy Fan Creations - http://ziggyfanscraps.blogspot.com/
Melissaz Creationz - http://melissazcreationz.blogspot.com
Wicked Princess - http://wickedprincesstuts.blogspot.com/
MoonBeams Creations - http://moonbeamskitsandkaboodles.blogspot.com/
KittenScraps - http://kittenscraps.blogspot.com
Dazzling Scraps - http://www.dazzlingscraps.com
Creations By Laura - http://ladyyunacreations.blogspot.com
GF Designz - http://girlfrienddesignz.blogspot.com/
Pspgirl - http://pspgirlplace.blogspot.com/
Hippie Daze Tuts - http://hippiedazetuts.blogspot.com/
Crazy Lady Scraps - http://crazyladyscraps.blogspot.com/
Please note that not all designers live in the same time zone so check back at a later date if that designer's part isn't posted. A little thank you goes a long way for all these talented designers.
CT Call
Ok ladies, I think it's time I had a wee team of Creative girls who enjoy my kits & stuff,
I'm looking for maybe 3 ppl who would like to work with my scrap kits on a regular basis (i.e I would let you know when i have a new kit and send you a preview then you would decide if you wanted to work with that particlar kit), no ties no stirngs at the moment lol as i dont have a vast selection of scrap kits yet.
If anyone is interested pls drop me an email with 3 or 4 examples of your tags or if you do quickpages your most welcome to apply too, pls include your blog address (if you have one) you can find my email addy >>>> over there on the right lol and i will reply as soon as i have everything in place.
Hope some of you will be interested
Have a great day everyone
hugs Susan
Store Links for New Products
Hi all
Finally got around to posting the links to all the new templates over the last couple of days, there may be more coming lol but for now you can get the templates at Paradise 4 Scrappers store & Designs by Katelynn store
All templates are priced at a bargain price of just $1.50 each
Links for P4S
HERE
& Link to Katelynn Designs
HERE.
Monday, 27 July 2009
$1.00 Tuesday Tomorrow

Dont forget its Tuesday tmw and hundreds of items are listed for just $1.00 each, I have many of my templates and overlays & stuff listed so stock up while these crazy prices last
Also my 25% off sale runs for another 2 days so dont miss out on extra bargains
Happy Shopping Everyone
My Portion of the Mission Heatwave Blog Train
Just wanted to post thislittle preview for you all as the train takes off in just a few days (1st August) mark your diaries lol,
theres lots of awesome designers taking part and I will post a list along with the download link at the end of the week so be sure to check back to hop on the train and download all the cool kits for summer.
Another Awesome Tut with my DJ Rockstar kit

This fab tag comes from my good friend Shani aka Wicked Princess, I love it weeeeeeeeee, she used my DJ Rockstar kit and totally rocked it, you can find the tut on Shani's blog by clicking the tag above, and its listed over on the right >>>>>>>> along with lots of others that Shani has tutted from my work
The kit is marked down 25% at P4s HERE and theres still a few days left of the sale if you would like it, dont forget to check out my other listings while your there, lots of new templates been added over the weekend
Awesome Shani and thank you bunches
hugs Susan
Saturday, 25 July 2009
Wordart Freebie Pack 1

Heres sme freebie wordart for you this weekend, you get 8 song titles/quotes from yonks ago lol, sure to bring back some memories for these music themed tags, all wordarts are saved .psp and greyscaled so you can colourise to suit your needs, also previews are much smaller than the original files, the coloured wordarts are not included theyre shown for the preview only.
You can download this pack - HERE.
Have a fab weekend everyone
hugs Susan


The Girl Rules
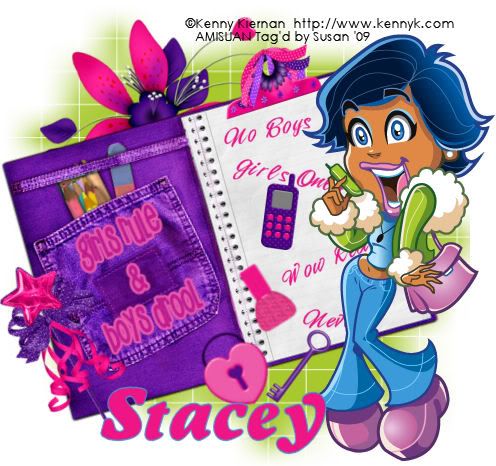
This tutorial was written on July 25th 2009 by Susan aka Hippiedaze.
The idea for this tag is off my own head, any resemblance is purely coincidence.
Easy to follow tut.
General Knowledge of psp is required, tutorial was written in psp 9 but will work in other versions.
Supplies Needed
Tube of Choice, I used the artwork of Kenny Kiernan, you must have a proper license to use his work please visit AMI - HERE.
PTU Scrap Kit Used - 'Girls Rule/Boys Drool' by Stacey @ Staceys Designs and you can purchase thos awesome kit at Scrap Heaven Boutique - HERE.
Mask Used - WSL Mask #84 by Chelle @ Wee Scots Lass Creations - HERE.
Effects Used - Eye Candy 4000, Gradient Glow.
Fonts of Choice.
(Open all supplies and save mask to psp folder before you begin)
Lets Get Started
Open a new canvas in your psp workspace by going to file, select new, choose white 500x500 and click ok.
Take the notebook element and paste as a new layer on your canvas, place in the centre then go to image, select rotate and rotate to the left by 25, click ok.
Choose a font and colour of your choice and type out some phrases for the notebook, once you have a phrase you like go to layers and choose convert to raster layer, use new layers for each phrase and then with the deform tool rotate slightly & place on the note page.
Using the same font in a bigger size type out another phrase you like, convert to raster layer and rotate a little then place this on the opposite note page, I added a small gradient glow to this text layer, go to effects, select eye candy 4000, gradient glow and the following settings :-
Glow Width - 3.00 .... Soft Corners - 25 .... Overall Opacity - 100 .... Colour - to match your tube, click ok.
Take your tube and paste this as a new layer, resize around 80% smartsize and place to the right side of your tag (see mine).
Take the nail polish element and place as a new layer, resize down till its to your liking and place this where you want it also rotate slightly using the deform tool.
Take the heart lock element and place this on your canvas as a new layer, resize as needed and place where you want it, you can rotate if you wish.
Take the key element and place this as a new layer, again resize, rotate & place where you like it.
Take the mobile phone element and place as a new layer, resize and place where you like.
I also used the magic wand element and the clip but you can choose which elements you want to decorate the tag with, paste each element as a new layer and resize to your liking.
Activate the bottom layer of your canvas and choose a doodle from the kit, paste as a new layer and resize as needed then place it so its showing from behind the notebook at the top left side.
Activate the bottom white layer again, i added a new layer and filled it green to match my tube but you can paste a paper from the kit as a new layer then go to layers, select load mask from disc then in the box that pops up look for the mask you saved at the start (WSL Mask #84) use the following settings to add the mask:-
Fit to canvas - checked .... Source luminace - checked .... Invert transparency - unchecked .... Hide Mask - checked, click ok, go to layers, merge group, use your deform tool to stretch the mask layer out a little till its how you want it & showing around your tag.
Crop or resize your tag now if you want to or didnt at the start but leave enough room for your name lol.
Add your name, artist info and copyright info.
Save as jpeg or .png.
and we're done i think lol.
Thanks for trying my tutorial and i hope you enjoyed it
would love to see your results,
hippiedaze@hotmail.com .
Thursday, 23 July 2009
Nre Kit Coming Tomorrow

Heres a preview of my new kit, a wee change from all the rock stuff lol, spoilt for choice everything in the kit is just yummy hehe, makes you hungry eh lol
I need some sleep here am trying to have an earlier night (whatever that is) its almost 1am so will wait till the morning to get this uploaded and into the stores .
Have a good night yall
hugs Susan
Tuesday, 21 July 2009
Don't Forget
Theres still a few hours left to grab a $1.00 bargain over at Paradise 4 Scrappers, over 600 items listed and so much to choose from. I also have many items listed as well as 2 brand new Sail Surf CU Templates for just $1.00
Remember all my kits & stuff are marked down 25% for the next week, so grab them while you can
Happy Shopping
An Example with Template 026

Here's just a wee example I came up with for my new template, haven't tutted it this time lol but I still might yet hehe
I'm participating in my first Blog Train
Just wanted to share my news lol.
I just had word I got accepted on the Mission Heatwave Blog Train that takes off from Mission Scrap Possible on August 1st, great news :D this will be the first time I have taken part in a Blog Train so hope I do everything right lol.
Watch this space, I will post my part on August 1st and a list of all the others taking part, so mark your calendars for take off hehe
Hugs Susan
DJ Rocker

This tutorial was written on July 20th 2009 by Susan aka Hippiedaze.
The idea for this tag is off my own head lol and any resemblance is purely coincidence.
Very quick and easy tut.
General Knowledge of psp is required, tutorial was written in psp 9 but will work in other versions.
Supplies Needed
Tube of Choice, I used the artwork of Kenny Kiernan, you must have a proper license to use his work please visit AMI - HERE.
PTU Scrap Kit Used - 'DJ Superstar' by Hippiedaze @ hippiedaze tutorials, kit can be purchased at p4S - HERE.
Mask Used - WSL Mask #282 by Chelle @ Wee Scots Lass Creations - HERE.
Plugin Used - Eye Candy 4000, Gradient Glow.
Font of Choice.
(Open all supplies and save mask to psp folder before you begin)
Lets Get Started
Open a new canvas in your psp workspace by going to file, select new, choose white 500x500 and click ok.
Take one of the round frames from the kit and paste as a new layer in the centre of your working canvas, resize as needed to suit you, go to adjust, select brightness contrast and move the brightness slider all the way to the right so that the whole frame is now white, click ok, go to effects select eye candy 4000, gradient glow and add the following settings to the frame layer :-
Glow Width - 3.00 .... Soft Corners - 25 .... Overall Opacity - 100 .... Colour - Pink or one to match your tube ... move the colour slider half way along to the centre to give a bolder glow effect. click ok.
Click inside the frame area with your magic wand tool so the marching ants are blinking, go to selections, select mdoify and then choose expand, expand by 2 and click ok, take a paper from the kit and paste as a new layer, resize a little if needed and then go to selections, select invert then hit delete on your keyboard, go back to selections and select none.
I started with pasting my tube on this one and worked around that, so take your tube and paste as a new layer in the centre of your canvas, resize to your liking and add a dropshadow.
The following elements are just an example and you can place them in front of or behind your tube to suit your liking.
Take the record deck element and paste as a new layer, resize as needed and place behind the tube layer (see mine as example), add a dropshadow.
Take a speaker of choice and paste this as a new layer, resize as needed and place in bottom left of your tag, you can also use the deform tool to rotate to an angle if you like & add a dropshadow to this layer too.
Choose a wordart and paste as a new layer, resize as needed and place in top left of your tag, rotate as before using the deform tool and add the dropshadow.
Choose a keyboard element and paste as a new layer, resize as needed and place in bottom right of your tag, use the deform tool again to rotate to how you like it and add the dropshadow.
Choose a T Shirt and paste as a new layer then resize as needed and place this in top right of the tag, rotate with the deform tool if you want and add a dropshadow.
Activate the bottom white layer and paste a paper from the kit as a new layer, go to layers, select load mask from disc and fid the mask that you saved at the start (WSL Mask # 282)and use the following settings :-
Fit to canvas - checked .... Source luminace - checked .... Invert transparency - unchecked .... Hide Mask - checked, click ok, go to layers, merge group, use your deform tool to stretch the mask layer out a little till its how you want it.
Go back to your top layer of the canvas now and add any other elements you wish to use to decorate the tag, paste each element as a new layer and resize to suit then add a dropshadow to each element, I added the gradient glow to some elements here.
Crop or resize your tag now if you want to or didnt at the start.
Add your name, artist info and copyright info.
Save as jpeg or .png.
and we're done i think lol.
Thanks for trying my tutorial and i hope you enjoyed it
would love to see your results,
hippiedaze@hotmail.com .
Monday, 20 July 2009

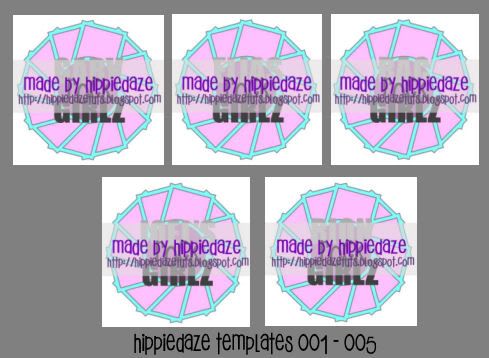
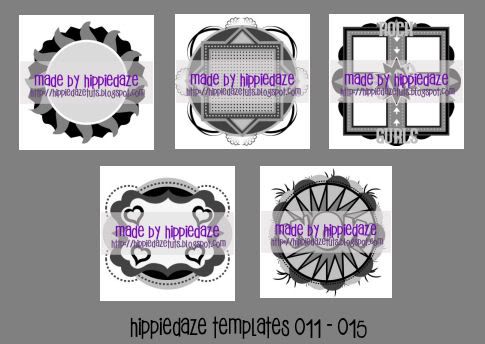
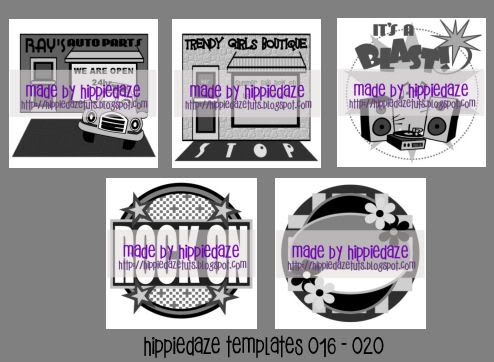
Tag Templates 021 - 025
My next 5 templates zipped and you can download from 4shared by clicking the preview
Dont forget I would love to see any creations you make with my templates or kits, you can always email to me at my addy on the right.
Enjoy
hugs Susan .
Dj Rocker
Heres a preview of my new tut coming later tonight, made with my latest kit 'DJ Superstar which is available at P4S now and with 25% marked off the price, check back later for the tut, I gotta do a few bits n pieces in the house before posting.
Friday, 17 July 2009
Gone for a Couple of Days
Just a lil note to let you all know I wont be aroun the rest of today or tomorrow, we are taking my son and his friend and going up to Loch Earn camping & the boys will be fishing lol I'm good for getting the camp fire going and the BBQ so its no rest for me but I don't mind I quite enjoy it...
The weathers held good all week for us but last nights forecast for the weekend is heavy rain and galeforce winds YIKES lol, couldn't let the boys down tho as they have been looking forward to this for ages
Anyways hope yall have a great weekend and dont forget lol all my kits and stuff are marked down 25% at P4S still so take a trip over sometime and see whats on offer, heres the link for you to go direct to my listings HERE.
Take care & Stay Safe everyone, see you in a day or two
hugs Susan
Nite In

This tutorial was written on July 13th 2009 by Susan aka Hippiedaze.
The idea for this tag is off my own head and any resemblance is purely coincidence.
General Knowledge of psp is required, tutorial was written in psp 9 but will work in other versions.
Supplies Needed
Tubes of Choice I used the artwork of Elias Chatzoudis, you must have a proper license to use his work please visit MPT, mypsptubes - HERE .
FTU Scrap Kit 'Girls Night In' by Melissa @ Melissa's Creationz - HERE .
Template Used - Template #76 by Melissa @ Melissa's Creations - HERE .
Effects Used- Blur, Guassian Blur.
No Mask Used.
Font of Choice.
(Open all supplies and save mask to psp folder before you begin)
Lets Get Started
Open the template, hit shift & d on your keyboard,this pastes the template as new image, close the original template.
I resized all layers by 85% smart size at this point. (this depends what size you like to work with)
Delete info layer, go to layers, add new raster layer, grab your floodfill tool from the tool palete and choose white colour as your foreground then floodfill the new layer, move this all the way down to the bottom of your canvas, while still on white layer, go to layers, select canvas size and select 500x500 so you have a little more room to work, if theres any transparent canvas showing click it with the floodfill tool.
Activate the glitter circle layer, go to adjust colour to target brush tool, choose a colour of your choice that matches your tube for your foreground colour tool then move your mouse over the circle and it should colourise to your chosen colour.
Activate the middle rectangle layer, go to selections, select all, select float, select defloat then paste a paper from the kit as a new layer, go image select resize and resize the paper a little if you want to, go to selections again and select invert then hit delete on your keyboard, back to selections and select none, Delete the orginal layer now. Add a dropshadow to the layer you created.
Repeat the step above for the layers named top rectangle, bottom rectangle & both thin rectangle layers, use a different paper on each layer or mix n match lol, delete the original layers and add a dropshadow to each new layer you created.
I decided not to use the grey circle layer but you can colourise this in the usual way if you want to.
Take the little coloured dots element from the kit and paste this as a new layer on your working canvas, resize if you need to and move the layer all the way to the bottom of your canvas so its just above the white background layer, move to to top left corner of your canvas, go to layers, select duplicate then go to image and select mirror, again go to layers, duplicate, image, mirror so you should now have the scattered dots around the backing of your tag, reposition a little if you want to so they look how you like them.
Activate the bottom white layer now, grab your eclipse tool from the tool palette and in your colour tabs set your foreground to null and background to a colour that matches your tube and draw out a largish circle in the centre of your canvas, just big enough so that its showing slightly from behind the rectangle layers, go to layers, select convert to raster layer then go to adjust, select blur, select guassian blur and set to 15.00, click ok, use the deform tool if you need to stretch it out a little.
Activate yout top layer of your canvas and paste your tube as a new layer, resize a little if needed and place where you want it, add a dropshadow to the tube.
Use any other elements you want from the kit and paste each as a new layer, resize each element as needed and place around your tag, see mine as example, add a dropshadow to each layer.
p.s. this kit elements are saved on one sheet so be careful when you select them you need to use your lasso tool to draw around the element then click copy and paste onto your canvas that way.
Crop and resize now if you wish to.
Add your name, artist info and copyright info.
Save as jpeg or .png.
and we're done lol.
Thanks for trying my tutorial and i hope you enjoyed it
would love to see your results,
hippiedaze@hotmail.com
Wednesday, 15 July 2009
Just a Lil Example

I quickly finished off the tag I was doing with my template so just thought id post it tonight, haven't wrote the tut yet but watch this space lol I will get round to it eventually
Going to have my bath just now but might even start writing this tonight
Hugs Susan
Template 023
A new fun template for you all tonight, well lol this ins't new but had a few things that kept getting in the way of me posting this and wanted to tut it before posting too, as it turns out I still havent finished the tut lol but your welcome to get creative and show me what you come up with from this, my tag in the making is Al Rio (quite fitting) for the template dontcha think lol
Anyways if you like this you can get from 4shared
Download - HERE.
Have fun and remember to send me these results.
Hugs Susan
My July Sale
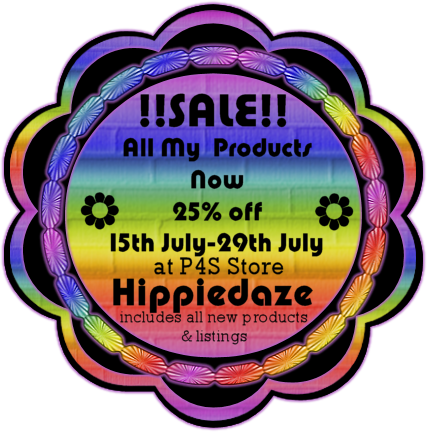
Just cuz it summer lol I decided to do a sale on my kits & stuff over at P4S, you save 25% on everything in my listings from today until the 29th July so if you like the kits but looking for a bargain lol nows the time to go shopping, just click the sale ad to go direct to the listings in the store today and stock up while the sale lasts
Have a fab day everyone
hugs Susan
Tuesday, 14 July 2009
A Few Hours Left
To grab these overlays, ipod template & 'one summer day' scrap kit for just $1.00 each in the $1.00 day Tuesday sale over at P4S, be sure to stop by before midnight, just click the blinkie on the right and start shopping
Bed time for me here though its 2am yikes lol
nite everyone
Hugs Susan
Summer Beauty

This tutorial was written on July 1st 2009 by Susan aka Hippiedaze.
The idea for this tag is off my own head and any resemblance is purely coincidence.
General Knowledge of psp is required, tutorial was written in psp 9 but will work in other versions.
The tutorial is fairy quick and easy to follow.
Supplies Needed
Tubes of Choice I used the artwork of Elias Chatzoudis, you must have a proper license to use his work please visit MPT, mypsptubes - HERE .
FTU Scrap Kit 'Fruitalicious' by Pink Poetic Scraps - HERE.
Template Used - Template #76 by Melissa @ Melissa's Creations - HERE .
Mask Used - Bfly flby Mask #45 by Butterfly Flutterby Creations - HERE .
Font of Choice.
(Open all supplies and save mask to psp folder before you begin)
Lets Get Started
Open the template, hit shift & d on your keyboard,this pastes the template as new image, close the original template.
I resized all layers by 85% smart size at this point. ( optional, depends what size you like to work with)
Delete info layer, go to layers, add new raster layer, grab your floodfill tool from the tool palete and choose white colour as your foreground then floodfill the new layer, move this all the way down to the bottom of your canvas, while still on white layer, go to layers, select canvas size and select 500x500 so you have a little more room to work, if theres any transparent canvas showing click it with the floodfil tool.
Activate the angled thin rectangle layer, go to selections, select all, select float, select defloat then paste a paper from the kit as a new layer, go image select resize and resize the paper a little if you want to, go to selections again and select invert then hit delete on your keyboard, back to selections and select none, Delete the orginal layer now.
The above step should be repeated on all the template layers except the glitter circle layer so go through all layers and fill with different papers of choice from the kit, delete the original layers as you work.
Ad a dropshadow to All layers you just created.
Activate the glitter circle layer, go to adjust colour to target brush tool, choose a colour of your choice that matches your tube for your foreground colour tool then move your mouse over the circle and it should now be the choosen colour.
Take your tube and place as a new layer in the middle of your canvas & circle, resize a bit if needed and when happy with placement go to layers, select duplicate, move the duplicate layer to below the circle layer then activate the top tube layer and grab your eraser tool to eraser bits of the tube that are hanging over the bottom of the circle, add a dropshadow to the duplicate tube layer and not the top one.
Activate the bottom white layer and paste a paper of choice from the kit as a new layer, go to layers, select load mask from disk and then find the mask that you saved at the start, select this and make sure the following settings are set :-
Fit to canvas - checked .... Source luminace - checked .... Invert transparency - unchecked .... Hide Mask - checked. Click ok. I used the deform tool to pull it out a little from behind the template layers.
Take a doodle of choice from the kit and paste as a new layer on the layer above the mask you just created, move the doodle to the right side of your tag so it shows from behind the template layers just a little, take the deform tool and pull down the bottom nodes to stretch it a bit, when happy with how it looks go to layers, select duplicate then go to image and select mirror, I move this doodle down nearer the bottom of my tag but you can just play with them till they are how you like them.
Take any other elements from the kit that you want to use for decorating your tag, paste each element on a new layer and resize as needed then place where you want them and add a small dropshadow to each element.
Crop and resize now if you wish to.
Add your name, artist info and copyright info.
Save as jpeg or .png.
and we're done lol.
Thanks for trying my tutorial  and i hope you enjoyed it
would love to see your results,
hippiedaze@hotmail.com
Monday, 13 July 2009
$1.00 Tuesday at P4S
Don't forget to stop by the store tomorrow and pick up a bargain or two lol, hundreds of items listed in $1 Tuesday section of the store.
Look out for a couple of listings from me too hehe, simply click the preview to start shopping tomorrow.
Bed time for me here tonight, will be back in the morning with a new tut, a FTU one.
hugs Susan
Rainbow Rockz Add On Scrap Kit

Using up some left over elements and making some groovy new ones lol so put it all together and came up with this rockin add on kit, smaller than the others but still packed with 42 cute elements & 23 papers (600x600) tagger sized intented & priced at just $2.50.
You can get to the store by clicking the preview.
Any tut writers out there using my kits, I would love to see so pls leave a link in my cbox or drop me an email .
Happy Shopping & Tagging
hugs Susan
Sunday, 12 July 2009
My Garden BBQ
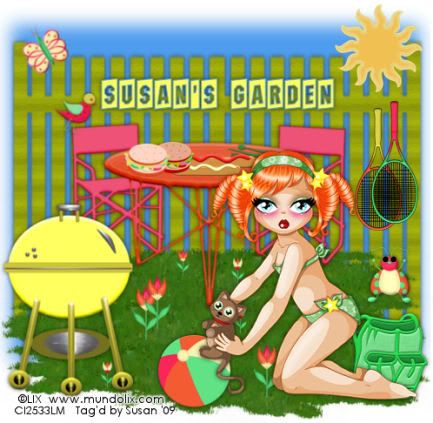
This tutorial was written on July 12th 2009 by Susan aka Hippiedaze.
The idea for this tag is off my own head lol and any resemblance is purely coincidence.
General Knowledge of psp is required, tutorial was written in psp 9 but will work in other versions.
Supplies Needed
Tube of Choice, I used the artwork of Lix, you must have a proper license to use his work please visit CILM - HERE .
PTU Scrap Kit Used - 'One Summer Day' by Hippiedaze (me), you can purchase this kit from P4S - HERE.
No Template Used.
Mask Used - Vix Mask #133 by Vix - HERE.
Effects Used - Blur, Guassian Blur.
2nd Effect Used - Textured Effects, Woodgrain.
Standard Lawn Picture Tube (included with your psp program).
Font of Choice.
(open all supplies and save mask to psp folder before beginning)
Lets Start ....
Go to file in your psp tabs, select new and choose a white image whichever size you prefer to work with, i use 500x500 but select yours to suit yourself, click ok.
Take one of the table/chairs elements from the kit and paste as a new layer on your working canvas, resize as needed to suit your tag size and place in the middle, move up a little (you can reposition this later on).
Take one of the BBQ elements and paste this as a new layer, resize as needed and move to bottom left corner of your canvas, add a dropshadow.
Choose the hamburger and hot dog elements paste each as a new layer on your canvas, make sure your on the top layer lol, resize the elements as needed and place on the table.
Take the cutlery element and paste this as a new layer, resize as needed again and place on the table along with the food, i also used the deform tool on this element to 'flatten' the cutlery, simply click the deform tool then while holding your shift key down move the mouse to pull the nodes down and flatten.
Take one of the rucksack elements from the kit and paste this as a new layer on your canvas, resize as needed and place where you want it, dorpshadow this layer.
Now activate your bottom white layer, go to layers, select add new raster layer, now go to your picture tubes tool in psp, look for the lawn/grass tube and select this and click in your psp workspace, be sure to add the new raster layer or the tube will post on your background layer lol, click the tube and paste as many times as needed to fill the area you want for the 'grass'.
Take a flower element and paste as a new layer, resize as needed and place anywhere on the grass, duplicate this as many times as you want and place your flowers around the garden, i resized some flowers smaller than others.
Now paste your tube as a new layer,resize as needed and place where you want it on your tag, add a dropshadow to the tube layer.
Activate the bottom white layer, paste a paper from the kit as a new layer, go to layers and select load mask from disc, look for the mask you saved at the start (vix mask #133) select this and make sure the following settings are checked:-
Fit to canvas - checked Source luminace - checked Invert transparency - unchecked .... Hide Mask - checked. go to layers, merge group & you can use the deform tool to resize to suit your tag.
Still on the mask layer go to effects, select texture and look for the 'woodgrain' effect, choose this and your fence should now look a bit like wood lol, add a dropshadow to this layer.
Activate the bottom layer once more and take your Rectangle preset shape, choose a colour in your background tab and leave foreground tab to null, draw out a large rectangle on your canvas just a little bigger than the mask layer, go to adjust, select blur, guassian blur and set to 10.00, click ok.
Activate the top layer of your canvas now and add a few other elements of your choice, i used the bird, butterfly ,ladybug & Tennis Bat and place them around my tag, remember to resize each element and add the dropshadow.
Add your name in your chosen font and place on the fence, add a dropshadow to your name.
Add artist info & copyright info.
Save as jpeg or .png.
and we're done i think lol.
Thanks for trying my tutorial and i hope you enjoyed it.
would love to see your results,
hippiedaze@hotmail.com
Lil Update, New Tuts & A Thank You
Good Morning Everyone,
Its not so nice here today lol a bit dull and already had some rain with more to follow later in the day, I have a busy one too and have to go out a few times so it is typical the weathers not good eh lol.
Anyways, I hope your all enjoying my latest kits and first cu template, I have another new kit goin on sale today called 'Groovy Festival' yip is another bright and colourful kit with a funky feel to it lol, as a certain someone said hehe 'suits me' and your sooo right girl :P
Also that certain someone mentioned above is none other than the truly awesome Shani aka Wicked Princess, shes such a gem and has been busy tutting from my kits & templates again, Ive added new tut links to Shani's Tut blog to the list on the right over >>>>>>> so be sure to check out her awesome blog, with so many fantastic tuts,
Thanks Ya Shani, love them all girl
Have a fab Sunday everyone
hugs Susan :)
Saturday, 11 July 2009
Just Groovy
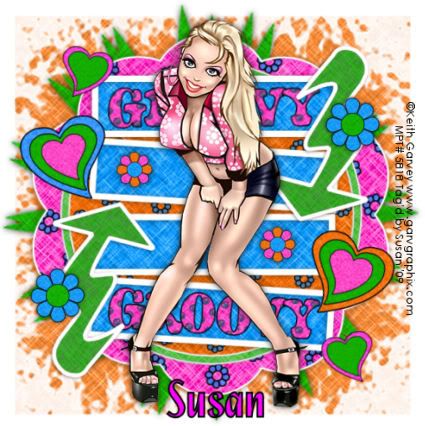
This tutorial was written on June 23rd 2009 by Susan aka Hippiedaze.
The idea for this tag is off my own head lol and any resemblance is purely coincidence.
General Knowledge of psp is required, tutorial was written in psp 9 but will work in other versions.
Supplies Needed
Tube of Choice, I used the artwork of Keith Garvey, you must have a proper license to use his work please visit MPT - HERE .
Scrap Kit Used - 'Give Peace A Chance' by Hippiedaze (me) d/l from 4shared - HERE .
Template Used - Hippiedaze Template #022 by Me which you can d/l from 4shared - HERE .
2 Masks of Choice.
Plugin Used - Eye Candy 4000, Gradient Glow.
Font of Choice.
(Open all supplies and save mask to psp folder before you begin)
Lets Get Started
Open the template, hit shift & d on your keyboard,this pastes the template as new image, close the original template. Delete the info layer.
Go to image and choose resize, select width & height to 90%, smartsize checked and make sure the tab resize all layers is checked, click ok.
Click on the bottom white layer and go to image, select canvas size then choose 500x500, click ok, if there is any transparent image showing grab your floodfill tool and fill with white.
Activate the Large Flower Shape layer, go to selections, select all, select float, select defloat then paste a paper from the kit as a new layer, resize if needed then go to selections again and select invert then hit delete on your keyboard, back to selections and select none, delete the original layer.
Add a gradient glow by going to effects, select eye candy 4000, gradient glow, use the following settings :-
Glow Width - 3.00 .... Soft Corners - 25 .... Overall Opacity - 100 .... Colour - White, click ok.
Repeat that step for the layers named merged rectangles using a different paper & delete the original layer. But no need to add the gradient glow to this layer.
Activate the Circle layer, go to selections, select all, select float, select defloat then paste a paper from the kit as a new layer, resize if needed then go to selections again and select invert then hit delete on your keyboard, back to selections and select none, delete the original layer.
Add a gradient glow by going to effects, select eye candy 4000, gradient glow, use the following settings :-
Glow Width - 3.00 .... Soft Corners - 25 .... Overall Opacity - 100 .... Colour - White, click ok, i also added a dropshadow to this layer.
Do this again on the Circle frame layer & add a gradient glow by going to effects, select eye candy 4000, gradient glow, use the following settings :-
Glow Width - 3.00 .... Soft Corners - 25 .... Overall Opacity - 100 .... Colour - Black ... move the colour slider half way along to the centre to give a bolder glow effect. click ok.
I left the merged rectangle frames layer white and added the same gradient glow to this layer.
Activate the arrow 1 layer, grab your magic wand and click inside the grey area so the marching ants are blinking, open a paper of choice in your psp workspace and minimise, go to your foreground tab in the colour palette and click, choose pattern from the tabs at the top and look for the paper that you just minimised in the pattern tabs, select this then take your floodfill tool and click inside the marching ants to fill with paper, go to selections and select none then activate the arrow layer and add a dropshadow.
Repeat the above step for the arrow 2 layer.
Activate your bottom white layer, paste a paper of your choice as a new layer, go to layers, select load mask from disc and choose the 1st mask that you saved at the start, a starburst mask will work well on this layer and use the following settings :-
Fit to canvas - checked .... Source luminace - checked .... Invert transparency - unchecked .... Hide Mask - checked, click ok, go to layers, merge group.
Activate the bottom white layer again and paste another paper from the kit as a new layer, repeat the step you just did for the mask using the 2nd mask you saved at the start, an edge mask will work for this layer.
Add any other elements from the kit that you wish, place each element as a new layer and resize as needed, elements should be resized smartsize, add a dropshadow to each layer or add the gradient glow to some elements.
Activate the rectangles layer and paste a wordart from the kit as a new layer, resize as needed and take your deform tool to rotate it just slightly so its in line with the rectangle, go to layers, select duplicate and move this so its sitting inside another rectangle, use the deform tool here again to line it with the rectangle.
Activate your top layer now and paste tube as a new layer, resize as needed then place where you like it and add a dropshadow.
Crop or resize your tag now if you want to or didnt at the start.
Add your name, artist info and copyright info.
Save as jpeg or .png.
and we're done i think lol.
Thanks for trying my tutorial and i hope you enjoyed it
would love to see your results,
hippiedaze@hotmail.com
Friday, 10 July 2009
Surfer

This tutorial was written on July 8th 2009 by Susan aka Hippiedaze.
The idea for this tag is off my own head and any resemblance is purely coincidence.
General Knowledge of psp is required, tutorial was written in psp 9 but will work in other versions.
Supplies Needed
Tubes of Choice I used the artwork of Michael Landefeld, you must have a proper license to use his work and you can get that by visiting CILM - HERE.
PTU Scrap Kit Used - 'Summertime Sunshine' by Sizzel @ Sizzels Designs, you can purchase the kit from Scrap Heaven Boutique - HERE.
Template Used - Template CMXC3T3 by Aiya (part of the misfits template challenge 3) you can get this from the creative misfits blog - HERE.
Mask Used - Mask #342 by Chelle @ Wee Scots Lass Creations - HERE.
Plugin Used - Eye Candy 4000, Gradient Glow.
2nd Plugin Used - Textured Effects, Weave.
Font of Choice.
(open all supplies and save mask to psp folder before beginning)
Lets Start ....
Open the template in your psp workspace, hit shift & d on your keyboard,this pastes the template as new image, close the original template. Delete the info layer.
Go to image and choose resize, select width & height to 80%, smartsize checked and make sure the tab resize all layers is checked, click ok.
Go to the bottom blue layer and delete this, go to layers, select add new raster layer, floodfill this layer white, go to image, select canvas size and choose 500x500, click ok, if you get any transparent image showing grab your floodfill tool and fill with white.
Whether you resize here or at the end is up to you, i just find it easiest working this size.
Activate the layer named circle back, go to selections, select all, select float, select defloat then paste your chosen close up tube as a new layer, resize a little if you want to then go to selections, select invert then hit delete on your keyboard, go to selections again and select none.
Activate the circle back layer again and go to adjust, select hue/saturation/lightness then select colourise and choose a colour that matches your tube.
Activate the circle frame layer and colourise in the same way as above, add a dropshadow to the frame.
Repeat the colourise step again for the wavelength layer, open circle layer & the closed circle layer. Choose colours that match your tube.
Activate the rectangle 1 layer (i used a gradient for the fill on this rectangle but you can fill by adding a paper, go to selections, select all, select float, select defloat then paste a paper of choice from the kit as a new layer, resize as needed and then go to selections, select invert, hit delete on your keyboard then go to selections again and select none.
Repeat the paper fill step above for the rectangle 2 and rectangle 3 layers, delete the original layers as you work and add a dropshadow to each layer.
Activate the bottom white layer and paste a paper of choice from the kit as a new layer, ( I choose a plain paper then colourised it), to add the dots effect go to effects, select textured effects, weave and use the following settings :-
Gap - 5 .... Width - 7 .... Opacity - 1 .... Colour - your choice .... Fill Gaps - Checked, click ok.
Now go to layers, select load mask from disk and then find the mask that you saved at the start ( WSL Mask #342) select this and make sure the following settings are set :-
Fit to canvas - checked .... Source luminace - checked .... Invert transparency - unchecked .... Hide Mask - checked. Click ok.
Activate the top layer of your canvas now and paste your main tube as a new layer, resize as needed and place where you like it, add a dropshadow.
Use any other elements from the kit to decorate your tag, place each element as a new layer, resize as needed and place where you like them, add the dropshadow to each element layer.
Crop and resize now if you wish to.
Add your name, I used a small gradient glow on my name but this is optional.
Add artist info and copyright info.
Save as jpeg or .png.
and we're done lol.
Thanks for trying my tutorial and i hope you enjoyed it
would love to see your results,
hippiedaze@hotmail.com
Thursday, 9 July 2009
Fun Summertime

This tutorial was written on June 24th 2009 by Susan aka Hippiedaze.
The idea for this tag is off my own head lol and any resemblance is purely coincidence.
General Knowledge of psp is required, tutorial was written in psp 9 but will work in other versions.
Supplies Needed
Tubes of Choice I used the artwork of Keith Garvey, you will need a proper license to use his work and you can get that by visiting MPT - mypsptubes - HERE .
FTU Scrap Kit 'Summertime Brights Sampler Kit' by Hippiedaze (me) @ hippiedaze tutorials (full kit is availabe at P4S store - HERE.) FTU kit can be downloaded from 4shared - HERE.
Template Used - Template #14 by Cheri @ Wild Creationz - HERE.
Mask Used - WSL Mask #84 by Chelle @ Wee Scots Lass Creations - HERE.
Font of Choice.
No Plugins Used.
(Save mask to your psp folder before you begin and open all other supplies you need)
Lets Get Started
Open the template, hit shift & d on your keyboard,this pastes the template as new image, close the original template.
Delete info layer, I resized mine a little at this point, go to image, resize, change width & height to 85%, choose smartsize and make sure resize all layers is checked, click ok.
Click on the bottom white layer then go to image and select canvas size, choose 500x500, click ok.
Or if you prefer you can skip the resizing and can resize later, i just find it easier working with it at this size.
Activate the layer named sunflower, go to selections, select all, select float, select defloat then paste a paper from the kit as a new layer, you can resize the papers if needed by going to image, select resize and choose your size, remember to make sure resize all layers is unchecked on this step, click ok, now go to selections, select invert then hit delete on your keyboard, go to selections again and select none, you can delete the original layer now. Add a dropshadow to the layer you just created.
Repeat that step for ALL other template layers, use different papers for each layer and add a dropshadow to each layer.
Choose one of the round frames from the kit and paste as a new layer, move this layer right down to the bottom layer of your canvas, resize a little if needed, the kits tagger sized so i didnt resize too much, just enough so it showing from behind the sunflower layer.
Choose a flower from the kit and paste as a new layer, make sure your on the top layer of your canvas and resize the flower to around 25% depending on the size your working with, add a dropshadow to the flower and place on the edge of the frame, see mine as an example, go to layers and select duplicate, i duplicated this as many times as needed to place the flowers around the frame.
Now choose one of the falling hearts elements and paste as a new layer, move this to the layer above your frame, grab your deform tool from the tool palette and rotate to the right slightly, place near top left of your tag, go to layers and select duplicate, go to image and select mirror so you should have the falling stars on each side.
Paste the falling hearts as a new layer once more, resize the same size as you choose for the top hearts, grab the deform tool again and this time rotate slightly to the left then move the hearts to the bottom left of your tag, go to layers, select duplicate then go to image and select mirror, now you should have the hearts in all 4 corners of your tag. I didnt add a dropshadow to these layers.
Activate the bottom white layer, paste a paper from the kit as a new layer, go to layers, select load mask from disc and find the mask that you saved at the start (WSL Mask #84), use the following settings :-
Fit to canvas - checked .... Source luminace - checked .... Invert transparency - unchecked/checked depending on the mask you choose ....Hide Mask - checked. Click ok. go to layers select merge group.
Go to layers, select duplicate then go to image and select mirror, move both these layers up slightly nearer the top of your tag.
Now paste another paper of choice from the kit and repeat the mask layer with the same mask and after merging go to layers, select duplicate, go to image and select mirror, move both these layers down slightly nearer the bottom of your tag.
Activate the top layer now and paste your tube as a new layer, resize a little if you need to and place where you like it, add a dropshadow.
Take any other elements you want from the kit, paste as new layers on your canvas and resize each element as needed, remember elements should be resized smartsize, add a dropshadow to each element layer.
Crop or resizeyour tag if you want to or didnt at the start lol.
Add your name, artist info & copyright info.
Add artist info and copyright info.
Save as jpeg or .png.
and we're done lol.
Thanks for trying my tutorial and i hope you enjoyed it
would love to see your results,
hippiedaze@hotmail.com
Templates Packs of 5 in .ZIP files
I had a few emails saying some of the templates wouldnt open for everyone, I had used winace program which is free but have changed each of the template files to .zip and they should now open for you no problems, so heres my templates 1-20 zipped into packs of 5 for you, just click on each preview above to go to the download from 4shared.
Happy Tagging
hugs Susan
Wednesday, 8 July 2009
Cool Skool

This tutorial was written on June 20th 2009 by Susan aka Hippiedaze.
The idea for this tag is off my own head lol and any resemblance is purely coincidence.
General Knowledge of psp is required, tutorial was written in psp 9 but will work in other versions.
Supplies Needed
Tube of Choice, I used the artwork of Kenny Kiernan, you must have a proper license to use his work please visit AMI - HERE.
FTU Scrap Kit Used - 'Skool Daze' by Sammygirl @Sd Scraps - HERE .
Template Used - Hippiedaze Template #022 by Me which you can d/l from 4shared - HERE.
Mask Used - WSL Mask #84 by Chelle @ Wee Scots Lass Creations - HERE.
Plugin Used - Eye Candy 4000, Gradient Glow.
Font of Choice.
(Open all supplies and save mask to psp folder before you begin)
Lets Get Started
Open the template, hit shift & d on your keyboard,this pastes the template as new image, close the original template. Delete the info layer.
Go to image and choose resize, select width & height to 90%, smartsize checked and make sure the tab resize all layers is checked, click ok.
Click on the bottom white layer and go to image, select canvas size then choose 500x500, click ok, if there is any transparent image showing grab your floodfill tool and fill with white.
Activate the Large Flower Shape layer, go to selections, select all, select float, select defloat then paste a paper from the kit as a new layer, resize if needed then go to selections again and select invert then hit delete on your keyboard, back to selections and select none, delete the original layer.
Add a gradient glow by going to effects, select eye candy 4000, gradient glow, use the following settings :-
Glow Width - 3.00 .... Soft Corners - 25 .... Overall Opacity - 100 .... Colour - Black ... move the colour slider half way along to the centre to give a bolder glow effect. click ok.
Repeat that step for the layers named merged rectangles using a different paper & delete the original layer.
Activate the Circle Dotted layer, go to adjust, select hue/saturation/lightness and then choose colourise, pick a colour that matches your tube/tag to colour this layer, click ok.
Do this again on the Circle frame layer & add a gradient glow by going to effects, select eye candy 4000, gradient glow, use the following settings :-
Glow Width - 3.00 .... Soft Corners - 25 .... Overall Opacity - 100 .... Colour - Black ... move the colour slider half way along to the centre to give a bolder glow effect. click ok.
I left the merged rectangle frames layer white and added the same gradient glow to this layer.
Activate the arrow 1 layer, grab your magice want and click inside the grey area so the marching ants are blinking, go to adjust, select hue/saturation/lightness and choose the same bright colour used on the circle frame, click ok, now go to selections and select none, go to effects and add the gradient glow to the whole arrow.
Repeat the step on arrow 2 layer.
Activate your bottom white layer, paste a paper of your choice as a new layer, go to layers, select load mask from disc and choose the mask you saved at the start (WSL Mask #84) and use the following settings :-
Fit to canvas - checked .... Source luminace - checked .... Invert transparency - unchecked .... Hide Mask - checked, click ok, go to layers, merge group, use your deform tool to stretch the mask layer out a little till its how you want it.
Now take a swirl of your choice from the kit and paste as a new layer, resize this a bit and place where you like it so it shows from behind the flower shape layer, use your deform tool to rotate it if you want to, go to layers, select duplicate then go to image, select mirror so you have 2 swirls, i also added a different swirl and left this one quite big , the choice is yours.
Activate your top layer now and paste tube as a new layer, resize as needed then place where you like it and add a dropshadow.
Add any other elements from the kit that you wish, place each element as a new layer and resize as needed, elements should be resized smartsize, add a dropshadow to each layer or add the gradient glow to some elements.
Crop or resize your tag now if you want to or didnt at the start.
Add your name, artist info and copyright info.
Save as jpeg or .png.
and we're done i think lol.
Thanks for trying my tutorial and i hope you enjoyed it
would love to see your results,
hippiedaze@hotmail.com
V.I.P

This tutorial was written on July 7th 2009 by Susan aka Hippiedaze.
The idea for this tag is off my own head and any resemblance is purely coincidence.
General Knowledge of psp is required, tutorial was written in psp 9 but will work in other versions.
The tutorial is fairy quick and easy to follow.
Supplies Needed
Tubes of Choice I used the artwork of Ismael Rac, this artist has moved from MPT to Artistic Minds Inc, my tag has an MPT license from where I bought it but you can get Ismaels awesome tubes from AMI - HERE.
PTU Scrap Kit 'Hard Candy' By Pimptress @ Pimp'd Designs, the kit can be purchased from P4S store - HERE.
No Template Used.
No Mask Used.
Font of Choice.
Effects Used - 3d effects, Inner Bevel.
Lets Get Started...
Open a new canvas by going to file, select new, choose your size (mine was 500x500) white canvas, click ok.
Open the frame 10 element from the kit and paste as a new layer in the centre of your canvas, resize this as needed depending on what size you work with on your tags, grab your magic wand tool from the tool palette and click inside the middle area so that the marching ants are blinking, go to selections and select modify, select expand from the drop menu, choose expand by 2, click ok, take your close up tube and paste as a new layer, move this to where it fits inside the frame and when happy with position go to selections, select invert then hit delete on your keyboard, do not de select yet, activate the frame layer again and take a paper of your choice from the kit, paste this as a new layer, resize a little if needed then when happy with this hit delete on your keyboard, now you should have the paper layer behind the tube layer.
Activate the frame layer and add a dropshadow of choice.
Activate the top layer of your canvas and paste your main tube as a new layer, resize as needed and place this where you like it or follow mine if you are using the same tube also add a dropshadow to this layer.
Take the rock on wordart from the kit, paste as a new layer and resize as needed then place at top right of the frame.
Take the VIP pass and paste this as a new layer, resize as needed and place at top left side of the frame, use the eraser tool to eraser a little of the string so it looks like its threaded through the frame, add a dropshadow to this layer.
Paste the guitar element as a new layer and resize as you like, go to adjust, select hue/saturation/lightness and then choose colourise and select a colour that matches your tubes, click ok, i used the deform tool to rotate the guitar slightly against the frame.
Repeat the above step with the microphone element and place this beside the guitar, add a dropshadow to both layers.
I also used a couple of the star elements, resize these and paste where you like them.
Choose a font & colour for your name, go to effects, select 3d effects, inner bevel and play with the setting till its how you like it.
Add artist info & copyright info.
Save as jpeg or .png.
And I think thats us about done.
Thanks for trying my tutorial and i hope you enjoyed it
would love to see your results,
hippiedaze@hotmail.com
Tuesday, 7 July 2009
Sail Day
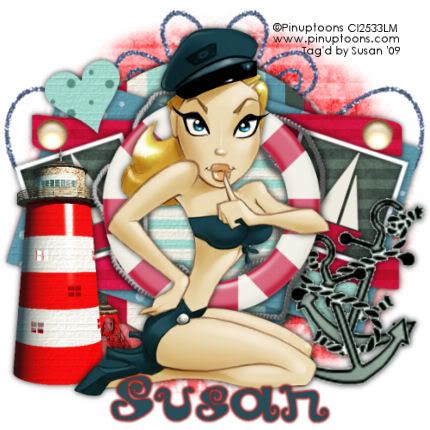
This tutorial was written on 17th June 2009 by Susan aka Hippiedaze.
The idea for this tag is off my own head lol and any resemblance is purely coincidence.
General Knowledge of psp is required, tutorial was written in psp 9 but will work in other versions
Supplies Needed
Tube of Choice I used the artwork of Pinuptoons, you will need a proper license to use his work which you can get by visiting CILM - HERE.
Scrap Kit Used - 'Sailboats' by Tyger @ Tygers Tid Bits - HERE . (this was part of the Sailboats Blogtrain for June 2009)
Template Used - MC Template #15 by Melissa @ Melissaz Creationz - HERE.
Mask Used - WSL Mask #291 by Chelle @ Wee Scots Lass Creations - HERE.
Plugin Used - Eye Candy 4000, Gradient Glow. (optional, only used on name)
Font of Choice.
(open all supplies and place mask into your psp folder before we start)
Lets Get Started
Open the template, hit shift & d on your keyboard,this pastes the template as new image, close the original template. Delete info layer. Go to image, select resize and choose 90%, make sure smartsize is checked and resize all layers checked, click ok.
Go to layers, select add new raster layer, grab your floodfill tool and with white as the foreground click on the canvas to fill new layer white, move this layer all the way to the bottom of your working canvas, now go to image, select canvas size and choose 500x500, click ok, if theres any transparent image showing click to fill white.
Activate the large circle layer (raster 8), go to selections, select all, select float, select defloat, paste a paper from the kit as a new layer, resize a little if you want to, go to selections, select invert then hite delete on your keyboard, go to selections again and select none, delete the original layer and add a dropshadow to the layer you created.
Repeat that step for the layers named raster 5, copy of raster 5, raster 2, copy of raster 2, raster 6, copy of raster 6, raster 7, raster 9 & copy of raster 9, use different papers for each layer as you wish, delete the original layers as you work and add the dropshadow to all layers except raster 6 & copy of raster 6 layers.
Activate the layer named raster 3, i left this frame layer white and added the dropshadow.
Repeat for other 2 frame layers.
Take the life preserve frame with rope element from the kit and paste as a new layer, resize as needed so it fits nicely around the middle circle layer, add the same dropshadow to this layer.
Activate the bottom white layer and paste a paper as a new layer, go to layers, select load mask from disc and find the mask that you saved at the start (WSL #291) and use the following settings :-
Fit to canvas - checked .... Source luminace - checked .... Invert transparency - unchecked.... Hide Mask - checked. Click ok, use the deform tool to stretch it out a little if needed.
Take a glitter doodle from the kit and paste as a new layer, resize around 60%, smartsize and move to top left of your canvas, this layer should be directly above the mask layer, when happy with placement of doodle go to layers, select duplicate then go to image and choose mirror and position on opposite side of your tag where you want it.
Activate the top layer of your canvas now and paste your tube as a new layer, resize as needed and place where you like it then add the same dropshadow to this layer.
Choose a sailboat element from the kit and paste as a new layer, resize as needed and place inside the left frame, use your deform tool to rotate slightly in line with the frame, add the dropshadow to the sailboat layer then go to layers, select duplicate then go to image and select mirror and position on opposite frame, mke sure both elements are below your tube layer.
Take the lighthouse element from the kit and paste as a new layer, resize around 60%, smartsize, click ok, place on bottom left of your tag or where you like, add a dropshadow.
Take an anchor from the kit and paste as a new layer, resize this as needed and place on bottom right side of your tag, i duplicated this and mirrored then moved mirrored layer to the same side (see mine).
Finally lol add a bead of choice and place on the top strip, duplicate and mirror this so you have one on each side.
Crop or resize if you wish to now.
Add your name, I used the gradient glow settings here in red, also added a dropshadow to my name.
Add artist info & copyright info.
Save as jpeg or .png. and we're done lol.
Thanks for trying my tutorial and i hope you enjoyed it would love to see your results,
hippiedaze@hotmail.com
Monday, 6 July 2009
I have another new award

thanks so much Lou for thinking of me with this one & am smiling big time here, it means a lot.
The rules for this award is to pass on to 5 friends blogs who you know that has these qualities so Im passing this award to the following 5 blogs...
Maurine @ Let Me Scrapbook
Shani aka Wicked Princess @ Wicked Princess Tutorials
Sizzel @ Sizzels Designs
Adelyn @ Cays Creations Designs
Vassia @ Vassia's Designs


