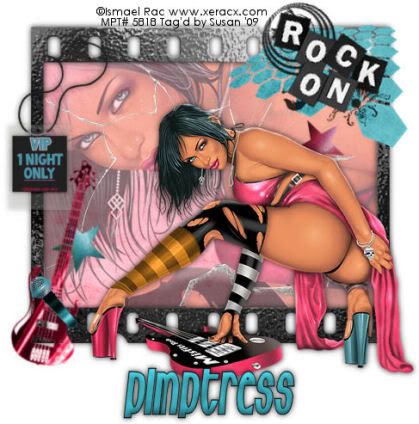
This tutorial was written on July 7th 2009 by Susan aka Hippiedaze.
The idea for this tag is off my own head and any resemblance is purely coincidence.
General Knowledge of psp is required, tutorial was written in psp 9 but will work in other versions.
The tutorial is fairy quick and easy to follow.
Supplies Needed
Tubes of Choice I used the artwork of Ismael Rac, this artist has moved from MPT to Artistic Minds Inc, my tag has an MPT license from where I bought it but you can get Ismaels awesome tubes from AMI - HERE.
PTU Scrap Kit 'Hard Candy' By Pimptress @ Pimp'd Designs, the kit can be purchased from P4S store - HERE.
No Template Used.
No Mask Used.
Font of Choice.
Effects Used - 3d effects, Inner Bevel.
Lets Get Started...
Open a new canvas by going to file, select new, choose your size (mine was 500x500) white canvas, click ok.
Open the frame 10 element from the kit and paste as a new layer in the centre of your canvas, resize this as needed depending on what size you work with on your tags, grab your magic wand tool from the tool palette and click inside the middle area so that the marching ants are blinking, go to selections and select modify, select expand from the drop menu, choose expand by 2, click ok, take your close up tube and paste as a new layer, move this to where it fits inside the frame and when happy with position go to selections, select invert then hit delete on your keyboard, do not de select yet, activate the frame layer again and take a paper of your choice from the kit, paste this as a new layer, resize a little if needed then when happy with this hit delete on your keyboard, now you should have the paper layer behind the tube layer.
Activate the frame layer and add a dropshadow of choice.
Activate the top layer of your canvas and paste your main tube as a new layer, resize as needed and place this where you like it or follow mine if you are using the same tube also add a dropshadow to this layer.
Take the rock on wordart from the kit, paste as a new layer and resize as needed then place at top right of the frame.
Take the VIP pass and paste this as a new layer, resize as needed and place at top left side of the frame, use the eraser tool to eraser a little of the string so it looks like its threaded through the frame, add a dropshadow to this layer.
Paste the guitar element as a new layer and resize as you like, go to adjust, select hue/saturation/lightness and then choose colourise and select a colour that matches your tubes, click ok, i used the deform tool to rotate the guitar slightly against the frame.
Repeat the above step with the microphone element and place this beside the guitar, add a dropshadow to both layers.
I also used a couple of the star elements, resize these and paste where you like them.
Choose a font & colour for your name, go to effects, select 3d effects, inner bevel and play with the setting till its how you like it.
Add artist info & copyright info.
Save as jpeg or .png.
And I think thats us about done.
Thanks for trying my tutorial and i hope you enjoyed it
would love to see your results,
hippiedaze@hotmail.com
Wednesday, 8 July 2009
V.I.P
Posted by hippiedaze at 00:36
Labels: Tutorials - PTU
Subscribe to:
Post Comments (Atom)


0 comments:
Post a Comment