Till the end of my August Sale, if theres anythinng you have your eye on nows the time to do the shopping lol cuz after Aug 31st the sale will be over and all listings will be back to normal prices, All my items are listed in P4S & Katelynn Designs, which you can find the links to on the right over >>>>>
Many many new listings this last few days so if you havent been following and missed any, you can preview them all on my scrappin stuff blog.
Dont forget to stop and say hi when you drop by, its always good to hear from yall.
Hope its a good night for everyone, I will be hitting the sack very soon lol.
Hugs Susan
Friday, 28 August 2009
2 Days to Go
Garv Girls Bar

This tutorial was written on August 27th 2009 by Susan aka Hippiedaze.
The idea for this tag is off my own head lol and any resemblance is purely coincidence.
General Knowledge of psp is required, tutorial was written in psp 9 but will work in other versions.
Supplies Needed
Tube/s of Choice, I used the artwork of Keith Garvey, you must have a proper license to use his work please visit MPT - mypsptubes - HERE .
PTU Scrap Kit 'Club Night' by Hippiedaze (me) @ Hippiedaze Tuts and you can purchase this kit from P4S - HERE .
No Template Used.
Mask Used - WSL Mask #314 by Chelle @ Wee Scots Lass Creations - HERE.
Font of Choice.
No Outside Plugins Used.
Open all supplies before you start ....
Lets Get Started....
Open a new image in your psp by going to file tab and select new, choose 500x500 white image, click ok.
Take one of the Round Frames from the kit and paste as a new layer in your new canvas, you may want to resize a little so to do this go to image, select resize, choose resize by around 80% smartsize or whichever size suits you, make sure resize all layers tab is unchecked, click ok.
Grab your magic wand from the tool palette and click inside the frame area so there will be marching ants flashing around the inside frame, take a paper from the kit and paste as a new layer, you can always resize the paper a little if you wish but not smaller than the 'ants', when your happy with the size of the paper go to selections, select invert then hit delete on your keyboard, go back to selections and select none, move the paper layer to below your frame layer.
Take one of the Bar Elements from the kit and paste this as a new layer in the middle of your canvas and middle of frame lol, resize this in the same way as before to suit your liking.
Take one of the signs elements and paste this as a new layer on your working canvas, resize as needed and move upwards to just about level with the frame.
Take a bar stool from the kit (make sure your on the top layer of the canvas now) and paste this as a new layer, resize as needed and place where you like it in front of the bar, i also duplicated the stool layer a few times to make more seats around the bar lol, you can do this by going to layers, select duplicate layer, do this as many ties as needed.
Take one of your chosen tubes and paste this as a new layer, i resized mine by 80% bicubic and moved the layer below the bar layer, make sure the legs arent showing at the bottom of the bar lol and if they are then grab your selection tool and select the parts that are showing then hit delete on your keyboard to erase, go to selections and select none.
Take your 2nd choosen tube, paste as a new layer on your working canvas, resize as needed and place her where you like, also do this with a third tube if you are following mine and place this where you want it.
Take a pool cue element from the kit and paste as a new layer, resize as needed and place at one end of the bar, do this with the other 2 coloured cue elements also and line them up so they are like agaings the wall lol.
Take the dartboard element and paste as a new layer on your canvas, resize as needed and move upwards and towards the oposite side of the bar so it looks like its hanging on the wall.
Now make sure you are on the layer just above the frame, choose a paper from the kit and paste as a new layer, go to layers select load mask from disc, look for the mask you loaded at the start, (WSL Mask #314) use the following settings to add the mask:-
Fit to canvas - checked .... Source luminace - checked .... Invert transparency - unchecked .... Hide Mask - checked, click ok, go to layers, merge group, use your deform tool to stretch the mask layer out a little till its how you want it & showing around your tag.
Now repeat the mask step with a different coloured paper and go to image, select mirror, you can move the layers slightly so they are sorta mixing lol, see mine as example.
I used the blank bar for this tag so I added some words to the front, this is entirely up to yourself.
Add another other elements from the kit that you want to use to decorate your tag more.
Add dropshadows to any layers you like or all if you want lol.
Crop or resize your tag now if you want to or didnt at the start but leave enough room for your name lol.
Add your name, artist info and copyright info.
Save as jpeg or .png.
and we're done i think lol.
Thanks for trying my tutorial and i hope you enjoyed it
would love to see your results,
hippiedaze@hotmail.com .
Thursday, 27 August 2009
New Tut coming Tonight

Decided to do a tut for a change lol & had some time to rustle up this tag this morning, made with my Club Night Scrap Kit which is available at P4S with 25% savings, just wanted to show it before i go and will write the tut tonight when i get back from my hospital appt so check back later in the day for this one.
And have a good day everyone.
Hugs Susan.
Tuesday, 25 August 2009
Dont Forget Its $1 Tuesday

Why not rock on over to Paradise 4 Scrappers today and fetch yourself a bargain or three lol, I have tons of my kits & templates as well as All overlay packs listed for just $1 plus theres over 750 products to choose from by all the fantasic designers in the store.
Stilll just over 8hours left to do your shopping and saving.
See you there
Hugs Susan
Sunday, 23 August 2009
Tag Pressie for me

Awesome just Awesome :D one of my fav popeye tubes and my first ever freebie scrap kit was used by a good friend of mine, Jeanne aka Happy made this for me and she did so brilliantly didnt she :D, thanks ya bunches Happy for my pressie am over the moon with this.
Happy also used my template and did the tut written by Wicked Princess.
you rock Happy love it
Thanks again
hugs Susan
I Sea

This tutorial was written on August 23rd 2009 by Susan aka Hippiedaze.
The idea for this tag is off my own head lol and any resemblance is purely coincidence.
General Knowledge of psp is required, tutorial was written in psp 9 but will work in other versions.
Supplies Needed
Tube of Choice I used the artwork of Suzanne Woolcott, you will need a proper license to use her work and can get one by visiting - HERE.
PTU Scrap Kit 'Ror Row Out to Sea' by Natasha @ Sticky Kisses, you can purchase this kit from Scrap Heaven Boutique - HERE.
Mask Used - Mask 178 by Cat @ Insatible Dreams - HERE
No Template Used.
No Plugins Used.
Font of Choice.
(Open all supplies and save mask to psp folder before you begin)
Lets Get Started
Open a new image in your psp workspace by clicking file and select new, choose image size 500x500 (or bigger if you prefer), white canvas and click ok.
Choose one of the frames from the kit and paste as a new layer in the centre of your working canvas, you will need to resize a little if using my sizes so click image and choose resize, make sure resize all layers is UNCHECKED, i resized mine by around 80%, click ok.
Grab your magic and tool from the tool palette and click inside the frame so you have the marching ants blinking around the edges, go to selections again, select modify and choose expand, select expand by 3 and click ok, now take a paper of your choice from the kit and paste as a new layer in your canvas, resize as needed but not smaller than the marching ants lol, once happy with size go to selections select invert then hit delete on your keyboard, do not deselect yet..... take the waves element from the kit and paste as a new layer move down to the bottom of the frame and then when happy hit delete on your keyboard again, this pastes the wave inside the frame, you need to move both the wave layer and paper layer to below the frame layer tho .
Take the seaweed element from the kit and paste as a new layer above the waves layer but below the frame lol, resize to your liking, i resized quite small and then duplicated the layer and moved to the right a little, also added a dropshadow to both seaweed layers.
Take the lighthouse element from the kit and paste this as a new layer on your canvas, resize a little and move to the left side of your tag, add a small dropshadow if you wish.
Take your tube and paste as a new layer, resize to your liking and move to the left beside the lighthouse, add a small dropshadow to your tube as well.
Take the fish element from the kit and paste as a new layer, resize as needed (made mine quite small again) move the fish to where you like it on the waves, i also used the deform tool to rotate a little, you can do this by grabbing your deform tool and rotate while holding the mouse over over the node that rotates, go to layers, select duplicate and move the second fish to where you like it in the waves, add a dropshadow to both fis layers.
Take the octopuss tube from the kit and paste as a new layer in your canvas, resize this to your liking and move to the right side of your canvas, add the same dropshadow to this layer.
I also used the sea word label and a bow from the kit to decorate a little more, simply paste as new layers and resize you your liking then place where you like on top area of the frame, dropshadow both layers.
Now activate bottom white layer, paste a paper of choice from the kit as a new layer, go to layers again, load mask from disc, then find the first mask we loaded at the start (178 Insatible Dreams) Make sure the following settings are set...
Fit to canvas - checked .... Source luminace - checked .... Invert transparency - unchecked
Hide Mask - checked.
Go to layers, merge group.
Take your deform tool and stetch the mask layer out to suit so it shows a little from behind all layers.
Crop or resize your tag if you want to to your preffered size in the usual way.
Activate the top layer of your canvas again & add you name, artist info & copyright info.
Save as jpeg or .png.
and we're done lol.
Thanks for trying my tutorial  and i hope you enjoyed it
would love to see your results,
Saturday, 22 August 2009
Back to School Collab @ P4S

Take a look at all these goodies in this massive collab kit happening now at P4S store.
21 Designers from Paradise 4 Scrappers have put together this fantastic collaboration for you. Back 2 School is the theme. Hundreds of goodies for these back to school tags.
Remember its 21 designers that means 21 fabulous kits which can be yours free withjust $10 spend or more throughout the store. When you add to your cart and add an additional $10 worth of items from the store go to the checkout & enter the coupon code, Back2SchoolCollab, this will be yours free with your other downloads, couldnt be any easier eh :D
Hurry tho cuz this wont be available for long!
Dont miss it
Visit P4S today to start shopping and own these fab kits.
And remember I posted my preview earlier in the week but for those of you who missed, here it is again
Brag Book Page & Tag from Amy


Thes 2 awesome creations were made by Amy over on the Sticky Kits CT, these ladies there are just fabulous at whipping out some dazzling tag etc, be sure to take a peek at their blog (linked over on the right >>>>>
Amy, thanks you bunches for working with my Lets Go Camping kit and coming up with these ever so cute creations, ps thats the first brag book page anyones made from my kits so far so yayyyyyyyy to you (big smiles)
Hugs Susan.
Punk Rocker Tut from Mary

Mary from Sticky Kits Ct has used my Punk Rocker Chic Kit here and wrote this fantastic tut, awesome eh, love it Mary and big thanks ya.
You can find this tut on Mary's blog Country Bug Tutorials.
My kit is available from P4S, Katelynn Designs & Dazzlings Scraps stores, each of the links are over on the right, >>>>>>
ps i need to get the blinkie for Dazzling Scraps store added lol also the tut is animated but with me having some PB issues i can only post the still version just now and will post the animated when i get things sorted.
Enjoy
Friday, 21 August 2009
New Templates
Just a wee note to let yall know theres a bunch of new templates posted over on my scrappin blog so if ya fancy some shopping ya know where it all is lol, you can view the previews from the link above and the store links are all listed to the right of the blog
Have a good weekend everyone
hugs Susan
ohhhhhhhhhhh i have another award to post, im not forgetting lol just very tired tonight so will make too many typos so its listed for my things to do tmw
niters
Another 2 Fab Tags from Gina


awww these are both actually animated too it totally rocks, Gina from Sticky Kits CT used my Dj Superstar kit to create these awesome tags.
Thanks bunches Gina
Another New Award

This fabby award was given to me by Staci over at Designs by Staci,
Thanks so much for thinking of me with this one, im honoured again yayyyy.
Here are the guidelines for accepting the award:
1 - Display the prize.
2 - Link to the Blog from whom you received it.
3 - Nominate another 10 blogs.
4 - Leave a message on their blog, letting them know they have received it
So my chosen blogs are :-
1. Stef & Tracy @ Freebie Friends Scraps & More
2. Mary @ Country Bug Tutorials
3. Everyone @ Getting Creative with Sticky Kits
4. Lou @ Truly Toxic
5. Shani @ Wicked Princess Tutorials
6. Jessica @ Gothic Inspirations
7. Gina @ Crafted by Gina
8. Mazie @ Mazies Mayhem
9. Melanie @ Beehaven Designs
10. Bits n Bobs Blogspot
Thursday, 20 August 2009
I Got An Award

This lovely blog award comes from Tracy & Stef over at Freebie Friend's Scraps & More.
Thanks ya bunches for this ladies and I'm very honoured.
Many many blogs have this award so I need to go through some and see what friends dont already have this, (ive had this award twice) promise to pass very soon when i get my muddle sorted out here
Thanks again ladies
Hugs Susan
New Tut From Alyssa

Alyssa over at Sticky Kits CT has came up with this fantastic tag with the most awesome tube and put together into a tut, yayyyy isnt is awesome....
You can find the tut on Aylssa's Blog HERE
Thanks bunches Alyssa for this, it rocks and I simply love it.
Sunday, 16 August 2009
New Freebies up for grabs
I just posted a couple of freebies over on my scrappin stuff blog if anyone wants them your welcome to download, they can be got at HERE
Hugs Susan.
Saturday, 15 August 2009
A New Tut from Wicked Princess

Shani aka Wicked Princess got busy with my Sweet Tooth kit and came up with this adorably sweet tag & she also wrote a tut with this which you can find on her tut blog HERE , she has some fabulous tuts written with my kits as well as many many others so take a trip over and let her know I sent ya lol
Another Tag Pressie

Mary over at the Sticky Kits CT has been busy with my part of the Summer Heat Blog Train and came up with this fabulous tag, wish i looked like thathehehe, I love the tag Mary & thanks so much for using this.
Check Out These Awesome Tag Pressies
The first of 3 fantastic new tags for me from Dawdy over at Sticky Kits CT team. Dawdy used my Lets Go Camping kit for this one and she did awesomely with it.
Thanks bunches for this girl.
2nd tag pressie from Dawdy again at Sticky Kits CT, she used my Groovy Festival kit for this colourful lil tag, Love this thanks Dawdy.
and last but by no means least the 3rd tag from Dawdy, using my DJ Superstar kit, way to go girl I love them all.
Thanks so much and hope you had fun with these.
Friday, 14 August 2009
Freebies
I just posted 2 new freebie paper packs for anyone that wants them lol, as ya know all my scrappin stuff has moved to my other blog so thats where the freebies are too hehehe....
Boogie on over HERE to see whats new today and dont forget to let me know you stopped by
Also check back later today as there is a couple of new templates going in the stores,
Lil reminder that all my kits & stuff is still going at 25% off normal prices for the whole of August and this includes ALL new listings
Have Fun Everyone
hugs Susan
Thursday, 13 August 2009
Bubblegum Rock
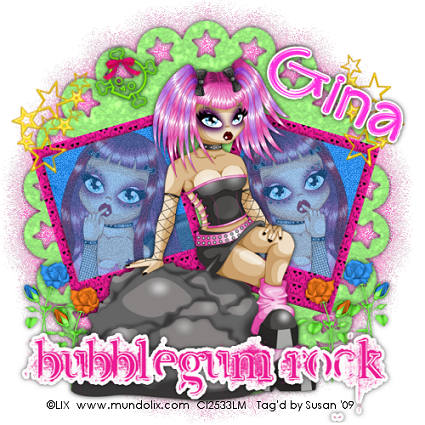
This tutorial was written on August 13th 2009 by Susan aka Hippiedaze.
The idea for this tag is off my own head lol and any resemblance is purely coincidence.
General Knowledge of psp is required, tutorial was written in psp 9 but will work in other versions.
Supplies Needed
Tube of Choice, I used the artwork of Lix, you must have a proper license to use his work please visit CILM - HERE .
Scrap Kit Used - 'Bubblegum Rock' by Gina @ , you can purchase this awesome kit from HERE.
No Templates Used.
No Masks Used.
Plugin Used - Eye Candy 4000, Gradient Glow.
2nd Plugin Used - Toadies, Blast n Blur.
Font of Choice.
Open all supplies before you start ....
Lets Get Started....
Open a new image in your psp by going to file tab and select new, choose 500x500 white image, click ok.
Take one of the mat elements and paste as a new layer in the centre of your canvas, resize around 85% smartsize, make sure resize all layers is unchecked then click ok.
Duplicate this layer and go to adjust, select hue/saturation/brightness and then choose a colour to match your tube/tag, click ok then go to effects, choose Toadies, blast n blur and use the default settings, click ok and move this layer below the first mat layer.
Take one of the frames from the kit and paste as a new layer, go to image, select rotate and rotate by around 20.00 left, duplicate this layer and then go to image and select mirror, position to your liking or see mine as example.
Grab your magic wand and click inside the frame area so the marching ants are blinking, go to selections, select modify and choose to expand by 2, click ok take a paper of choice from the kit and paste as a new layer, resize a little then go to selections again and select invert then hit delete on your keyboard, do not deselect yet, choose a tube and paste this as a new layer, resize a little then position how you like it inside the frame, when happy with placement simply hit delete on your keyboard to erase excess tube from around the frame.
Repeat that step for the other frame using the same tube mirrored or a different tube if you wish as long as its by the same artist.
On both tube layers i lowered the opacity down to around 60 but this is up to you. I also added some noise to both paper layers.
Take your main tube and make sure your on top layer of your canvas then paste tube as a new layer, resize as needed to your liking and place in middle of your canvas.
Take the bubblegum rock wordart from the kit and paste as a new layer, resize as needed and place at bottom of your canvas or where you like depending on what tube you use.
Add any elements you want to decorate your tag, or see mine as examples. I used some roses, stars and skull.
Add a drop shadow to any layers you wish.
Crop or resize your tag now if you want to but leave enough room for your name.
Add your name, artist info and copyright info.
Save as jpeg or .png.
Thanks for trying my tutorial and i hope you enjoyed it
would love to see your results,
hippiedaze@hotmail.com .
Wednesday, 12 August 2009
Tuts Tags n Stuff made with my Kits

This awesome Back to School tag was made by Gina at Sticky Kits, she used my part of the Back to School Collab kit which is available from today @ P4S store
Thanks so much Gina for my ever so cute tag, I love it.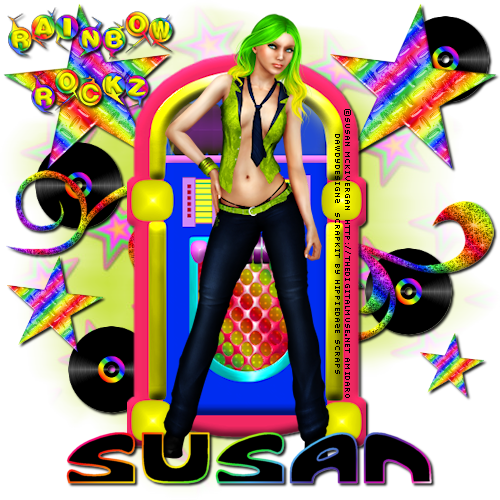
Next up is this fabby Rock tag made by Dawdy who is also part of Sticky Kits CT, she used my Rainbow Rockz Kit for this one and she really did rock it, the tube is perfect with the kit.
Thanks bunches Dawdy for my tag
Last but deffinitely not least is this awesome tut written by Stef of Freebie Friends & More, Stef is also part of Sticky Kits CT and you can find this tut on her forum HERE.
A big thank you to Stef too for you awesome work and for using my kit.
My kits can all be found over on my Scrappin Blog and in both P4S store & Katelynn Designs store
Tuesday, 11 August 2009
Its Tuesday... Its $1.00 Day @ P4S

Yayyy its Tuesday again, time to fetch a bargain or few lol, theres over 600 products listed at a crazy price of just $1 each over at p4S, lots of my listings are in this sale too so if you've seen something you like then todays the day to go shopping hehehe
Have fun everyone, the link to the store is in the advert above simply click to go shop
Sunday, 9 August 2009
Lots & Lots of New Goodies added
Have you visited my new blog yet ladies ? I have added lots of new templates over the weekend, mostly 60's 70's style stuff, if this is your kinda thing then why not pop over for a visit and check it out, new stuff being added to the stores daily as well as a few freebies thrown in along the way lol, its well worth a wee visit and dont forget to say hi when your there, feel free to add to the followers if you like what you see and keep up to date with new additions as they arrive.
Best of all for those of you who dont know yet, I have 25% off ALL listings for the entire month of August
just folow the link in my header or click on my scrappin stuff blinkie on the right to get there
See You There
hugs Susan
Friday, 7 August 2009
My Girly Room
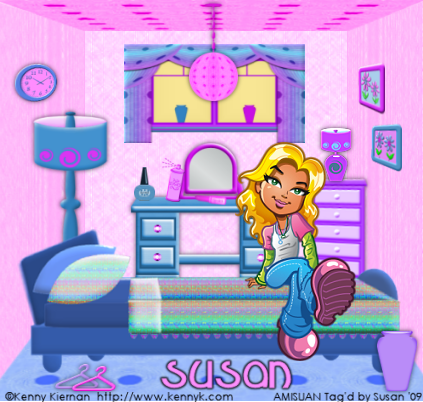
This tutorial was written on July 25th 2009 by Susan aka Hippiedaze.
The idea for this tag is off my own head lol and any resemblance is purely coincidence.
Very quick and easy tut.
General Knowledge of psp is required, tutorial was written in psp 9 but will work in other versions.
Supplies Needed
Tube of Choice, I used the artwork of Kenny Kiernan, you must have a proper license to use his work please visit AMI - HERE.
PTU Scrap Kit Used - 'Room For The Girls' by Hippiedaze (me) @ Hippiedaze Scrappin Stuff and you can purchase this kit at P4S or Katelynns Designs stores
No Template Used.
Font of Choice.
(Open all supplies and save mask to psp folder before you begin)
Lets Get Started
For this tut the instructions are just a rough guide only, yours may differ depending on what sizes you like to work with.
Open a new canvas in your psp workspace by going to file, select new, choose white 500x500 and click ok.
I started with the bed element so paste this as new layer on your working canvas and go to image, select resize, resize this so its to your liking and place in centre near the bottom of your tag.
Take one of the dressing table elements and paste as a new layer, resize as needed and place layer behind the bed nearer the centre of your tag, you can follow mine as an example.
These 2 elements gave me a guide for the rest of the tag placement lol so we will move to the walls before adding anything else okkies ....
Choose a paper from the kit and paste as a new layer, move this layer all the way to the bottom of your canvas, resize down till you have a square in the centre of your canvas.
Choose a different paper or the same one if you like lol and paste this as a new layer on your canvas, resize a little but not too much, move to the bottom of your canvas, we will cut this paper in half now so take your selection tool and draw a rectangle on the right hand side of your tag, from the centre to the right lol and top to bottom, when happy with size hit delete on your keyboard to erase this half of the paper, select none, now grab your deform tool, now hold the shift key down and move your mouse over the top right node, the little icon should slant a bit, now keep holding the shift key down and pull the node down towards the centre, not too much tho lol, now do the same with the bottom right node but drag it up towards the centre, when happy with this pull the middle right side node to the left to make it narrower, (hope that all makes sense lol).
Duplicate this now and then go to image and select mirror, you should now have the back wall and 2 side walls right ? lol
Choose another paper from the kit, paste as a new layer resize a bit again and do the same step as above that we did for the walls except this time pull the top left and top right nodes in toward the centre, also pull the middle node down towards the bottom, this should give it a more flattened look,remember you can follow my tag as an example.
For the ceiling i simply duplicated the floor layer and then flipped it, you may have to use the deform tool again to pull the nodes slightly to fit with the top sections of the walls, I also changed the colour by going to adjust, select hue/saturation/lightness and then choose colourise, i used a pink to match the walls.
Whewwww now we have the room done lol lets add the window, paste this as a new layer, make sure its the top layer of your canvas, resize to your liking and move towards the top of your tag a little but keep in centre, when happy with placement take your selection tool and draw out a rectangle just a little bigger than the window frames but not bigger than the curtain edges, activate the back wall layer now and then hit delete on your keyboard this will remove the wall from behind the windows, keep selected and go to layers, add new raster layer, choose a colour for the foreground in your colour palette then takeyour floodfill tool and fill new layer with choosen colour, you should now have something like mine.
Take one of the ceiling light elements and paste as a new layer, resize as needed and place in centre of tag, move to near the top so its coming from the ceiling lol.
Take one of the floor lamps and paste as a new layer, resize as needed and place in left corner of your tag, make sure this layer is behind the bed.
Take a drawer chest element and paste this as a new layer, resize as needed and place in opposite corner of your tag.
Take one of the table lamps and paste this as a new layer, resize quite small till its sitting nicely on top of the drawers.
Choose your tube and paste this as a new layer, resize as needed and place where she looks best, I used a sitting tube lol so put her sitting on the bed but the choice is yours.
Decorate the tag with any other elements you want, place each element on a new layer and resize as needed.
I added a dropshadow to most layers but this is up to you.
Still with me lol ...
Crop or resize your tag now if you want to but leave enough room for your name lol.
Add your name, artist info and copyright info.
Save as jpeg or .png.
and we're done i think lol.
Thanks for trying my tutorial and i hope you enjoyed it
would love to see your results,
hippiedaze@hotmail.com .
Thursday, 6 August 2009
New Anouncement Coming Very Soon
It's been a progressive night for me lol, and a busy one again, so am going to keep this announcement for tomorrow as its after 1am and the typo's start setting in haha lol - Anyways the announcement is regarding my CT so be sure to check back and find out the news lol, for now I'm keeping you all in suspense :P lol
gotta get me some beauty sleep so have a great night everyone and take care I will be back tomorrow
hugs Susan
Freebie Time
Well this weeks been a busy one for me and haven't had as much time as I wanted to psp but have posted a couple of wee freebies for you all over on my new blog, just a few bits that were lying around in my files and I was trying to tidy up lol so if you haven't already visited my scrappin stuff blog why not take a trip over and see whats on offer, you can get there by clicking HERE.
Make sure you say hi when you drop in, its always good to hear from yall.
Have a good day
Hugs Susan
Monday, 3 August 2009
$1.00 Tuesdays @ P4S
Yep its that time of the week again ladies, hundreds of items listed at just $1.00 each, many of my items will be listed there tomorrow so rock on over and shop yourself silly lol, this happens every Tuesday only at Paradise 4 Scrappers so mark these diaries and fill your baskets hehehe
Happy Shopping
In the process of moving things...
Hi everyone,
Well as you all know my kits and stuff are now on sale in 2 stores, thats P4S & Katelynn Designs, when i first started this blog i didnt even make kits or anything else but over the past couple of months I've got right into the designing side of things and lovin it...
Soooo I felt it was time to make a new blog and seperate the tutorials from the scrapping stuff, well thats what most ppl do right lol....
I created the new blog on Saturday and altho its nowhere near finished I've copied all the PTU things over to there.
If you see things starting to dissapear from this blog then they will all be on the new one...
You can have a peek in the blog
http://hippiedazescrappinstuff.blogspot.com/
I know its nowhere near finished yet and still no header lol but slowly and surely I will get there.
To celebrate the new blog I have EVERYTHING in my listings in both stores marked down 25% from 1st-31st August
Sorry for all the moving around for the time being
Hugs Susan
Saturday, 1 August 2009
Sweet Treat Shoppe
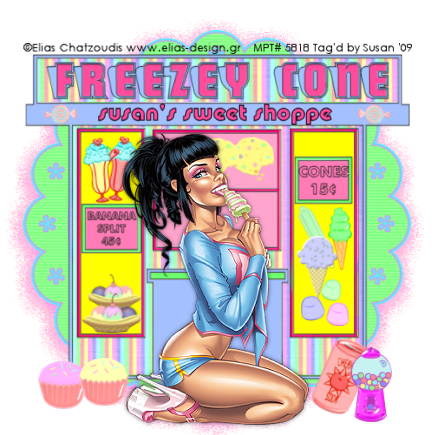
This tutorial was written on July 31st 2009 by Susan aka Hippiedaze.
The idea for this tag is off my own head and any resemblance is purely coincidence.
General Knowledge of psp is required, tutorial was written in psp 9 but will work in other versions.
Supplies Needed
Tubes of Choice I used the artwork of Elias Chatzoudis, you must have a proper license to use his work please visit MPT, mypsptubes - HERE .
PTU Scrap Kit 'Sweet Tooth' by Hippiedaze (me), you can purchase this kit at P4S - HERE. and Katelynn Designs - HERE.
Template used - Template #26 by Hippiedaze (me) and you can get this from 4shared - HERE.
No Masks Used.
Plugin Used - Toadies.
Font of Choice for your name.
Lets Get Started...
Open the template, hit shift & d on your keyboard,this pastes the template as new image, close the original template. Delete info layer, go to image, select resize, choose resize 80%, choose smartsize and make sure the box resize all layers is checked, click on the bottom white layer, go to image again and select canvas size and choose 500x500 to give a little extra room to work or if you prefer you can resize later.
Activate the layer named Freezy cone background, go to selection, select all, select float, select defloat then paste a paper from the kit as a new layer, go to selections again and select invert then hit delete on your keyboard, back to selections and select none.
Activate the layer Freezy Cone main heading and go to adjust, select brightnes /contrast and move the brightness slider a little to the right to lighten the layer just a little bit as you want this to still be quite bold lol, then choose a bright colour that matches your tube in your foreground colour tab, grab the colour to target brush tool and move the mouse over the layer to colourise.
Repeat that step with the layer named shop header using a lighter colour this time.
Activate the layer named main shop front dark, go to selections, select all, select float, select defloat then paste the stripe paper from the kit as a new layer, go to selections, select invert then hit delete on your keyboard the back to selections and select none.
Activate the light shop front layer, grab the colour to target brush tool and pick a colour in your foreground tab then move the mouse all over the light shop background to colour to choosen colour.
Activate the left & right window layer and colourise in the same way as above with a bright colour to match the kit.
Also do the same step with the middle window layer & small left and right window layers, i used a pale colour for these windows but the choice is yours.
Using the same colour as the main header sign (mines a bright pink) colourise the window frame layer 7 small window frame layer with the colour to target brush tool.
You can either leave the main outline layer as it is or colourise this to your choice to match the rest of the tag.
Now activate your bottom white layer and take one of the round frames from the kit, paste this as a new layer and resize a little if needed till its sized as you want it then duplicate this layer and on the original frame layer go to effects, select Toadies, Blast n Blur effect and use the following settings :-
X Effect - 15 .... Y Effect - 17 and click ok.
Activate the top layer of your tag now and take your tube and paste as a new layer, resize this to your liking and place where you like, add a dropshadow to the tube.
Time to decorate your tag now so choose any element you likefrom the kit and paste as new layers, resize each element as needed and place in the 'windows' and around your tag.
When done with adding elements resize you tag if you didnt at the start.
Add a name if you wish, i added mine just under the header sign.
Add artist info and copyright info.
Save as jpeg or .png.
Thanks for trying my tutorial and i hope you enjoyed it
would love to see your results,
hippiedaze@hotmail.com
Subscribe to:
Posts (Atom)


