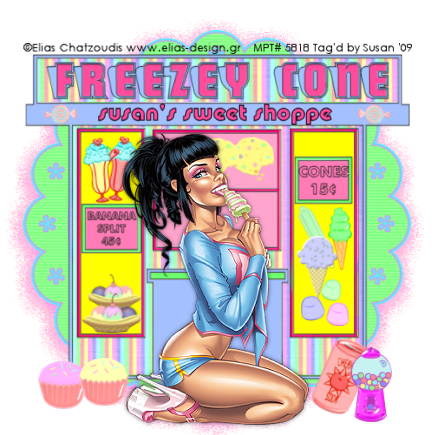
This tutorial was written on July 31st 2009 by Susan aka Hippiedaze.
The idea for this tag is off my own head and any resemblance is purely coincidence.
General Knowledge of psp is required, tutorial was written in psp 9 but will work in other versions.
Supplies Needed
Tubes of Choice I used the artwork of Elias Chatzoudis, you must have a proper license to use his work please visit MPT, mypsptubes - HERE .
PTU Scrap Kit 'Sweet Tooth' by Hippiedaze (me), you can purchase this kit at P4S - HERE. and Katelynn Designs - HERE.
Template used - Template #26 by Hippiedaze (me) and you can get this from 4shared - HERE.
No Masks Used.
Plugin Used - Toadies.
Font of Choice for your name.
Lets Get Started...
Open the template, hit shift & d on your keyboard,this pastes the template as new image, close the original template. Delete info layer, go to image, select resize, choose resize 80%, choose smartsize and make sure the box resize all layers is checked, click on the bottom white layer, go to image again and select canvas size and choose 500x500 to give a little extra room to work or if you prefer you can resize later.
Activate the layer named Freezy cone background, go to selection, select all, select float, select defloat then paste a paper from the kit as a new layer, go to selections again and select invert then hit delete on your keyboard, back to selections and select none.
Activate the layer Freezy Cone main heading and go to adjust, select brightnes /contrast and move the brightness slider a little to the right to lighten the layer just a little bit as you want this to still be quite bold lol, then choose a bright colour that matches your tube in your foreground colour tab, grab the colour to target brush tool and move the mouse over the layer to colourise.
Repeat that step with the layer named shop header using a lighter colour this time.
Activate the layer named main shop front dark, go to selections, select all, select float, select defloat then paste the stripe paper from the kit as a new layer, go to selections, select invert then hit delete on your keyboard the back to selections and select none.
Activate the light shop front layer, grab the colour to target brush tool and pick a colour in your foreground tab then move the mouse all over the light shop background to colour to choosen colour.
Activate the left & right window layer and colourise in the same way as above with a bright colour to match the kit.
Also do the same step with the middle window layer & small left and right window layers, i used a pale colour for these windows but the choice is yours.
Using the same colour as the main header sign (mines a bright pink) colourise the window frame layer 7 small window frame layer with the colour to target brush tool.
You can either leave the main outline layer as it is or colourise this to your choice to match the rest of the tag.
Now activate your bottom white layer and take one of the round frames from the kit, paste this as a new layer and resize a little if needed till its sized as you want it then duplicate this layer and on the original frame layer go to effects, select Toadies, Blast n Blur effect and use the following settings :-
X Effect - 15 .... Y Effect - 17 and click ok.
Activate the top layer of your tag now and take your tube and paste as a new layer, resize this to your liking and place where you like, add a dropshadow to the tube.
Time to decorate your tag now so choose any element you likefrom the kit and paste as new layers, resize each element as needed and place in the 'windows' and around your tag.
When done with adding elements resize you tag if you didnt at the start.
Add a name if you wish, i added mine just under the header sign.
Add artist info and copyright info.
Save as jpeg or .png.
Thanks for trying my tutorial and i hope you enjoyed it
would love to see your results,
hippiedaze@hotmail.com
Saturday, 1 August 2009
Sweet Treat Shoppe
Posted by hippiedaze at 03:27
Labels: Tutorials - PTU
Subscribe to:
Post Comments (Atom)


0 comments:
Post a Comment