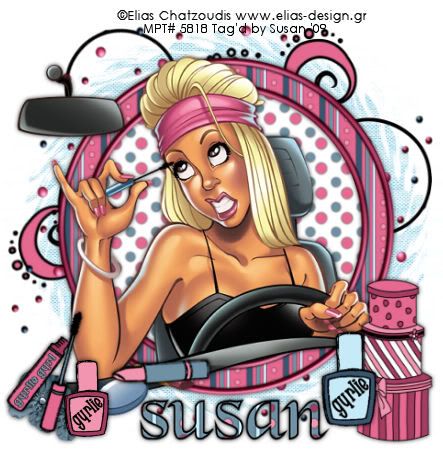
This tutorial was written on May 17th 2009 by Susan aka Hippiedaze.
The idea for this tag is off my own head lol and any resemblance is purely coincidence.
General Knowledge of psp is required, tutorial was written in psp 9 but will work in other versions.
Supplies Needed
Tubes of Choice I used the artwork of Elias Chatzoudis, you must have a proper license to use his work please visit MPT - mypsptubes - HERE .
FTU Scrap Kit 'Oh So Gyrlie' by Aiya @ My Juicy Bits - HERE .
Mask Used - Simply Devilish Scrapz Mask #10 by Lou @ Simply Devilish Scrapz - HERE .
Font of Choice.
Dropshadow layers throught.
Lets Get Started
Open a new image in your psp workspace by going to file, select new, choose 500x500, white image, click ok. Take Frame 11 from the kit and paste as a new layer on your canvas, position in centre.
Grab your magic wand from the tool palette and click inside the white area on the frame so you have the marching ants flashing round the inner frame part, paste paper 11 from the kit as a new layer, resize a litttle if you wish, when happy with it go to selections, select invert then hit delete on your keyboard, move this layer beneath the frame layer. Add a dropshadow to the frame now.
Paste your tube as a new layer, resize your tube if needed and position where you like, if your using the same tube as me then just place it on top of your frame layer, if your using a different tube you can set it inside the frame and use the eraser tool to tidy up the bottom bits. Dropshadow tube layer.
Click on the very bottom white layer, paste paper 6 from the kit as a new layer, go to layers, load mask from disc, then find the mask you saved at the start (Simply Devilish Scrapz Mask #10), Make sure the following settings are set...
Fit to canvas - checked .... Source luminace - checked .... Invert transparency - unchecked .... Hide Mask - checked.
Take the Doodle 3 element from the kit and paste as a new layer just above the mask layer you added, resize by around 60% and position where you like it and so its showing from behind the frame, duplicate this layer and mirror, i also used the deform tool to rotate it a bit and moved it down a little. Add a dropshadow to both doodle layers.
Now click back to your top layer and choose a few elements from the kit, paste each as a new layer and resize as needed, remember to resize the elements smartsize, and sharpen if resizing by a lot. Dropshadow each element layer.
Crop and resize your tag now if you wish to.
Add your name, I choose a paper as the background fill, open a paper of your choice in your psp workspace then minimise it, click on foreground tab in your colour palette and then choose pattern from the box that pops up, look for the paper that you choose and click on it to select, click ok, i used black for the foreground fill.
Add artist info and copyright info.
Save as jpeg or .png. and we're done lol.
Thanks for trying my tutorial and i hope you enjoyed it would love to see your results,
hippiedaze@hotmail.com
Saturday, 6 June 2009
Gyrlie
Posted by hippiedaze at 05:58
Labels: Tutorials - FTU
Subscribe to:
Post Comments (Atom)


0 comments:
Post a Comment