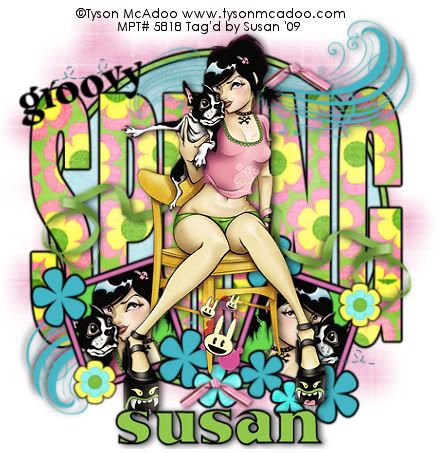
This tutorial was written on May 3rd 2009 by Susan aka Hippiedaze.
The idea for this tag is off my own head lol and any resemblance is purely coincidence.
General Knowledge of psp is required, tutorial was written in psp 9 but will work in other versions.
Supplies Needed
Tubes of Choice, I used the artwork of Tyson McAdoo, you must have a proper license to use his work please visit MPT - mypsptubes - HERE .
FTU Scrap Kit 'Bloomin Beautiful' by Mel @ Mels Lightbulb Moments - HERE .
Template Used - Template #22 by Melissa @ Melissas Creations - HERE .
Mask Used - WSL Mask #84 by Chelle @ Wee Scots Lass - HERE .
Plugin - Eye Candy 4000 - Gradient Glow.
Font of Choice.
(save mask in psp folder before beginning)
Lets Get Started Open the template, hit shift & d on your keyboard,this pastes the template as new image, close the original template. Delete info layer, go to layers, add new raster layer, move this layer to the very bottom then grab your floodfill tool and fill white. I resized mine a little at this point, go to image, resize, change width & height to 80%, choose smartsize and make sure resize all layers is checked, click ok, now click on image, select canvas size, choose 500x500, click ok, this gives you more room to work if theres any transparent canvas showing floodfill white, if you prefer you can skip the resizing and can resize later, i just find it easier working with it at this size .
Activate the Circle layer, select all, select float, select defloat and paste a paper of choice as a new layer, resize a little if needed then go to selections, select invert then hit delete on the keyboard, select none. You can delete the original layer now.
Repeat the above step on the Circle Frame layer & Spring Word layer. Go to effects, select eye candy 4000, gradient glow and add the following glow to all 3 layers you just created...
Glow Width - 3.00 .... Soft Corners - 25 .... Overall Opacitiy - 100 .... Colour - Black .
Activate the Squares layer, grab your magic wand from the tool palette, click inside one of the squares, paste a tube as a new layer, resize if needed and place how you like it within the marching ants, go to selections, select invert then hit delete on your keyboard. select none.
Activate the Squares layer again and repeat with a different tube or mirror of the first tube. Activate the Squares layer once more and go to adjust, select hue/saturation/lightness, select colourise and change to colour that matches your tubes.
Activate the Squares Frames layer, they are pink and went well with the tube i used so i left mine the way they were, you can colourise or paste a paper of choice, either way, use the steps above.
Add the same gradient glow you used before on this layer.
Activate the Grey Flowers layer, selections, select all, select float, select defloat then go to layers and add a new raster layer, grab your floodfill tool and choose a colour that matches your tube/s and floodfill each flower.
Do this step with the Dark Flowers layer too.
Add the same gradient glow as before to both these layers.
Colourise the Swirl layer & Bug Trails layer in the same way as before. Do not add gradient glow on these layer but a small dropshadow.
Activate the bottom white layer, paste a paper from the kit, resize a bit, go to layers, load mask from disc, then find the first mask we loaded at the start (WSL Mask #84) Make sure the following settings are set...
Fit to canvas - checked .... Source luminace - checked .... Invert transparency - unchecked Hide Mask - checked. Go to layers, merge group & resize to suit your tag using the deform tool if needed till you get it how you want it.
Click back to the top layer, paste your main tube as a new layer, resize and place where you want it. Add dropshadow.
Grab your text tool and choose a font, type the word groovy as a new vector layer, go to layers, convert to raster layer, grab your deform tool and rotate text slightly to the left so it sits on top of the spring word layer, ( see mine for example).
Add any other elements from the kit that you like, resize as needed and give a dropshadow or the gradient glow we used before, whichever you like.
Crop or resize your tag if you want to to your preffered size in the usual way. I resized at start but cropped a little at this point.
Add you name, artist info & copyright info.
Save as jpeg or .png. and we're done lol.
Thanks for trying my tutorial and i hope you enjoyed it would love to see your results,
Sunday, 17 May 2009
Groovy Spring
Posted by hippiedaze at 01:55
Labels: Tutorials - FTU
Subscribe to:
Post Comments (Atom)


0 comments:
Post a Comment