This tutorial was written on May 10th 2009 by Susan aka Hippiedaze.
The idea for this tag is off my own head lol and any resemblance is purely coincidence.
General Knowledge of psp is required, tutorial was written in psp 9 but will work in other versions.
Supplies Needed
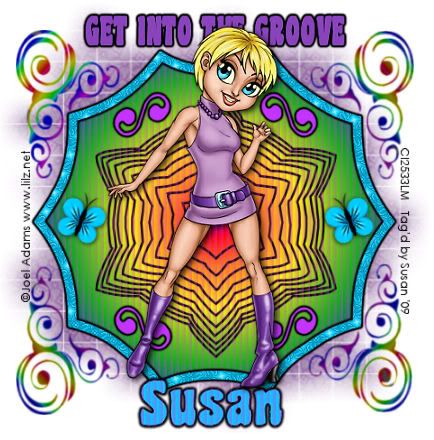
Tube of Choice I used the artwork of Joel Adams, you must have a proper license to use his work please visit CILM - HERE
FTU Scrap Kit 'Party Time' by Fantasy Moments - HERE .
Template Used - My Template #007 Groove - HERE.
Mask Used - WSL Mask #84 by Chelle @ Wee Scots Lass Creations - HERE .
Plugin Used - Eye Candy, Gradient Glow.
Effects Used - Textured Effects, Blinds.
Font of Choice.
(Open supplies in psp before starting and save mask to your psp folder if you dont have it already).
Lets Begin
Open the template, hit shift & d on your keyboard,this pastes the template as new image, close the original template. Delete info layer, we can resize later . My template has a white background layer so no need to add one on this tut.
Activate the Large Shape layer, go to selections, select all, select float, select defloat then go to layers and choose add new raster layer, make sure its transparent, click ok, go to your colour palette now and choose a colour for your shape, set this colour to foreground ( I choose a bright gradient but you can use what you like, even a paper from the kit lol) then grab your floodfill tool, click the shape and fill with colour/gradient or paper, go to selections, select none. You can delete the original shape layer now.
Go to effects, select textured effects, blinds and use the following settings :-
Width - 4 .... Opacity - 43 .... Colour - choose one to match your tube ....Horizontal - Unchecked .... Light from Top - Checked.
Activate the Large Shape Frame layer, go to selections, select all, select float, select defloat and paste a paper from the kit as a new layer, resize a little if you need to but not smaller than the marching ants lol, when happy go to selections, select invert then hit delete on your keyboard, selections, select none. Delete the original frame layer. Go to effects, select eye candy 4000, gradient glow and use the folowing settings :-
Glow Width - 3.00 .... Soft Corners - 25 .... Overall Opacitiy - 100 .... Colour - Black. (this will be the gradient glow setting throught the tag )
Activate the Centre Shape layer, go to your tool palette and select colour to target brush, go to your colour palette and choose a colour from your tube, now drag the mouse over the whole of the shape so its coloured to your choice. Go to effects, select textured effects, blinds and use the following settings :-
Width - 4 .... Opacity - 43 .... Colour - choose one to match your tube ....Horizontal - Unchecked .... Light from Top - Checked.
Activate the Small Swirls layer, select all, select float, select defloat, go to layers and add new raster layer, check its transparent, click ok, go to colour palette and select another colour you like, grab your floodfill tool and click the inside the 4 swirl shapes to fill with colour, go to selections, select none. Delete the original layer. Add the same gradient glow you used before on this layer.
Activate the Swirls layer, I used the colour to target brush on this layer again and choose the gradient but you can colourise solid or whatever you like. No glow added here though. Activate the Wordart layer, select all, select float, select defloat, go to layers and add new raster layer, check its transparent, click ok, go to colour palette and select colour you like, grab your floodfill tool and click the inside the words to colour, go to selections, select none. Add the gradient glow to this layer. (see settings we used before).
Activate the bottom white layer, paste a paper of choice from the kit as a new layer, layers, load mask from disk and find the mask we loaded at the start (WSL #84), settings should be as follows ...
Fit to canvas - checked .... Source luminace - checked .... Invert transparency - unchecked .... Hide Mask - checked go to layers, merge group & you can use the deform tool to resize to suit your tag. I simple stretched it out a bit.
Activate the top layer now and paste your tube as a new layer, resize to suit and place where you like it, add a dropshadow to this layer.
Time to add any other elements from the kit, I didnt use many but you can decorate how you wish. Remeber to resize each element and sharpen if needed, add dropshadow to your element layers.
Now crop & resize your tag if you wish to
Add your name, artist info & copyright.
Save as jpeg or .png.
And I think thats us about done, lol.
Hope this was nice n easy for you .
Thanks for trying my tutorial and i hope you enjoyed it would love to see your results, hippiedaze@hotmail.com
Saturday, 30 May 2009
Into The Groove
Posted by hippiedaze at 03:37
Labels: Tutorials - FTU
Subscribe to:
Post Comments (Atom)


0 comments:
Post a Comment