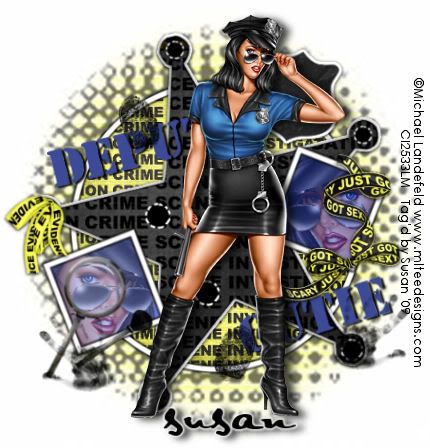
This tutorial was written on May 3rd 2009 by Susan aka Hippiedaze.
The idea for this tag is off my own head lol and any resemblance is purely coincidence.
General Knowledge of psp is required, tutorial was written in psp 9 but will work in other versions.
Supplies Needed
Tubes of Choice I used the artwork of Michael Landefeld, you must have a proper license to use his work please visit CILM - HERE .
PTU Scrap Kit - 'CSI' by Diane @ Candys Treats, you can purchase for just $1.00 at Stargazers Scrap Shop (its the last kit in the list) - HERE .
Template #13 by Melissa @ Melissas Creations - HERE .
Mask of Choice - I cant remeber where I got this one so can't supply a link, sorry.
2nd Mask Used - WSL Mask #12 by Chelle @ Wee Sctos Lass - HERE .
Font of Choice.
Plugin Used Eye Candy 4000 Gradient Glow.
(Save masks to your psp folder before you begin and open all other supplies you need)
Lets Get Started
Open the template, hit shift & d on your keyboard,this pastes the template as new image, close the original template. Delete info layer, I resized mine a little at this point, go to image, resize, change width & height to 85%, choose smartsize and make sure resize all layers is checked, click ok. Or if you prefer you can skip the resizing and can resize later, i just find it easier working with it at this size.
Add new raster layer, floodfill white & move to very bottom of your canvas. Go to image, select canvas size, choose 500x500, select ok. If theres any transparent showing then grab your floodfill tool and fill white.
Activate Raster 3 layer, go to selections, select all, select float, select defloat and paste paper from the kit as a new layer, go to selections and select invert, hit delete on your keyboard, selections, select none. Delete the original layer.
Repeat the same step for the Merged Star layer & Raster 7 layer, using different papers. Delete the original layers, then on both layers, add a gradient glow, go to effects, select eye candy 4000, gradient glow with the following settings :-
Glow Width - 3.00 Soft Corners - 25 Overall Opacitiy - 100 Colour - White or colour of your choice. Setting - Fat.
Add a dropshadow of choice to both layers.
Activate Raster 1 layer, go to adjust, select brightness/contrast and move brightness slider all the way to the right (255) it should now be white, go to effects, select gradient glow again but this time change the colour to black and do not choose fat setting this time.
Activate Raster 4 layer, I decided to colourise this, go to adjust, select hue/saturation/lightness, select colourise and play with sliders until you have the colour you like, click ok. Add a dropshadow to this layer.
Activate Raster 5 layer and repeat the last step.
Activate Raster 8 layer, grab your magic wand from the tools palette, click inside the frame area, see the marching ants ? i hope so lol, go to selections, select modify, expand by 2, paste one of the tubes, resize if needed, position where liked inside the marching ants then selections, invert and hit delete on the keyboard then select none.
Activate Copy of Raster 8 layer and repeat the same step again.
Click back on Raster 8 layer and colorise the same way as you did before, do this on Copy of Raster 8 layer also. I used close up tubes thats why they look misted out .
Raster 6 and Copy of Raster 6 layers are the same steps ok so click on raster 6 first, change this to white in the same way you did before, go to adjust, select brightness etc. Slider should even still be set at white, now activate copy of raster 6 and do the same. Give both these layers the smaller black gradient glow (settings above).
Click on the very bottom white layer, paste paper of choice, go to layers, load mask from disc, then find the mask you choose at the start, Make sure the following settings are set...
Fit to canvas - checked .... Source luminace - checked .... Invert transparency -unchecked ....Hide Mask - checked.
Go to layers palette and select merge group.
Activate bottom layer again go to layers, add new raster layer, floodfill with colour of choice, mow repeat the mask step using (WSL #12) use same settings.
Time to add your main tube, click on your top layer paste and resize if needed, place where liked on your tag. Dropshadow.
Choose some elements from the kit and place around the tag where you want them. Dropshadow elements.
Crop and resize now if you wish to.
Add your name, Add artist info and copyright info.
Save as jpeg or .png. and we're done lol.
Thanks for trying my tutorial and i hope you enjoyed it would love to see your results,
Friday, 15 May 2009
Deputy Cutie
Posted by hippiedaze at 03:29
Labels: Tutorials - PTU
Subscribe to:
Post Comments (Atom)


0 comments:
Post a Comment