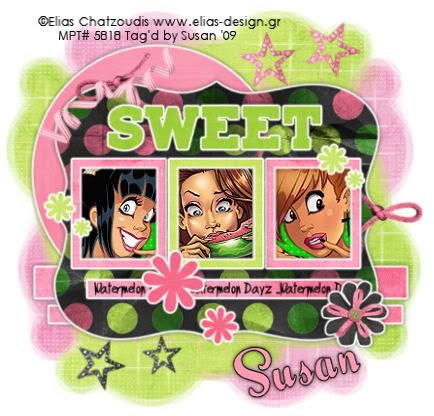
This tutorial was written on May 7th 2009 by Susan aka Hippiedaze.
The idea for this tag is off my own head and any resemblance is purely coincidence.
General Knowledge of psp is required, tutorial was written in psp 9 but will work in other versions.
Supplies Needed
Tubes of Choice I used the artwork of Elias Chatzoudis, you must have a proper license to use his work please visit MPT - mypsptubes - HERE .
FTU Scrap Kit 'May Goodie Train' collab part by Pimp'd Designz - HERE .
Template Used - Teresa's Template #10 by Teresa - I'm sorry the blog has been removed so until i hear back from Teressa I cant supply a link, sorry.
Mask Used - WSL Mask #99 by Chelle @ Wee Scots Lass Creations - HERE .
Font of Choice.
Effects Used - Textured Effects, Weave.
Plugin - Eye Candy 4000, Gradient Glow.
(save mask to psp folder before you start)
Lets Begin...
Open your template, hit shift & d on the keyboard to duplicate, now you can close the original template. Delete info layer. I resized here, go to image, resize and make sure resize all layers is checked, resize by around 65%. (This depends on the size you like your tags).
Click on the white background layer, go to image, canvas size and resize to 500x500, floodfill white, this gives us more room to work and you can crop & resize finished tag later on (my sizes are just a guide and you can resize to your liking) .
Click on the circle layer, go to selections, select all, select float, select defloat and paste paper of choice as a new layer, resize it till your happy with it then selections, invert & hit delete on the keyboard, selections, select none.
Repeat the step on the Strip1, Strip 2 & Strip 3 layers, I used the same papers for these. Repeat again on the Bracket layer, Sweet Wordart layer, Flower layers & finally the Frame 1,2 & 3 layers using different papers of your choice.
On all the above layers add eye candy, gradient glow with the following settings :-
Glow Width - 3.00 .... Soft Corners - 25 .... Overall Opacity - 100 ... Settings - Fat .... Colour - White.
Now add a small dropshadow to all these layers.
Activate the Photo Mat layer, grab your magic wand from the tool palette and click one of the grey squares, paste your tube part as a new layer and resize as needed, place where you like it inside the marching ants then go to selections, select invert then hit delete on your keyboard, select none.
Do this with each square remembering to click back on the photo mat layer before selecting with magic wand. Now activate the photo mat layer one more time, go to adjust, select hue/saturation/lightness, select colourise and colour to match your tubes.
Now go to effects, select textured effects, select weave and use the following settings :-
Gap Size - 2 .... Width - 5 .... Opacity - 9 .... Weave Colour - to match your tube .... Gap Colour - same as weave colour .... Fill Gaps - Checked.
Now click on the bottom white layer, paste a paper from the kit, go to layers, load mask from disk and find the mask we loaded at the start (WSL #99). Make sure the following settings are set...
Fit to canvas - checked .... Source luminace - checked Invert transparency - unchecked .... Hide Mask - checked go to layers, merge group.
Repeat the mask step with a different paper, then go to image, select mirror.
Now click back to your top layer and add any elements you wish from the kit, resize if needed and dropshadow, i also added the gradient glow to my flower element.
Words I added in the rectangle bar is optional.
Now crop or resize if you want to in the usual way.
Add your name, artist info and copyright info.
Save as jpeg or .png. and we're done i think lol.
Thanks for trying my tutorial and i hope you enjoyed it would love to see your results, hippiedaze@hotmail.com
Friday, 22 May 2009
Sweet Watermelon
Posted by hippiedaze at 08:21
Labels: Tutorials - FTU
Subscribe to:
Post Comments (Atom)


0 comments:
Post a Comment