This tutorial was written on April 29th 2009 by Susan aka Hippiedaze.
The idea for this tag is off my own head lol and any resemblance is purely coincidence.
This is a simple tutorial but hope it gives the beginners an idea of playing with plugins and creating basic shapes.
General Knowledge of psp is required, tutorial was written in psp 9 but will work in other versions.
Supplies Needed
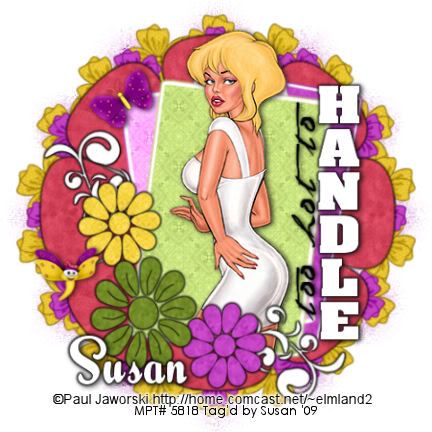
Tube of Choice, I used the artwork of Paul Jaworski, you need a proper license to use his work and you can purchase by visiting mypsptubes - HERE .
FTU Scrap Kit ' Spring Morning' by Fantasy Moments - HERE .
Template #11 by Dana @ Berry Delightz - HERE .
Wordart by me - HERE (hope this works lol) .
Preset Shape - Flower 5 (should already be included with your psp) .
Plugin used - Muras Meister - Copies.
2nd Plugin used - Toadies - Blast'n'Blur.
3rd Plugin used - Eye Candy - Gradient Glow.
Font of choice.
(before we start, make sure you have the flower preset shape saved in your psp folder).
Lets Get Started
Open the template, hit shift & d on your keyboard,this pastes the template as new image, close the original template. I find it easier to resize a little at the start so this is optional. (go to layers, resize, resize by 75%, make sure resize all layers is checked). Now delete info layer, click on bottom Raster 1 layer, floodfill white then select image, canvas size, i choose 500x500. This gives you room to work.
Click on Raster 6 layer, go to selections, select all, select float, select defloat then paste paper 2, resize, selections, select invert & hit delete on the keyboard, selections select none. Delete the original layer.
Repeat this step for Raster 4 layer, using paper 4.
Repeat again on Raster 2 layer using paper 8.
On Raster layers 3, 5 & 7, add gradient glow by going to effects, eye candy 4000 - gradient glow, settings :-
Glow Width - 3.00 .... Soft Corners - 25 .... Overall Opacitiy - 100 .... Colour - of your choice or choose a different colour for each raster layer if you prefer.
Click on Raster 8 layer, go to adjust, brightness/contrast, move brightness slider all the way to the right (255) to change to white. Add the same gradient glow as above but use black colour glow for this layer.
Repeat the same step on Copy of Raster 8 layer.
On all 3 flower layers, repeat the selections, select all, select float, select defloat step using different papers on each flower layer. Add the same black gradient glow to these layers. Delete the original layers.
Add your tube now, paste as new layer, resize as you like, move tube layer down below the flower layers, if theres any tube sticking out use eraser tool to tidy it Dropshadow your tube.
Now paste my wordart as new layers, you can colourise, lighten/darken or whatever lol. I made the 'handle' white, adjust, brightness/contrast, slide brightness all the way right (255). Add the black gradient glow to the this layer & small dropshadow if you wish.
On the 'too hot to' layer i darkened to black in the same way as before, brightness slider all the way left (-255). Add small dropshadow.
Paste paper 7 as a new image on your workspace, minimise it. go to your colour palette and choose background, now choose pattern instead of solid colour, you should be able to see paper 7 in the tiles there, select it as your background tile, leave foreground set to null. Back on your tag click on bottom white layer, grab your preset shape tool, find flower 5 shape and draw it big in the centre, it should now have paper 7 as a fill. Add black gradient glow to the shape layer.
OK now time to play with plugins lol.... On your top layer, paste element 13 from the kit, go to image, resize, resize to 20% smart size, go to effects and choose Muras Meister - Copies, choose the setting Encircle from the droplist, change the shift x & shift Y tabs to 75 click ok, move layer down to just above your bottom white layer, if this looks good then hooray lol, if not go back to muras meister and just play with the shift tabs till it looks how you want it.
Back on the top layer, paste element 10, resize to 25% smart size then repeat muras meister settings but this time change the number tab to 18. Look ok ? lol. when happy move this layer to the very bottom of your tag.
Duplicate this layer now and on the orginal layer go to effects, toadies, select blast n blur, move both X & Y tabs to 25.
Now back to top layer and add any elements you want from the kit, resize them and dropshadow.
Crop or resize your tag if you want to to your preffered size in the usual way. I resized at start but cropped a little at this point.
Add your name, artist info & copyright info.
Save as jpeg or .png. and we're done lol.
Thanks for trying my tutorial and i hope you enjoyed it would love to see your results,
hippiedaze@hotmail.com
Sunday, 10 May 2009
Too Hot
Posted by hippiedaze at 01:17
Labels: Tutorials - FTU
Subscribe to:
Post Comments (Atom)


0 comments:
Post a Comment