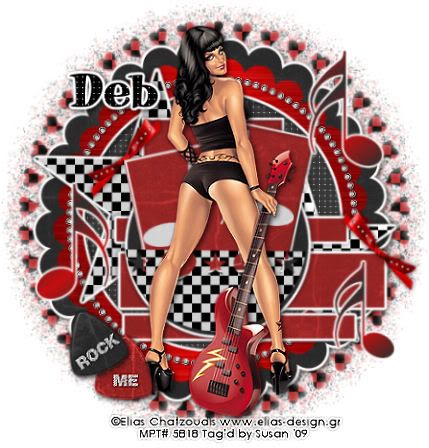
This tutorial was written on May 5th 2009 by Susan aka Hippiedaze.
The idea for this tag is off my own head lol and any resemblance is purely coincidence.
General Knowledge of psp is required, tutorial was written in psp 9 but will work in other versions.
Supplies Needed
Tubes of Choice
I used the artwork of Elias Chatzoudis, you must have a proper license to use his work please visit MPT - mypsptubes HERE .
FTU SCrapkit 'Rock Me' by Lori @ Wacky Scraps - HERE .
Template Used - GG Template #25 by Gina @ Ginas Gems - HERE .
Mask Used - WSL Mask #312 by Chelle @ Wee Scots Lass - HERE .
(open all supplies and place mask into your psp folder before we start)
Lets Get Started
Open the template, hit shift & d on your keyboard,this pastes the template as new image, close the original template. Delete info layer. This template already has the white background layer so no need to add new one .
Activate the Left Star layer, go to selections, select all, select float, select defloat then paste a paper of choice, then go to selections, invert, hit delete on your keyboard then delete the original layer.
Repeat this with the same paper on the Right Star layer.
Now do the same with the Rectangle layers (all 3 lol) and use a different paper for these layers.
Activate the Circle layer and again do the same steps, I used the black paper on this layer.
On the Half Circle layer do the same but choose a different paper, I choose the same as the stars layers.
Still repeating these steps for the Fill 1,2 & 3 layers, I used the same paper as the rectangles here.
And finally the Music Notes layers, make a gradient with 3 colours from your tube in your colour palette, click the foreground tab then choose gradient and look for the tile that says foreground/background, it shoud be the colours you picked. On the Music Note layer, grab your magic wand and click the music note, go to layers, add new raster layer and click ok, now floodfill the notes then select none. Do this on each music note layer then delete the original layers.
Paste the Frame 2 element from the kit as a new layer and move all the way to the bottom, just above your white background layer, if resizing needed, go to image, select resize, change size to 105% smartsize and make sure all layers is Unchecked, you can always undo the step then try again with different size,resize this to how you think it looks best.
Now I added a gradient glow to all the above layers now, activate first layer,go to effects, select eye candy 4000, gradient glow and use the following settings :-
Glow Width - 3.00 Soft Corners - 25 Overall Opacitiy - 100 Settings Tab - Fat Colour - White or colour of your choice.
go through each layer adding the same glow to all, you can also add a dropshadow if you like.
Activate the Frame layers and on each layer add a dropshadow of your choice. No gradient glow here though.
Ok now activate the very bottom layer and paste a paper of choice, go to layers, load mask from disc, then find the mask you choose at the start (WSL Mask #312), Make sure the following settings are set...
Fit to canvas - checked Source luminace - checked Invert transparency - unchecked Hide Mask - checked. Click ok.
You can grab the deform tool to stretch it out a bit if its not showing, depending on the size your tag is.
Go to your tool palette, choose Eclipse tool, on your colour palette choose a dark colour that matches your tube for the background fill, foreground set to null, now draw out a circle just big enough to sit behind your frame layer (see mine) , when your happy with the circle go to layers, select covert to raster layer then move this all the way down to the layer below your Frame.
Go to effects, choose textured effects, weave and use the following settings :-
Gap Size - 1 .... Width - 5 .... Opacity - 9 .... Weave & Gap Colours - White, Fill Gaps - Checked.
Add your main tube now, click on your top layer, paste tube as a new layer and resize if needed, place where liked on your tag. Dropshadow.
Choose some elements from the kit and place around the tag where you want them. Dropshadow elements.
Crop and resize now if you wish to.
Add your name, I also added the same weave effect to my name.
Add artist info and copyright info.
Save as jpeg or .png. and we're done lol.
Thanks for trying my tutorial and i hope you enjoyed it would love to see your results, please send to my addy on the right >>>
Tuesday, 19 May 2009
Rock Checks
Posted by hippiedaze at 03:07
Labels: Tutorials - FTU
Subscribe to:
Post Comments (Atom)


0 comments:
Post a Comment