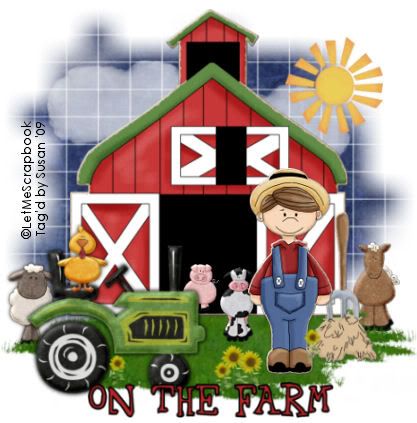
This tutorial was written on May 18th 2009 by Susan aka Hippiedaze.
The idea for this tag is off my own head lol and any resemblance is purely coincidence.
General Knowledge of psp is required, tutorial was written in psp 9 but will work in other versions.
Supplies Needed
No Tubes.
FTU Scrap Kit 'Grandma's Farm' by Maurine @ Let Me Scrapbook - HERE . (Thank You so much for the permission Maurine, pls make sure you read the terms of use).
Mask Used - WSL Mask #84 by Chelle @ Wee Scots Lass Creations - HERE .
Lawn Tubes - standard with your psp programme.
Cloud Tubes of choice (optional).
Font of Choice.
(Open all supplies and save your chosen mask to psp folder before you begin)
Lets Get Started Open psp and go to file, create new image, 500x500, choose white for your background, click ok.
Take the Barn element from the kit and paste as a new layer on your canvas, the kit is huge so you will need to resize by quite a bit, remember to sharpen elements if resizing by a lot, I resized the barn element by 15% smartsize, uncheck resize all layers and click ok, place this in the centre of your canvas and move up a little.
Go to your psp browser and select picture tubes, look for the lawn tubes and choose one, paste this as a new layer on your canvas and move layer underneath the barn layer, move to the left side of your canvas and then go to layers, select duplicate, go to image and select mirror, position the grass layers as you like. (see mine for example).
Take the Yellow Sun element from the kit and paste as a new layer on your canvas, resize by 10% smartsize and uncheck resize all layers, click ok, move the sun to the top of your canvas any side you wish.
Take the tractor element from the kit and paste this as a new layer, resize by 10% smartsize, make sure resize all layers is unchecked, click ok, place tractor where you like on your canvas and add a dropshadow.
Do the same step again for the pitchfork element, add a dropshadow to this layer too.
Choose one of the little tubes in the kit, I choose grandpa lol, paste as a new layer, resize by 10% smartsize again make sure resize all layers is unchecked, place him where you like on the canvas.
Pick out some animals from the kit and paste them as new layers, resizing as needed and add a dropshadow to all layers.
Now Activate the bottom white layer, paste a paper from the kit, resize a bit, go to layers, load mask from disc, then find the mask you saved at the start (WSL Mask #84). Make sure the following settings are set...
Fit to canvas - checked .... Source luminace - checked .... Invert transparency - unchecked Hide Mask - checked.
Go to layers, merge group & resize to suit your tag using the deform tool if needed till you get it how you want it.
Crop or resize your tag if you want to to your preffered size in the usual way. I resized at start but cropped a little at this point.
Add you name, artist info & copyright info.
Save as jpeg or .png.
Nice 'n' Easy eh lol.
and we're done.
Thanks for trying my tutorial and i hope you enjoyed it would love to see your results,
Tuesday, 19 May 2009
On The Farm
Posted by hippiedaze at 10:21
Labels: Tutorials - FTU
Subscribe to:
Post Comments (Atom)


0 comments:
Post a Comment