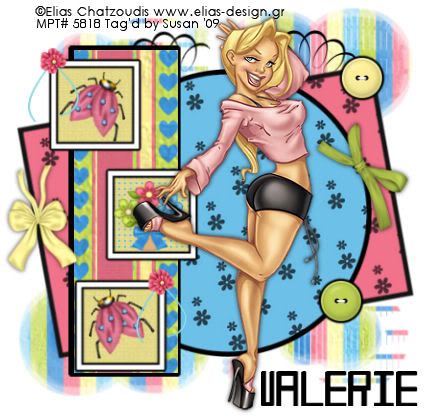
This tutorial was written on May 12th 2009 by Susan aka Hippiedaze.
The idea for this tag is off my own head lol and any resemblance is purely coincidence.
General Knowledge of psp is required, tutorial was written in psp 9 but will work in other versions.
Supplies Needed
Tubes of Choice, I used the artwork of Dean Yeagle, you need a proper license to use his work, you can get this by visiting CILM - HERE .
FTU Scrap Kit 'Butterfly Wishes' by Melissa @ Melissa's Creations - HERE .
Mask Used - Bfly Flby Mask #32 by Butterfly Flutterby - HERE .
Font of Choice.
(save mask to your psp folder if you dont already have it before starting)
Lets Begin...
Open a new image by going to file, select new, choose 500x500, choose white , click ok, this will be your background layer.
Grab one of the frames from Melissa's kit, paste as a new layer on your new image, go to image, select resize and set size to 130%, select smartsize, resize all layers unchecked, click ok. Go to effects, select 3d effects, select dropshadow and use settings to suit you, use these settings throughout the layers.
Grab your magic wand and click inside the frame, go to selections, select modify, select expand and set to 2, now paste a paper of your choice as a new layer, i resized mine by 80%, smartsize and all layers unchecked again, click ok, now go to selections, select invert then hit delete on your keyboard, select none and move this paper layer under the frame layer.
Choose a doodle from the kit, i choose raster layer 45, paste this as a new layer, resize by 60% smartsize and move to top left of your tag, move to just above the background layer, now go to layers, select duplicate, go to image, select mirror, back to layers, select duplicate again then image, select flip and once more to layers, duplicate, image, flip so you have 4 doodles around the frame, you may have to reposition these a little to your liking.
Paste the Butterfly Wishes wordart as a new layer, resize by 60% smartsize and then grab your deform tool to slant to the left a little, place this where you wish.
Paste your tube as a new layer, resize by 85% bicubic and place where you want it. Add a few butterflys around your frame, i resized different sizes, decorate how you wish, remember when resizing the elements to change back to smartsize.
Click on the very bottom white layer, paste a paper of your choice as a new layer, go to layers, load mask from disc, then find the mask you saved at the start (Bfly Flby Mask #32), Make sure the following settings are set...
Fit to canvas - checked .... Source luminace - checked .... Invert transparency - unchecked .... Hide Mask - checked, click ok. Use your deform tool to stretch the mask layer out a little if needed so its showing from behind the shape.
Activate the top layer now and add your name, i used one of the papers as my fill, you can do this by opening a paper in your psp workspace then minimise it, go to colour palete and click the background colour tab, on the box that opens, select pattern and look for the paper you choose, select this as the background fill, black for the foreground and i set the stroke width on my font to (2) so it was a bit bolder to blend with the rest of the tag lol.
Crop and resize now if you wish to.
Add artist info and copyright info.
Save as jpeg or .png. and we're done lol.
Thanks for trying my tutorial and i hope you enjoyed it would love to see your results, hippiedaze@hotmail.com
Sunday, 31 May 2009
Butterfly Wishes
Posted by hippiedaze at 02:24 0 comments
Labels: Tutorials - FTU
Template 007

DOWNLOAD HERE.
Sorry could not get this posted yst, issues with the pc and i just gave up lol...
Template used in tut below, hope some of you can use it :)
Posted by hippiedaze at 02:18 0 comments
Labels: Templates
Saturday, 30 May 2009
Into The Groove
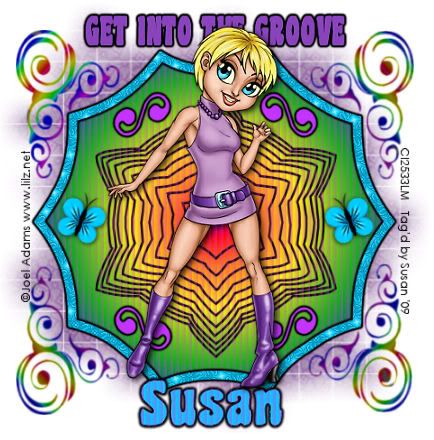
This tutorial was written on May 10th 2009 by Susan aka Hippiedaze.
The idea for this tag is off my own head lol and any resemblance is purely coincidence.
General Knowledge of psp is required, tutorial was written in psp 9 but will work in other versions.
Supplies Needed
Tube of Choice I used the artwork of Joel Adams, you must have a proper license to use his work please visit CILM - HERE
FTU Scrap Kit 'Party Time' by Fantasy Moments - HERE .
Template Used - My Template #007 Groove - HERE.
Mask Used - WSL Mask #84 by Chelle @ Wee Scots Lass Creations - HERE .
Plugin Used - Eye Candy, Gradient Glow.
Effects Used - Textured Effects, Blinds.
Font of Choice.
(Open supplies in psp before starting and save mask to your psp folder if you dont have it already).
Lets Begin
Open the template, hit shift & d on your keyboard,this pastes the template as new image, close the original template. Delete info layer, we can resize later . My template has a white background layer so no need to add one on this tut.
Activate the Large Shape layer, go to selections, select all, select float, select defloat then go to layers and choose add new raster layer, make sure its transparent, click ok, go to your colour palette now and choose a colour for your shape, set this colour to foreground ( I choose a bright gradient but you can use what you like, even a paper from the kit lol) then grab your floodfill tool, click the shape and fill with colour/gradient or paper, go to selections, select none. You can delete the original shape layer now.
Go to effects, select textured effects, blinds and use the following settings :-
Width - 4 .... Opacity - 43 .... Colour - choose one to match your tube ....Horizontal - Unchecked .... Light from Top - Checked.
Activate the Large Shape Frame layer, go to selections, select all, select float, select defloat and paste a paper from the kit as a new layer, resize a little if you need to but not smaller than the marching ants lol, when happy go to selections, select invert then hit delete on your keyboard, selections, select none. Delete the original frame layer. Go to effects, select eye candy 4000, gradient glow and use the folowing settings :-
Glow Width - 3.00 .... Soft Corners - 25 .... Overall Opacitiy - 100 .... Colour - Black. (this will be the gradient glow setting throught the tag )
Activate the Centre Shape layer, go to your tool palette and select colour to target brush, go to your colour palette and choose a colour from your tube, now drag the mouse over the whole of the shape so its coloured to your choice. Go to effects, select textured effects, blinds and use the following settings :-
Width - 4 .... Opacity - 43 .... Colour - choose one to match your tube ....Horizontal - Unchecked .... Light from Top - Checked.
Activate the Small Swirls layer, select all, select float, select defloat, go to layers and add new raster layer, check its transparent, click ok, go to colour palette and select another colour you like, grab your floodfill tool and click the inside the 4 swirl shapes to fill with colour, go to selections, select none. Delete the original layer. Add the same gradient glow you used before on this layer.
Activate the Swirls layer, I used the colour to target brush on this layer again and choose the gradient but you can colourise solid or whatever you like. No glow added here though. Activate the Wordart layer, select all, select float, select defloat, go to layers and add new raster layer, check its transparent, click ok, go to colour palette and select colour you like, grab your floodfill tool and click the inside the words to colour, go to selections, select none. Add the gradient glow to this layer. (see settings we used before).
Activate the bottom white layer, paste a paper of choice from the kit as a new layer, layers, load mask from disk and find the mask we loaded at the start (WSL #84), settings should be as follows ...
Fit to canvas - checked .... Source luminace - checked .... Invert transparency - unchecked .... Hide Mask - checked go to layers, merge group & you can use the deform tool to resize to suit your tag. I simple stretched it out a bit.
Activate the top layer now and paste your tube as a new layer, resize to suit and place where you like it, add a dropshadow to this layer.
Time to add any other elements from the kit, I didnt use many but you can decorate how you wish. Remeber to resize each element and sharpen if needed, add dropshadow to your element layers.
Now crop & resize your tag if you wish to
Add your name, artist info & copyright.
Save as jpeg or .png.
And I think thats us about done, lol.
Hope this was nice n easy for you .
Thanks for trying my tutorial and i hope you enjoyed it would love to see your results, hippiedaze@hotmail.com
Posted by hippiedaze at 03:37 0 comments
Labels: Tutorials - FTU
Friday, 29 May 2009
Template 008
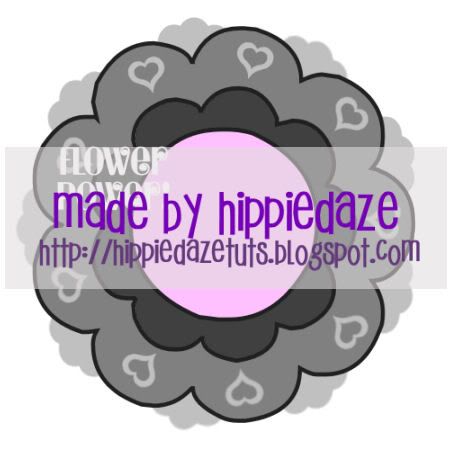
Download - HERE .
Heres a new template for you all to try out, below is a tut written as an example of the template, hope you all like and send me the results pls cuz i do love to see whats getting created,
We are having a massive heatwave today and ive been outside for most of it, am off visiting tonight so wont be around till tmw, have a great night everyone
hugs Susan
Posted by hippiedaze at 11:11 0 comments
Labels: Templates
Flower Power
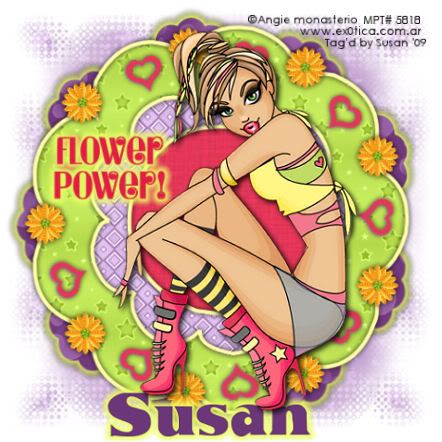
This tutorial was written on May 11th 2009 by Susan aka Hippiedaze.
The idea for this tag is off my own head lol and any resemblance is purely coincidence.
General Knowledge of psp is required, tutorial was written in psp 9 but will work in other versions.
Supplies Needed
Tube of Choice I used the artwork of Angie Monasterio, you need a proper license to use her work and you can purchase by visiting MPT - HERE .
Template Used - hippiedaze #008 by Me which you can get at 4 shared - HERE .
FTU Scrap Kit 'Tangerine' by Fantasy Moments - HERE .
Mask of Choice.
Font of Choice.
Effects Used - Textured Effects, Texture, Hatch Fine.
Plugin Used - Eye Candy 4000, Gradient Glow.
(save your chosen mask to psp folder before you begin) .
Open my template, hit shift & d on your keyboard,this pastes the template as new image, close the original template. Delete info layer, I didnt do any resizing on this one, and the Template has a bottom white layer so no need to add one.
Activate the Main Flower Shape Fill layer, go to selections, select all, select float, select defloat then cohoose a paper from the kit and paste as a new layer, i didnt resize this one, go to selections, select invert then hit delete on your keyboard, go to selections again, select none. Delete the original layer now.
Repeat the step you just did on the Smaller Shape Fill layer and also the Background Shape layer. Delete the original layers as you work.
Still on the Background Shape layer you just added, go to effects, select eye candy 4000, gradient glow and the following settings :-
Width - 3.00 .... Soft Corners - 25 .... Overall Opacity - 100 .... Settings tab - Colour - choose something bright to go with your tube. I used yellow then i added a dropshadow, it looks greenish lol.
Activate the Shape Frame layer, go to adjust, select brightness/contrast and move the brightness slider to (164) this will lighten it then go to colour to target brush tool and in your colour palette choose a colour from your tube, again i choose yellow, drag your mouse over the whole of the frame to change to choosen colour. Add a dropshadow to this layer.
Activate the Circle layer, go to selection, select all, select float, select defloat then go to layers, add new raster layer, make sure its transparent, now grab your floodfill tool and fill with a darker colour from your tube, I choose pink. Delete the original layer.
Repeat the last step on the Hearts layer and add a dropshadow to the hearts. Delete original layer.
Go back to the Circle layer, go to effects, choose textured effects, choose texture and find the tab that says 'Hatch Fine' use the following settings :-
Size - 100 .... Smoothness - 10 .... Depth - 1 .... Ambience & Shininess - both 0 .... Colour - White .... Angle - 315 .... Intensity - 50 .... Elevation - 30. Click ok. Activate the Wordart layer, colourise this in the same way as you did the Hearts & Circle. Delete the original layer. Add the gradient low with the same settings & colour you used before.
Make sure your on your top layer and paste your tube as a new layer, resize down a little if needed, place where you want it and add a dropshadow.
Click on the very bottom white layer, go to layers, select load mask from disc, then find the mask you saved at the start, Make sure the following settings are set...
Fit to canvas - checked .... Source luminace - checked .... Invert transparency - unchecked .... Hide Mask - checked, click ok. Use your deform tool to stretch the mask layer out a little if needed so its showing from behind the shape.
I only used one of the flower elements, resize quite a bit and place on the shape layer (see mine), dropshadow this layer. I duplicate this and placed flowers all the way round, this is up to you, decorate how you wish.
Crop and resize now if you wish to.
Add your name, Add artist info and copyright info.
Save as jpeg or .png. and we're done lol.
Thanks for trying my tutorial and i hope you enjoyed it would love to see your results, hippiedaze@hotmail.com
Posted by hippiedaze at 08:33 0 comments
Labels: Tutorials - FTU
Thursday, 28 May 2009
A Kinda Magic
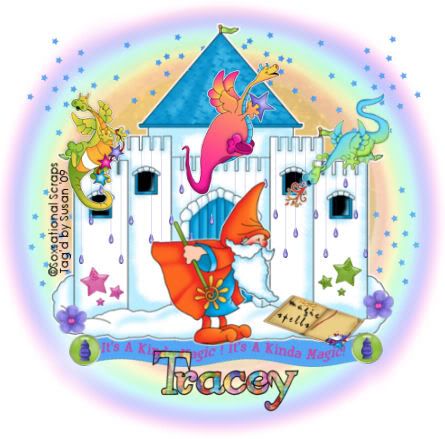
This tutorial was written on May 27th 2009 by Susan aka Hippiedaze.
The idea for this tag is off my own head lol and any resemblance is purely coincidence.
General Knowledge of psp is required, tutorial was written in psp 9 but will work in other versions.
Supplies Needed
PTU Scrap Kit 'Spellbinding' by Tracey @ Soxsational Scraps, you can purchase this kit from P4S - HERE .
No tubes used.
No Mask Used.
Nice n Easy this one lol so lets get started...
Open a new image in your psp workspace by clicking File, select new, choose 500x500, White background, click ok.
Take the Castle element from the kit and paste as a new layer on your canvas, go to image, select resize, I resized mine by 70%, smartsize and make sure the box that says resize all layers is unchecked, click ok, move the castle up a little on your canvas.
Choose one of the elements named Drops and paste as a new layer on your canvas above the castle layer, go to image, select resize and resize by 50% smartsize, click ok then resize once more by 50%, click ok, place over the castle layer and move to the left, use your eraser tool to erase the bits that are hanging over at the top of the castle, (see mine as example), when happy with this go to layers, select duplicate and then go to image, select mirror, you may need to tidy the top bits on this layer as well.
Activate the bottom white layer, paste the Rainbow from the kit as a new layer and resize to suit your liking, move to top of your canvas and when your happy with it go to layers, select duplicate, go to image, select flip, dupliate this layer and then go to image again, select rotate, free rotate and choose 90 degrees left, go back to layers, select duplicate one more time and then image, mirror, you should now have 4 rainbows forming a circle.
Activate the bottom white layer again and then choose a paper from the kit, open this in your psp workspace then minimise for now, grab your eclipse tool from the tool palette, go to colour palette and set foreground to null, click the background fill and choose pattern, find the paper that you minimised in the pattern drop list, select this and then go to your working canvas and draw out a large circle not bigger than the rainbow circle, when happy with this go to layers and select convert to raster layer.
Take one of the Stars 1 or Stars 2 elements from the kit, paste as a new layer above the coloured circle layer you just created, go to image, select resize and choose resize by 50% smartsize, click ok , move this layer to the top left of your canvas so the stars are showing from behind the castle, when happy with placement go to layers and select duplicate, go to image, select mirror so you have the stars on the top right of the canvas.
Take the element named 'its a kind of magic' ribbon, paste as a new layer and resize as needed so it fits nicely at the bottom of your castle, choose one of the brads ans paste as a new layer, resize this as needed and place over the 'kind of magic ribbon', duplicate the brad and place the duplicate layer on the other side of the ribbon (see mine as example).
Choose a Wizard from the kit and paste as a new layer, resize as needed and place where you like it. Do the same with a few dragon elements as well, remember if you are resizing by a lot to sharpen the elements.
I also added the spell book element and used the deform tool to make it 'flatter' I added the words 'magic spell' , the choice here is yours.
Add any other elements from the kit that you wish, resize as needed and place where you like them.
Crop & resize your tag now if you wish.
Add your name, I used a paper from the kit as my font fill.
Add artist info and copyright info.
Save as jpeg or .png. and we're done lol.
Thanks for trying my tutorial and i hope you enjoyed it would love to see your results, hippiedaze@hotmail.com
Posted by hippiedaze at 11:45 0 comments
Labels: Tutorials - PTU
Sassy Girl Power
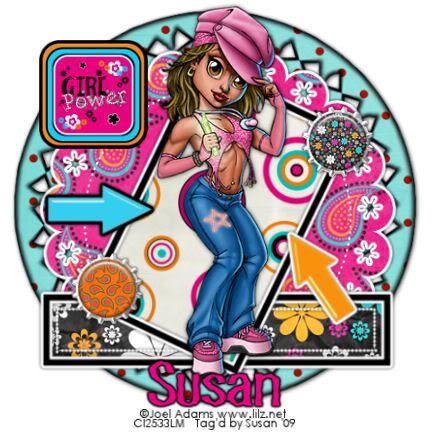
This tutorial was written on May 10th 2009 by Susan aka Hippiedaze.
The idea for this tag is off my own head lol and any resemblance is purely coincidence.
General Knowledge of psp is required, tutorial was written in psp 9 but will work in other versions.
Supplies Needed
Tube of Choice - I used the artwork of Joel Adams, you must have a proper license to use his work please visit CILM - HERE .
FTU Scrap Kit ' Sassy Lass' by Susan @ Raspberry Roads Designs - HERE .
Template Used - #22 by Lacarolita @ Lacarolita's Designz - HERE .
Mask Used - WSL Masl #136 by Chelle @ Wee Scots Lass Creations - HERE .
Plugin Used - Eye Candy 4000, Gradient Glow.
Font of Choice.
(Open supplies in psp before starting and save mask to your psp folder if you dont have it already).
Lets Begin
Open the template, hit shift & d on your keyboard,this pastes the template as new image, close the original template. Delete info layer, go to image, select resize and set to 80%, make sure you select smartsize and tick resize all layers, click ok. You can leave this step if you want and resize later, its up to you.
Click on the white background layer, go to image tab, select canvas size and set to 500x500, click okthis gives you room to work the elements etc.
Activate Raster 1 layer, go to selections, select all, select float, select defloat then paste a paper of choice as a new layer, (the papers in this kit are huge so resize down a good bit, when your happy with it go to selections again and select invert then hit delete on your keyboard, select none. You can delete the original layer now.
Repeat the same step on Raster 2 & Raster 5 layers using different papers on each layer and remember to delete the original layers as you go along.
Activate Raster 3 layer, go to adjust tab, select brightness/contrast and move the brightness slider all the way to the right (255) the dots will now be white. Add a small dropshadow to this layer.
Activate Raster 4 layer now and go to adjust again, brightness/contrast, this time move the brightness slider all the way to the left (-255) the frame should now be black. Go to effects, select eye candy gradient glow and use the following settings :-
Glow Width - 3.00 .... Soft Corners - 25 .... Overall Opacitiy - 100 .... Colour - White .... Setting - Fat. Add a small dropshadow to this layer.
Activate Raster 6 layer and repeat the step we just did on Raster 4 layer. Add the same dropshadow. Activate Raster 1 layer again and go to effects, add the same gradient glow we used on the other layers.
Activate the bottom white layer, paste a paper of choice from the kit as a new layer, layers, load mask from disk and find the mask we loaded at the start (WSL #136), settings should be as follows ...
Fit to canvas - checked .... Source luminace - checked .... Invert transparency - unchecked .... Hide Mask - checked go to layers, merge group & you can use the deform tool to resize to suit your tag. I added the gradient glow to this layer to make it bolder and blend with the rest of the tag but its up to you if you add the glow or not.
Click back to the top layer now, paste your choosen tube, resize if needed, remember tubes should be resized 'bicubic' and not smartsize like the elements. Give your tube a dropshadow.
Add any other elements from the kit that you want, I added the gradient glow to some and just a dropshadow to others, you choose lol.
Time to crop & resize your tag if you wish to, if you didnt at the start .
Add your name, artist info & copyright.
Save as jpeg or .png.
And I think thats us about done, lol.
Thanks for trying my tutorial and i hope you enjoyed it would love to see your results, hippiedaze@hotmail.com
Posted by hippiedaze at 11:37 0 comments
Labels: Tutorials - FTU
Wednesday, 27 May 2009
Glass Seduction
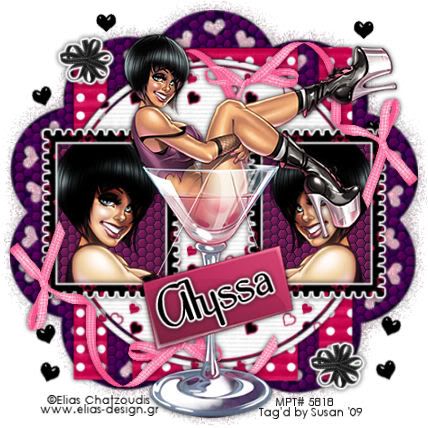
This tutorial was written on May27th 2009 by Susan aka Hippiedaze.
The idea for this tag is off my own head lol and any resemblance is purely coincidence.
General Knowledge of psp is required, tutorial was written in psp 9 but will work in other versions.
Supplies Needed
Tubes of Choice I used the artwork of Elias Chatzoudis, you must have a proper license to use his work please visit MPT, mypsptubes - HERE .
FTU Scrap Kit - 'Seduction' by Lacarolita @ Lacarolita's Designs - HERE .
Template Used - Template #11 by Alyssa @ Alyssas Tutorials - HERE .
No Mask Used.
Plugin Used - Xero, Radiance.
2nd Plugin Used- Eye Candy 4000, Gradient Glow.
3rd Plugin Used - Toadies, Blast 'n' Blur.
Effects Used - Textured Effects, Tile.
Font of Choice.
(open all supplies needed before you begin)
Lets Get Started ...
Open your template, hit shift & d on the keyboard to duplicate, now you can close the original template. Delete info layer. I resized here, go to image, resize and make sure resize all layers is checked, resize by around 75% smartsize and check the box that says resize all layers, click ok. (This depends on the size you like your tags).
Activate the pink background layer, grab your floodfill tool and then select white as your foreground colour in the colour palette, click on the pink area to fill layer white. We can resize more later on.
Activate the Rectangle layer, go to selections, select all, select float, select defloat and paste paper of choice as a new layer, resize it till your happy with it then selections, invert & hit delete on the keyboard, selections, select none. Delete the original layer now.
Repeat the step on the Thin Rectangles, Thin Circle, Circle & both Frame layers, use different papers from the kit for each layer and delete the original layers as you work.
Activate the Frame 1 layer, go to effects, select eye candy ,gradient glow and use the following settings :-
Glow Width - 6.00 .... Soft Corners - 25 ....Overall Opacity - 100 .... Colour - White .... move the slider to about halfway along so the glow is quite bold. click ok. Add a small dropshadow to this layer.
Activate Frame 2 layer and repeat the same step.
Activate the Photo 1 layer, grab your magic wand from the tool palette and click on the white area, you should see the marching ants blinking now, go to selections, select modify, select expand and choose to expand by 2, now take your tube and paste as a new layer choose which part you want showing inside the frame and when happy with placement go to selections and select invert then hit delete on your keyboard to remove the excess tube, now your tube part should be fitting nicely inside the frame, now go to effects, select xero, radiance and use the default settings or play with settings till your happy, click ok, this will give your tube a radiant glow lol.
Activate the Photo 1 layer once more then go to layers, select add new raster layer, transparent then choose a colur to match your tube as your foreground colour in the colour palette, click inside the marching ants to fill with choosen colour, now go to effects , select textured effects, tile, use the default settings but choose a colour of your choice and click ok.
Repeat the whole of that step for the Photo 2 layer.
Activate the top layer of your canvas and paste your main tube, resize if needed and place where you like it, add a dropshadow to the tube.
Now activate the bottom white layer, take the Scalloped Template 1 from the kit and paste as a new layer, resize as much as needed so its just showing around the main tag. (see mine for example), when happy with size and placement, duplicate this layer and on the top copy, go to effects and choose textured effects, tile and use the same settings as we used on the photo layers.
Activate the bottom copy of the pink template, go to effects, select toadies, blast n blur and play with the settings there till you have it how you like it.
Add any other elements you wish from the kit, remember to resize, sharpen as needed and add a gradient glow or dropshadow to whichever elements you like.
Now crop or resize your tag in the usual way if you want to.
Add your name, artist info and copyright info.
Save as jpeg or .png. and we're done i think lol.
Thanks for trying my tutorial and i hope you enjoyed it would love to see your results, hippiedaze@hotmail.com
Posted by hippiedaze at 13:32 0 comments
Labels: Tutorials - FTU
What's New Pussycat
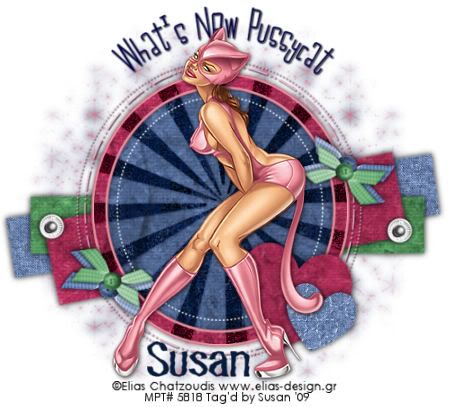
This tutorial was written on May 10th 2009 by Susan aka Hippiedaze.
The idea for this tag is off my own head lol and any resemblance is purely coincidence.
General Knowledge of psp is required, tutorial was written in psp 9 but will work in other versions.
Supplies Needed
Tubes of Choice I used the artwork of Elias Chatzoudis, you must have a proper license to use his work please visit mypsptubes - MPT - HERE .
FTU Scrap Kit 'Wacky Scraps Kit 4' by Lori @ Wacky Scraps - HERE .
Template Used - #85 by Rachel @ Scraps of Enchantment - HERE .
Mask Used - WSL Mask #120 by Chelle @ Wee Scots Lass Creations - HERE .
Plugin Used - Eye Candy 4000, Gradient Glow.
Dropshadow throughout.
(open all supplies and place mask into your psp folder before we start)
Lets Get Started
Open the template, hit shift & d on your keyboard,this pastes the template as new image, close the original template. Delete info layer. Go to image, select resize and choose 85%, make sure smartsize is checked and resize all layers checked. Go to layers, add new raster layer, grab your floodfill tool, select white as your foreground in your colour palete and fill new layer white, move this layer all the way down to the bottom layer.
Activate Light Grey Strip layer go to selections, select all, select float, select defloat and paste a paper from the kit as a new layer, go back to selections, select invert and then hit delete on your keyboard, selections, select none, delete the original layer. Add a small dropshadow.
Do the same step for the other 2 strip layers also the circle & hearts layers. Repeat step on the Frame layer but instead of a dropshadow i added a glow, go to effects, select eye candy 4000, gradient glow and use the following settings :-
Glow Width - 3.00 .... Soft Corners - 25 .... Overall Opacitiy - 100 .... Settings Tab - Fat .... Colour -colour of your choice to match your tube. On all the Dots layers, I simply added a small dropshadow.
Activate the Wordart layer, go to adjust, select hue/saturation/lightness, select colourise and choose a colour to match your tube again, i also darkened the wordart by going to adjust, select brightness.contrast and move the brightness slider to the left a little till its as dark as you wish. I closed the white wordart layer off cuz my background is fairly light but you can add a dropshadow or do as you like with this.
Ok now activate the very bottom layer and paste a paper of choice, go to layers, load mask from disc, then find the mask you choose at the start (WSL Mask #312), Make sure the following settings are set...
Fit to canvas - checked .... Source luminace - checked .... Invert transparency - unchecked .... Hide Mask - checked. Click ok. Use the deform tool to stretch it out a bit if you like.
Activate the top layer of your canvas and paste your tube as a new layer, resize to your liking, place where you want it and add a dropshadow to this layer.
Add a few elements from the kit if you wish, resize them as needed and add dropshadow to each layer.
Crop and resize now if you wish to.
Add your name.
Add artist info and copyright info.
Save as jpeg or .png. and we're done lol.
Thanks for trying my tutorial and i hope you enjoyed it would love to see your results, hippiedaze@hotmail.com
Posted by hippiedaze at 13:19 0 comments
Labels: Tutorials - FTU
Template 006

Morning all, here is a new template for you to try, its not perfect lol but hope someone can use it and an example of it is below in the tut, the template preview is shown smaller than the actual size, if anyone would like it the link is in the tut supplies below or you can d/l it from
HERE
hugs Susan :)
Posted by hippiedaze at 02:12 0 comments
Labels: Templates
Flower Child

This tutorial was written on May 9th 2009 by Susan aka Hippiedaze.
The idea for this tag is off my own head lol and any resemblance is purely coincidence.
General Knowledge of psp is required, tutorial was written in psp 9 but will work in other versions.
Supplies Needed
Tube of Choice I used the artwork of Lix, you must have a proper license to use this work, to do so please visit CILM - HERE .
Template Used - Template #006 by Me which you can d/l from 4share - HERE.
FTU Scrap Kit 'Mixed Mess Papers' by Susan @ Raspberry Roads - HERE .
Mask Used - WSL Mask #105 by Chelle @ Wee Scots Lass Creations - HERE .
Font of Choice - I used Coaster.
Effects Used - Textured Effects - Blinds & Weave.
Plugin Used - Eye Candy 4000, Gradient Glow.
(Open all supplies and save mask to psp folder before you begin)
Lets Get Started
Open the template, hit shift & d on your keyboard,this pastes the template as new image, close the original template. Delete info layer. I didnt do any resizing but we can crop layer.
Activate the Circle layer, go to selections, select all, select float, select defloat then paste paper of choice, resize it a bit if the papers are quite big then go to selections, invert, hit delete on the keyboard and then select none. Now you can delete the original layer.
Go to effects, select eye candy 4000, gradient glow and use the following settings :-
Glow Width - 3.00 .... Soft Corners - 25 .... Overall Opacitiy - 100 .... Setting - Fat .... Colour - Black .
Activate the Flowers layer, go to selections, select all, select float, select defloat, go to layers, add new raster layer and grab your floodfill tool, select a bright colour that matches with your tube/paper and click inside one of the flowers to fill with the choosen colour, go back to your colour palette and choose another colour now, then back to another flower and click to fill with new colour, do this for all the flowers, select none. You can delete the original flower layer now.
Now grab your magic wand and click inside one of the flowers so that the marching ants appear, go to effects, select textured effects, select blinds and use the following settings :-
Width - 7 .... Opacity - 61 .... Horizontal - Unchecked .... Light from top left - Checked .... Colour - Choose a bright colour you used on one of the flowers.
Select another flower with the magic wand and repeat blinds effect but change the colour, when finished all flowers select none. Add the same gradient glow you used before to this layer.
Activate the Stars layer, repeat the same as the flowers use bright colours again but do not add the blinds effect. Delete the original stars layer. Add the same gradient glow to the Stars.
Activate the Flower fills layer and again repeat the step we just did on the last 2 layers, do not add the blinds or gradient glow but we will add a weave effect to this layer instead, go to effects, select textured effects, weave and the following settings :-
Gap Size - 4 .... Width - 5 .... Opacity - 9 .... Gap Colour - black .... Fill colour - Black .... Fill Gaps - Checked. No glow or shadow added to this layer.
Now activate the wordart layer, select all, select float, select defloat, go to layers ,add new raster layer, grab your floodfill tool and choose a colour you want to make the wordart, click inside the marching ants and fill, select none. Delete the original wordart layer. I didnt add the gradient glow here just a small dropshadow.
Activate bottom white layer, paste a paper from the kit, go to layers, load mask from disc, then find the first mask we loaded at the start (WSL Mask #105) Make sure the following settings are set...
Fit to canvas - checked .... Source luminace - checked .... Invert transparency - unchecked Hide Mask - checked. Go to layers, merge group & resize to suit your tag using the deform tool if needed till you get it how you want it.
Click back to your top layer now and paste your tube, resize this if needed and place where you like it, add a dropshadow if you wish.
I didnt use any elements on this tag but you can add some if you want, place where you like, resize and dropshadow any elements you add.
Now time to crop or resize if you want, do this in the usual way, grab the crop tool and select the area to crop.
Add your name, artist info & copyright info.
Save as jpeg or .png. and we're done lol.
Thanks for trying my tutorial and i hope you enjoyed it would love to see your results, hippiedaze@hotmail.com
Posted by hippiedaze at 02:08 0 comments
Labels: Tutorials - FTU
Tuesday, 26 May 2009
Jellybean Ice Cream

This tutorial was written on May 9th 2009 by Susan aka Hippiedaze.
The idea for this tag is off my own head lol and any resemblance is purely coincidence.
General Knowledge of psp is required, tutorial was written in psp 9 but will work in other versions.
Supplies Needed
Tube of Choice I used the artwork of Al Rio, you must have a proper license to use his work please visit CILM - HERE .
Scrap Kit Used - I used some papers & elements from last years FTU 'Sugar Shoppe' collab kits. Any Kit will do .
Template Used - #17 by Doris @ Scraps Dimensions - HERE .
Mask Used - Vix Mask #326 by Vix - HERE .
Plugin Used - Eye Candy 4000, Gradient Glow.
Font of Choice.
(Save mask to your psp folder before you begin and open all other supplies you need)
Lets Get Started
Open the template, hit shift & d on your keyboard,this pastes the template as new image, close the original template. Delete info layer, I resized mine at this point as the template is quite big, go to image, resize, change width & height to 25%, select smartsize & make sure resize all layers is checked.
Now activate the bottom background layer, grab your floodfill tool from the tool palette and choose white as foreground colour, null for background colour, now click in the layer and floodfill it white, go to layers, select canvas size and choose 500x500, click ok, this gives you a little more room to work and we can crop later.
Activate the Scalloped Round Template layer, go to selections, select all, select float, select defloat then paste a paper of your choice as a new layer, you may have to resize the paper a little, making sure the paper is not smaller than the marching ants flashing lol, once happy go to selections, select invert then hit delete on your keyboard, selections, select none. You can delete the original layer now.
Repeat the same step for the Cloud 1, Cloud 2, Ice Cream Cup, Ice Cream Cone,Ice Cream Top 1 & 2 layers. Be creative and use different papers each time, delete the original layers as you go along.
Activate the Jellbean layer, go to selections, select all, select float, select defloat, go to layers, add new raster layer, now grab your floodfill tool and choose any colours you wish for this layer, i used a few different colours.
Activate the Ice Cream wordart layer and repeat the last step, fill with a colour that matches your tube. Activate the Delight wordart layer, I choose to use change to target brush on this layer, keep the same colour you used on the ice cream word layer, go to tool palette and choose change to target brush tool, drag your mouse over the word delight and it should change to just a little darker than the first wordart layer.
Go to effects, select eye candy 4000, gradient glow and use the following settings :-
Glow Width - 3.00 .... Soft Corners - 25 .... Overall Opacitiy - 100 ....Colour - Black or colour of your choice. Setting - Fat.
Add this glow to both wordart layers and also the scalloped round template layer and Cloud 2 layers. Add a small dropshadow to all other layers.
Click on the bottom white background layer now and paste a paper of choice as a new layer, go to layers and select load mask from disk, find the mask you saved at the start (Vix Mask #326), Make sure the following settings are set...
Fit to canvas - checked .... Source luminace - checked .... Invert transparency - unchecked .... Hide Mask - checked. I used the deform tool to pull it out a little from behind the scalloped layer.
Time to add your tube, paste tube of choice as a new layer, resize to suit and move down to just below the ice cream wordart layer, place where you like it & add a dropshadow.
Choose some elements from the kit and place around the tag where you want them. Dropshadow elements.
Crop and resize now if you wish to.
Add your name, Add artist info and copyright info.
Save as jpeg or .png. and we're done lol.
Thanks for trying my tutorial and i hope you enjoyed it would love to see your results, hippiedaze@hotmail.com
Posted by hippiedaze at 16:27 0 comments
Labels: Tutorials - FTU
Monday, 25 May 2009
Good Ole Time Rock

This tutorial was written on May 25th 2009 by Susan aka Hippiedaze.
The idea for this tag is off my own head lol and any resemblance is purely coincidence.
General Knowledge of psp is required, tutorial was written in psp 9 but will work in other versions.
Supplies Needed
Tube of Choice I used the artwork of Popeye Wong, this artwork is FTU and you can grab Popeye's awesome tubes from - HERE .
FTU Scrap Kit 'Rockstar' by Mar @ Scrappin Mar - HERE .
Template Used - Template #24 by Beth @ Blissfully Beth - HERE .
Mask Used - WSL Mask #84 by Chelle @ Wee Scots Lass Creations - HERE .
Plugin Used - Mura Meister, Copies.
2nd Plugin Used - Eye Candy 4000, Gradient Glow.
Fonts of Choice.
(open all supplies and save mask to psp folder before beginning)
Lets Start ....
Open the template, hit shift & d on your keyboard,this pastes the template as new image, close the original template. Delete info layer, go to image, select resize, choose resize 80%, choose smartsize and make surethe box resize all layers is checked, click on the bottom white layer, go to image again and select canvas size and choose 500x500 to give a little extra room to work or if you prefer you can resize later.
Activate the Background Music layer, go to selection, select all, select float, select defloat then paste a paper of choice from the kit as a new layer, resize a bit if needed, go to selections, select invert then hit delete on your keyboard, selections once more and select none. Delete the original layer.
Repeat the same step on the layers named Music Notes & Music, use different papers for each layer and delete the original layers as you work. I resized the smaller notes to suit my tag but the choice is yours.
Now go to effects, select eye candy 4000, gradient glow and use the following settings to give each layer you just created a gradient glow :-
Glow Width - 3.00 .... Soft Corners - 25 .... Overall Opacitiy - 100 .... Colour - White. Add a dropshadow to each layer after the glow.
Activate the Circle 3 layer, grab your magic wand and click the white inner area of the circle so the marching ants are blinking round the white, go to layers, select add new raster layer, grab your floodfill tool and then choose a colour that matches your tag in your foreground colour tab, click inside the marching ants to fill with choosen colour, now go to effects, choose textured effects, blinds and use the following settings :-
Width - 5 .... Opacity - as dark or light as you like .... Colour - to match your tube .... Horizontal - Checked .... Light from Top - Checked, click ok, go to selections & select none.
Add the same gradient glow as before to this layer.
Click back to the circle 3 layer, go to adjust, select hue/saturation/lightness, select colourise and choose a colour that matches your tube, click ok.
Add the same gradient glow as you used before to this layer and then add a dropshadow.
Repeat the last step on the layer named Circle 2, use different colours.
Activate Circle 1 layer, repeat the step but dont add the blinds effects....
Open a new image in your psp workspace 500x500 transparent, grab your text tool and with a small font, colour of your choice type out a phrase, i choose ' rock n roll' click apply, position text in centre of your canvas then go to effects, select mura meister, copies, in the box that pops up leave all settings as they are but change the number to (2), click ok.
Back to your working canvas, copy and paste the text layer your just created, make sure its on the layer above the circle, go to selections, select invert then hit delete on your keyboard, selections, select none, your text should now be inside the circle.
Click back to the circle 3 layer, go to adjust, select hue/saturation/lightness, select colourise and choose a colour that matches your tube again, click ok.
Add the same gradient glow as you used before to this layer and then add a dropshadow.
Activate the bottom white layer, go to layers, choose add new raster layer, make sure its transparent,click ok, grab your floodfill tool and choose a colour that matches your tube, now floodfill new layer with the colour, go to layers, select load mask from disk and find the mask we loaded at the start (WSL #84), settings should be as follows ...
Fit to canvas - checked .... Source luminace - checked .... Invert transparency - unchecked .... Hide Mask - checked go to layers, merge group & you can use the deform tool to resize to suit your tag. I simple stretched it out a bit.
Take the music notes shape element and paste as a new layer just above the mask layer, resize to your liking and place where you like.
Activate the top layer now and paste your tube as a new layer, resize to suit and place where you like it, add a dropshadow to this layer.
Time to add any other elements from the kit, decorate how you wish, resize elements as needed and place where you like them, add a dropshadow to each element layer.
Now crop & resize your tag if you wish to
Add your name, artist info & copyright.
Save as jpeg or .png.
And I think thats us done, lol.
Thanks for trying my tutorial and i hope you enjoyed it would love to see your results, hippiedaze@hotmail.com
Posted by hippiedaze at 16:14 0 comments
Labels: Tutorials - FTU
Miss Moneybags
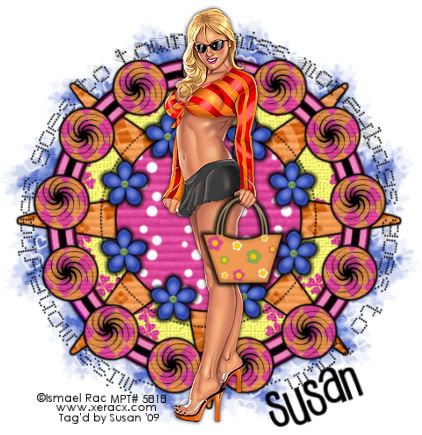
This tutorial was written on May 22nd 2009 by Susan aka Hippiedaze.
The idea for this tag is off my own head lol and any resemblance is purely coincidence.
General Knowledge of psp is required, tutorial was written in psp 9 but will work in other versions.
Supplies Needed
Tube of Choice I used the artwork of Ismael Rac, you must have a proper license to use his work please visit MPT - mypsptubes - HERE .
FTU Scrap Kit 'Colourful Day' by Lacarolita @ Lacarolita's Designz - HERE .
Template Used - Template #10 by Alyssa @ Alyssa's Tutorials - HERE .
Mask Used - WSL Mask #78 by Chelle @ Wee Scots Lass Creations - HERE .
Plugin Used - Eye Candy 4000, Gradient Glow.
Preset Shape or Brush of Choice. (sorry i cant remember where i got the swirl shape i used therefore i cant supply it but any shape will work) .
Font of Choice.
(save mask to psp folder before you start)
Lets Begin...
Open your template, hit shift & d on the keyboard to duplicate, now you can close the original template. Delete info layer. I resized here, go to image, resize and make sure resize all layers is checked, resize by around 75% smartsize and check the box that says resize all layers, click ok. (This depends on the size you like your tags).
Activate the pink background layer, grab your floodfill tool and then select white as your foreground colour in the colour palette, click on the pink area to fill layer white.
Activate the Star Shape layer, go to selections, select all, select float, select defloat and paste paper of choice as a new layer, resize it till your happy with it then selections, invert & hit delete on the keyboard, selections, select none. Delete the original layer now.
Repeat the step on the Small Circles layer and also the Centre Circle layer using different papers for each one and then delete the original layers. Now go to effects, select eye candy 4000, gradient glow and use the following settings to add a gradient glow to all the layers you just created :-
Glow Width - 3.00 .... Soft Corners - 25 .... Overall Opacity - 100 .... Colour - Black .... move the slider half way along to give a bolder edge. Click ok.
Activate the Dotted Circle layer, go to adjust, select brightness/contrast and move the brightness slider all the way to the left (-255) this will change the dots to black, now go to effects, select gradient glow again and use the following settings for this layer:-
Glow Width - 6.00 .... Soft Corners - 25 ....Overall Opacity - 100 .... Colour - Pink or something that matches your tube, move the slider all the way along to the right and this will give you a thick boarder, click ok then go to effects, eye candy 400, gradient glow again and repeat the last settings but change both colour sliders to black. Click ok.(see mine as example).
Activate your bottom white layer, grab your eclipse tool from the tool palette, set foreground colour to null and background colour to black, now draw out a circle in the centre of your canvas but make sure it isnt bigger than the large circle layer, once happy with your shape go to layers and select convert to raster layer, go to selections, select all, select float, select defloat then paste a paper of choice from the kit as a new layer, resize a little if you want but not smaller than the marching ants lol, once happy, go to selections, select invert then hit delete on your keyboard, selections again, select none.
Activate your bottom white layer once more, paste another paper of your choice as a new layer, go to layers, select load mask from disc and choose the mask you saved at the start (WSL Mask #78) and use the following settings :-
Fit to canvas - checked .... Source luminace - checked .... Invert transparency - unchecked .... Hide Mask - checked, click ok, go to layers, merge group.
Activate your top layer now, pick a flower element from the kit and paste as a new layer, resize as needed, small enough to sit nicely inbetween the star points, when happy with size, go to layers, select duplicate as many times as needed and place the duplicates around the circle. (See mine for example).
Add a small gradient glow to these layers if you wish.
Getting there lol....
Paste your tube as a new layer now, resize to your liking and place where you like it, add a dropshadow.
Ok now activate the small circles layer you created, go to layers, select add new raster layer, make sure its transparent and click ok, take your paint brush tool or preset shape tool, set your foreground colour to black or colour of your choice, whichever you choose and draw your shape quite small so it fits nicely inside the small circle, when happy with that, go to layers and choose convert to raster layer, duplicate as many times as needed and place one in each small circle, i also added a slight dropshadow to the layers.
If your using the same tube as mine add the hanbag element as a new layer, move layer to above your tube layer and resize as needed, use your eraser tool to erase a little of the handle to make it look like shes holding the bag, i added a small black gradient glow to this but the choice here is yours.
Now lol grab your eclipse tool again, foreground colour black and background colour null, draw out a large circle in the centre of your canvas, do not convert to raster yet, select your text tool and font of choice, create this text layer as floating selection, click on the circle and you should see the text icon with a half moon lol, click that and in your text box type out your phrase, i typed ' miss moneybags goes to town' , once happy with your text, click ok, the text should have the marching ants around it, go to layers, select add new raster layer and move this layer just below the vector layer, now go to selections and select none, click yes in the box that pops up here, now delete the vector circle layer.
Now crop or resize your tag in the usual way if you want to.
Add your name, artist info and copyright info.
Save as jpeg or .png. and we're done i think lol.
Thanks for trying my tutorial and i hope you enjoyed it would love to see your results, hippiedaze@hotmail.com
Posted by hippiedaze at 15:59 0 comments
Labels: Tutorials - FTU
Good Afternoon
Good Afternoon from Scotland lol, its dry today but not very bright or sunny so have spent the morning catching up with housework yuck lol, but at least its done....
I had a busy weekend and my footie team won the league cup yst so yeahhhhh to that lol
Ohhh and have you all heard about Susan Boyle ????
The singing sensation on Britains Got Talent, it was the first heat of the semi finals last night and shes through :D,
Shes a superstar lol and lives not 20 minutes from me (am still hoping to catch a glimpse of her when im over her way shopping hehe)
If you havent heard or seen the video go take a peek on you tube HERE now, she is awesome and would be fantastic if she wins, so good luck Susan, im deffinitely voting for you :D ....
Hope you are all still enjoying the tuts and I will post another one or 2 later today, I still have a few ready to post but need to catch up
Right, am off to put the ironing away then settle with a cuppa see what new tags i can create today
Have a fab day everyone
hugs Susan x
Posted by hippiedaze at 04:51 0 comments
Labels: General
Whatever

This tutorial was written on May 23rd 2009 by Susan aka Hippiedaze.
This was written off my own head lol, any resemblance is purely coincidence.
General Knowledge of psp is required, tutorial was written in psp 9 but will work in other versions.
Supplies Needed
Tube of Choice I used the artwork of Joel Adams, you need a proper license to use Joel's Artwork, pls visit CILM - HERE .
PTU Scrap Kit 'Whatever' by Ivory @ Ivory's Designs and you can purchase this kit by visitng Scrap Heaven Boutique - HERE .
Mask of Choice, am sorry i cant remember where i got the one i used so cant supply it.
Font of Choice.
(open supplies and save your chosen mask to psp folder before we start)
Lets Get Started....
Go to file, select new image and open a new image size 500x500, set the colour to white, click ok.
Choose one of the pads elements and paste as a new layer on your working canvas, resize by 50% smartsize and place in centre of your canvas,
Choose a frame element from the kit and paste as a new layer on your canvas, resize to 50% smartsize and then grab your deform tool to rotate it to the left slighty, when happy with this go to layers, select duplicate, go to image, select flip, back to image select mirror, move both these layers under the pad layer and position so you have parts of the frames showing behind the large pad, (see mine for example).
Activate your bottom white layer, paste a paper of choice as a new layer, go to layer, select load mask from disc and find the mask that you choose at the start, make sure the following settings are checked :-
Fit to canvas - checked .... Source luminace - checked .... Invert transparency - unchecked .... Hide Mask - checked, click ok, go to layers, merge group and then resize to suit your liking.
Now take your selection tool and draw out a rectangle shape in the middle of your canvas, go to layers, select add new raster layer, take your floodfill tool and choose a colour that matches your tube as the foreground colour, click inside the marching ants selection to fill with your colour, go to adjust, select blur, guassian blur and set to 20.00, click ok, move this layer below your mask layer.
Activate your top layer and paste your tube as a new layer, resize as needed and place where you like it, add a dropshadow.
Choose any elements you like from the kit and place around your tag to decorate, resize elements as needed and add a dropshadow to each layer.
Now crop & resize your tag if you wish to.
Add your name, artist info & copyright.
Save as jpeg or .png.
And I think thats us about done, lol.
Hope this was nice n easy for you .
Thanks for trying my tutorial and i hope you enjoyed it would love to see your results, hippiedaze@hotmail.com
Posted by hippiedaze at 02:52 0 comments
Labels: Tutorials - PTU
Another example of Crazy,Sexy,Cool tut
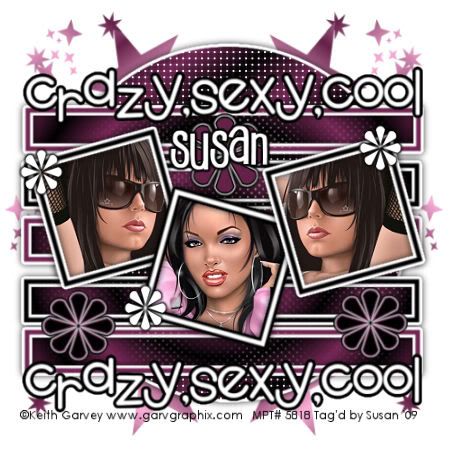
Here is another example of the tut just posted using Keith Garvey artwork & different coloured gradients
enjoy
hugs Susan
Posted by hippiedaze at 02:06 0 comments
Labels: General
Crazy, Sexy, Cool

This tutorial was written on May 8th 2009 by Susan aka Hippiedaze.
The idea for this tag is off my own head lol and any resemblance is purely coincidence.
General Knowledge of psp is required, tutorial was written in psp 9 but will work in other versions.
Supplies Needed
Tubes of Choice I used the artwork of Elias Chatzoudis, you must have a proper license to use his work please visit MPT, mypsptubes - HERE .
Template Used - Template #37 by Melissa @ Melissa's Creations - HERE .
Mask Used - DBA Mask #26 by Ali - HERE .
No Scrap Kit Used. Preset Shape Used - Flower 7. ( this should be included with your psp program).
Plugin Used - Eye Candy 4000, Gradient Glow.
Effects Used - Textured effects, Weave.
Font of Choice.
(Open all supplies and save mask to psp folder before you begin)
Lets Get Started
Open the template, hit shift & d on your keyboard,this pastes the template as new image, close the original template. I resized all layers by 90% smart size at this point. ( optional) Delete info layer, go to layers, add new raster layer, grab your floodfill tool from the tool palete and choose white colour as your foreground then floodfill the new layer, move this all the way down to the bottom of your canvas, while still on white layer, go to layers, select canvas size and select 500x500 so you have a little more room to work, if theres any transparent canvas showing click it with the floodfil tool.
Go to your colour palette and choose 2 colours you want to use for the tag, i used (#c13d52) & (#eeb7bc), now click the foreground tab and choose gradient from the pop up box, scroll the tiles till you find foreground/background tile, select this and use the folowing settings :- Linear Style .... Angle - 145 ... Repeats - 8. Click ok.
Activate the Circle layer, go to selections, select all, select float, select defloat then go to layers, add new raster layer, grab your floodfill tool and fill the new layer with the gradient you just made, selections, select none. Delete the orginal circle layer now.
Still on the Circle layer, go to effects , select textured effects, weave and put in the following settings :-
Gap Size - 2 ... Width - 5 ... Opacity - 9 ... Weave Colour - White ... Gap Colour - White ... Fill Gaps - Checked.
Now go to effects once more and select eye candy 4000, gradient glow and use the following settings :-
Glow Width - 3.00 .... Soft Corners - 25 .... Overall Opacitiy - 100 .... Colour - White or colour of your choice.
Activate the Rectangles layer, go to selections, select all, select float, select defloat, go to layers, add new raster layer, grab your floodfill tool, i used the gradient to fill but this time i changed the pink to a darker colour (#c13d52), the gradient will change in your foreground tab now, click inside the marching ants on the rectangles and fill them with the new gradient. No glow or dropshadow used on this layer. Delete the original rectangle layer now.
Activate the Rectangle Frame layer, select all, select float, select defloat then go to layers and add new raster layer, back to your colour palette and change your foreground back to solid colour (blue#74b8d0) , now grab floodfill tool and click inside each alternate frame with the blue then switch colours and fill remaining frames with (pink#c13d52). Delete the original frame layer, Add a dropshadow to the new layer.
Repeat this step on the 3 Frame layers, see mine as an example.
Delete each original frame layer and Add the dropshadow to the new layers.
Activate the Lft Square layer, select all, select float, select defloat, paste a tube of your choice as a new layer, resize if needed and position inside the marching ants, when happy with placement go to selections, select invert then hit delete on your keyboard, do not deselect yet, activate the lft square layer again and go to adjust, select brightness/contrast and move the brightness slider all the way left (-255) the square should now be black.
Repeat that step on the other Squares layers with different tubes if you wish.
Activate the Dots Brush layer and go to adjust, select brightness/contrast and move the brightness slider all the way left (-255) the dots will now be black.
Activate the wordart layer, I did the same as with the frame layers here using both colours. (see mine for example). Add the same gradient glow you used before on this layer. No dropshadow.
Activate your top layer, go to your preset shape tool from the tool palette and choose flower 7 shape which should be included with your psp program, I used the same pink & blue colours to draw out some flowers, not too big, you can also switch the forground/background colours to make some flowers the alternate colours. I also added a few smaller white flowers, just change the foreground to null and background to white for these. Give all the flower layers the same gradient glow we used before.
Ok now activate the very bottom layer, add a new raster layer, Go to your colour palette and choose 2 colours we used in the circl layer back at the start, (#c13d52) & (#eeb7bc), now click the foreground tab and choose gradient from the pop up box, scroll the tiles till you find foreground/background tile, select this and use the folowing settings :-
Linear Style .... Angle - 145 ... Repeats - 8.
Click ok, go to layers, load mask from disc, then find the mask you choose at the start (Designs by Ali Mask #26), Make sure the following settings are set...
Fit to canvas - checked .... Source luminace - checked .... Invert transparency - unchecked .... Hide Mask - checked. Click ok.
I moved the mask to the left of my canvas then duplicated it and mirrored.
Crop and resize now if you wish to.
Add your name, artist info and copyright info.
Save as jpeg or .png. and we're done lol.
Thanks for trying my tutorial and i hope you enjoyed it would love to see your results, hippiedaze@hotmail.com
Posted by hippiedaze at 02:01 0 comments
Labels: Tutorials - FTU
Sunday, 24 May 2009
Inperfection
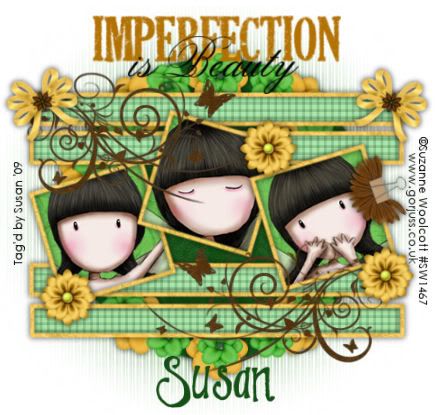
This tutorial was written on May 8th 2009 by Susan aka Hippiedaze.
The idea for this tag is off my own head lol and any resemblance is purely coincidence.
General Knowledge of psp is required, tutorial was written in psp 9 but will work in other versions.
Supplies Needed
Tubes of choice - I used the artwork of Suzanne Woolcott and you need a proper license to use her tubes, visit gorjuss.com - HERE .
FTU Scrap Kit ' FM Samjiva' which you can get by visiting Fantasy Moments - HERE .
Template Used - Melissa Template #36 by Melissa @ Melissa's Creations - HERE .
Mask of Choice.
Word Art Used - Wordart #7 by Melissa @ Melissa's Creations - HERE .
Plugin Used - Mura Meister - Copies.
Font of Choice.
(Save mask to your psp folder before you begin and open all other supplies you need)
Lets Get Started
Open the template, hit shift & d on your keyboard,this pastes the template as new image, close the original template. Delete info layer, I resized mine a little at this point, go to image, resize, change width & height to 85%, choose smartsize and make sure resize all layers is checked, click ok. Go to layers, add new raster layer, grab floodfill tool and fill the new layer with white, go to image, select canvas size and choose 500x500, click ok. this gives you more room to work.
Ok this ones really easy, all template layers (except the 3 squares layers) require the same following step :-
go to selcetions, select all, select float, select defloat then paste a paper of choice from the kit as a new layer, go to selections and select invert then hit delete on your keyboard, select none, this pastes the paper as a new layer so you can delete the orginial layers as you go through each layer. Give each of the new frame layers a dropshadow.
Activate one of the squares layers, grab your magic wand and click on the white area, paste a tube of choice as a new layer, resize a little if you need to, make it fit nice inside the frame, when happy with placement go to selections and select invert then hit delete on your keyboard, select none.
Repeat this with the other 2 squares layers with different tubes as long as they are the same artist. Now back on the square layer, selections, select all, select float, select defloat then paste a paper of choice, go to selections and select invert then hit delete on the keyboard, select none. No need for a dropshadow on this layer.
Repeat for the other 2 square layers. Now you can delete all the original square layers.
Take a flower element of choice from the kit and paste in the centre of your canvas, resize down around 20% smartsize, all layers UNCHECKED, now go to effects and select mura meister, copies, select encircle,change the number to 10 and change shift x&y to 60, leave all other settings the way they are, click ok. Move this layer down to just above the main circle layer.
(p.s if your using different size for your image from mine then you might have to play with the settings a bit to get the circle fitting).
Now take another flower from the kit, paste as a new layer, resize to around 15% smartsize, click ok and place in centre of your canvas, go to mura meister again, select encircle but this time change the number to 16, shift x&y should stay at 60. Place this layer just above the first flower layer (see mine).
Click on top layer of your canvas now and paste the wordart as a new layer, resize if needed, i resized mine by 80% smartsize, place at top of your tag or where you like it, go to adjust, select hue/saturation/lightness, select colourise and choose a colour that matches your tubes. I did this with both wordart layers.
Click on bottom white layer now, paste another paper from the kit as a new layer, go to layers, select load mask from disc and find the mask you choose at the start, check the following settings :-
Fit to canvas - checked .... Source luminace - checked .... Invert transparency - unchecked ....Hide Mask - checked, click ok.
Click back to your top layer now and add a few elements of your choice around your tag, resize elements as needed and add a dropshadow to each layer.
Do any cropping and resize now if you wish to.
Add your name, Add artist info and copyright info.
Save as jpeg or .png. and we're done lol.
Thanks for trying my tutorial and i hope you enjoyed it would love to see your results, hippiedaze@hotmail.com
Posted by hippiedaze at 01:09 0 comments
Labels: Tutorials - FTU
Girls Thing
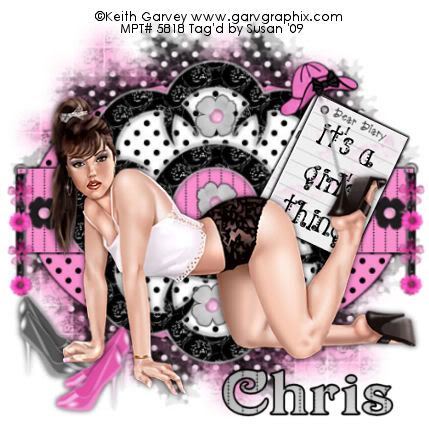
This tutorial was written on May 22nd 2009 by Susan aka Hippiedaze.
The idea for this tag is off my own head lol and any resemblance is purely coincidence.
General Knowledge of psp is required, tutorial was written in psp 9 but will work in other versions.
Supplies Needed
Tubes of Choice I used the artwork of Keith Garvey, you must have a proper license to use his work please visit MPT - mypsptubes - HERE .
PTU Scrap Kit 'It's A Girl Thing' by Chris @ Katelynn's Designs, you can purchase the kit from - HERE .
Template Used - Template #3 by Sylly Creationz - HERE .
Mask Used - WSL Mask #78 & WSL Mask #84 by Chelle @ Wee Scots Lass Creations - HERE .
Plugin Used - Eye Candy 4000, Gradient Glow. Font of Choice.
(Open all supplies and save mask to psp folder before you begin)
Lets Get Started
Open the template, hit shift & d on your keyboard,this pastes the template as new image, close the original template. I resized all layers by 80% smart size at this point. ( optional) . Delete info layer, activate the bottom white layer, go to image, select canvas size, choose 500x500, click ok, if theres any transparent canvas showing grab your floodfill tool and fill white. This gives you a little room to work.
Activate the layer named Black Oval, go to selections, select all, select float, select defloat then paste paper of choice, resize it a bit as papers are quite big then go to selections, invert, hit delete on the keyboard and then select none. Now you can delete the original layer.
Repeat this step with all the other template layers, Use different papers of choice for each layer & delete the original layers as you work.
Activate the Black Oval layer you created, go to Effects, select eye candy 4000, gradient Glow and use the following settings :-
Glow Width - 3.00 .... Soft Corners - 25 .... Overall Opacitiy - 100 .... Colour - Black .
Activate the Rectangle layer you created and repeat the gradient glow on this layer & then activate the pink shape layer you created, add the gradient glow to this layer but change the colour to white & add a small dropshadow.
Activate the bottom white layer, paste a paper of choice from the kit as a new layer, go to layers, select load mask from disc then find the first mask we loaded at the start (WSL Mask #78) Make sure the following settings are set...
Fit to canvas - checked .... Source luminace - checked .... Invert transparency - unchecked Hide Mask - checked.
Go to layers, merge group & resize to suit your tag using the deform tool if needed.
Now activate the bottom white layer once, paste a different paper of choice then repeat the mask settings once more changing the mask to the 2nd mask we loaded at the start (WSL Mask #84). Merge group then resize how you want it.
Activate your top layer of canvas now and paste your tube as a new layer, resize a little if needed and place where you like it, add a dropshadow.
Take a 'dear diary' element from the kit and open as a new image in your psp workspace, resize quite smal then grab your text tool from the tool palette, select foreground colour to null and background colour to black, choose a font and type out any words you want on your diary sheet, when happy, convert to raster layer, go to layers and merge visible, now take the merged layer and paste on your tag, resize more if needed, using the deform tool rotate your paper a little to the right, remember to sharpen, duplicate this layer and grab deform tool again to move it very slighty so it looks like you have 2 pages, (see mine). Add the gradient glow to these 2 layers using the same settings as before with colour black.
Add any elements you wish and decorate your tag, resize elements as needed and add a dropshadow.
Crop or resize your tag if you want to to your preffered size in the usual way. I resized at start but cropped a little at this point.
Add you name, artist info & copyright info.
Save as jpeg or .png. and we're done lol.
Thanks for trying my tutorial and i hope you enjoyed it would love to see your results, hippiedaze@hotmail.com
Posted by hippiedaze at 01:00 0 comments
Labels: Tutorials - PTU
Saturday, 23 May 2009
Rock Revolution Chick

This tutorial was written on May 8th 2009 by Susan aka Hippiedaze.
The idea for this tag is off my own head lol and any resemblance is purely coincidence.
General Knowledge of psp is required, tutorial was written in psp 9 but will work in other versions.
Supplies Needed
Tubes of Choice
I used the artwork of Martin Abel, you must have a proper license to use his work please visit CILM - HERE .
FTU Scrap Kit ' Rock Revolution' by Yvette @ Misfits Scrapz - HERE .
Template Used - Template #1 from Template Bundle by Caitlin @ Cupcake Sprinkles - HERE . Mask of Choice. ( I've had this mask a while and can't remember the link so can't share it, sorry) .
Font of Choice.
Plugin Used - Eye Candy 4000, Gradient Glow.
(Open all supplies and save your chosen mask to psp folder before you begin)
Lets Get Started
Open the template, hit shift & d on your keyboard,this pastes the template as new image, close the original template. I resized all layers by 95% smart size but this is optional depending what size you are comfy working with. Delete the info layer. Go to layers, add new raster layer, grab floodfill tool and floodfill the new layer white, move this layer all the way to bottom of your canvas, now go to image, select canvas size, choose 500x500, if theres any transparent image showing floodfill white.
Activate the Circle 1 layer, go to selections, select all, select float, select defloat (you should now have marching ants around the circle) then paste a paper of your choice as a new layer, go to selections, select invert then hit delete on your keyboard, select none & delete the original circle layer.
Repeat that step on the Circle 2 layer and the 3 rectangle layers, use different papers for each layer and delete the original layers as you go along.
Activate one of the Frame layers, I opted to leave these white but you can change them how you wish by doing the above step with a paper or even floodfill with different colour . I did all 3 frame layers the same.
Still on a frame layer, go to effects, select eye candy gradient 4000, gradient glow and use the following settings :-
Glow Width - 3.00 .... Soft Corners - 25 .... Overall Opacitiy - 100 .... Colour - Black .... Setting - Fat.
Go through the other template layers you created (except the Circle 2 layer) and add the same gradient glow to each layer.
I left the staples as they were, you can change if you wish.
Now paste your tube as a new layer, make sure its on the top layer lol, resize it if needed and place in the middle, dont worry if theres a bit hanging over the bottom we will post an element to cover that . Dropshadow your tube.
Now take the Rock Revolution label element from the kit, paste as a new layer above your tube layer so its covering the bottom, resize the label a bit so it fits nicely. I added the gradient glow to this but moved the 2nd slider to the left a bit so it wasnt so bold as the others.
Pick a wordart from the kit and paste as a new layer, resize a bit, remember to sharpen elements if you resize by a lot, place this at the top right of your canvas.
Now Activate the bottom white layer, paste a paper from the kit, resize a bit, go to layers, load mask from disc, then find the mask you chose at the start. Make sure the following settings are set...
Fit to canvas - checked .... Source luminace - checked .... Invert transparency - unchecked Hide Mask - checked. Go to layers, merge group & resize to suit your tag using the deform tool if needed till you get it how you want it.
Back on your top layer, time to decorate with any elements you want to use from the kit, resize, sharpen, and place where you like them, add small dropshadow to each layer.
Crop or resize your tag if you want to to your prefered size in the usual way. I resized at start but cropped a little at this point.
Add you name, artist info & copyright info.
Save as jpeg or .png. and we're done lol.
Thanks for trying my tutorial and i hope you enjoyed it would love to see your results, hippiedaze@hotmail.com
Posted by hippiedaze at 03:09 0 comments
Labels: Tutorials - FTU
Weekend & Thank You's
Good Morning everyone,
Yeaaa its the weekend and after the week i had with the pc i think i deserve some time out tonight hehe, will be here most of today inbetween housework and stuff so hope to post a couple of tuts for you all before i go out later.
I also wanted to say Thank You all so much for all the comments on my tuts, Im truly overwhelmed at how many people are stopping by to have a peek :D its been awesome hearing from you and is fab to see so many blogs featuring my tuts, i never thought they would be so popular lol.
I have accepted an invitation to join the CT team over at Katelynns Designs, so im looking forward to getting started there very soon :D and a big thank you to Chris for the invite...
Time for me to get a tut or 2 on the go lol so hope you all have a wonderful weekend and take care
hugs Susan
Posted by hippiedaze at 01:43 0 comments
Labels: General
Chickz Rock

This tutorial was written on May 7th 2009 by Susan aka Hippiedaze.
The idea for this tag is off my own head lol and any resemblance is purely coincidence.
General Knowledge of psp is required, tutorial was written in psp 9 but will work in other versions.
Supplies Needed
Tube of Choice. I used the artwork of Elias Chatzoudis, you must have a proper license to use his work please visit MPT - mypsptubes - HERE .
FTU Scrap Kit 'You Rock' by Bea @ Bea Creations - HERE .
Template Used - Template #74 by Beth @ Blissfully Beth - HERE .
Mask Used - WSL Mask #84 by Chelle @ Wee Scots Lass Creations - HERE .
Font of Choice .
Plugin - Eye Candy 4000, Gradient Glow.
(save mask to psp folder before you start)
Lets Get Started ...
Open your template, hit shift & d on the keyboard to duplicate, now you can close the original template. Delete info layer. I resized here, go to image, resize and make sure resize all layers is checked, resize by around 80%. You can always crop & resize finished tag later on .
Activate Triple Squares Bottom layer, go to selections, select all, select float, select defloat and paste paper of choice as a new layer, resize it till your happy with it then selections, invert & hit delete on the keyboard, selections, select none. You can delete the original layer now.
Activate Triple Squares Top layer and repeat the step above.
Now do the same step on all 3 Black Line layers, use different papers for each layer if you wish. Remember to delete the original layers as you go along. Go to effects, select eye candy 4000, gradient glow and add the following gradient glow to all the layers you just created :-
Glow Width - 3.00 .... Soft Corners - 25 .... Overall Opacity - 100 .... Settings - Fat .... Colour - White.
Now add a small dropshadow to each layer.
Activate the Dashed Lines layer, go to adjust, select brightness/contrast and move the brightness slider all the way to the right (255) the lines will now be white. Add a small dropshadow to this layer.
Activate one of the Circle Frame layers, grab your magic wand and click in the middle of the circle, go to selections, select modify, select expand and expand by 1, paste a paper of choice as a new layer, go to selections, select invert then hit delete on your keyboard.
Repeat this with the 2nd circle frame layer.
Now activate the Circle frame layer again and add the gradient glow we used before, do this on 2nd circle frame layer too.
Activate the Wordart layer, I simply add a small dropshadow to this layer. Now click on the bottom white layer, paste a paper from the kit, go to layers, load mask from disk and find the mask we loaded at the start (WSL #84). Make sure the following settings are set...
Fit to canvas - checked .... Source luminace - checked .... Invert transparency - unchecked .... Hide Mask - checked, then go to layers, merge group.
Click back to your top layer and paste your tube as a new layer, resize if you want to, place where liked and add a dropshadow.
Add any other elements you want to from the kit and place where liked, dropshadow the elements.
Crop or resize now if you want to. My finished tags are around 500x500.
Add your name, artist info and copyright info.
Save as jpeg or .png. and we're done i think lol.
Thanks for trying my tutorial and i hope you enjoyed it would love to see your results, hippiedaze@hotmail.com
Posted by hippiedaze at 01:39 0 comments
Labels: Tutorials - FTU
Friday, 22 May 2009
Cute Bug Luv
This tutorial was written on May 21st 2009 by Susan aka Hippiedaze.
The idea for this tag is off my own head lol and any resemblance is purely coincidence.
General Knowledge of psp is required, tutorial was written in psp 9 but will work in other versions.
Supplies Needed
Tubes of Choice, I used the artwork of Elias Chatzoudis, you must have a proper license to use his work please visit MPT - mypsptubes HERE .
PTU Scrap Kit 'Ladybugluv' by Valerie @ BabyV Dezign, you can purchase this kit by visiting P4S - HERE .
Template Used - MC Template #51 by Melissa @ Melissa's Creationz - HERE .
Mask Used - WSL Mask #79 by Chelle @ Wee Scots Lass Creations - HERE .
Plugin Used - Eye Candy 4000, Gradient Glow.
Font of Choice.
(open all supplies and place mask into your psp folder before we start)
Lets Get Started
Open the template, hit shift & d on your keyboard, this pastes the template as new image, close the original template. Delete info layer, go to image, select resize, choose 85% smartsize and make sure resize all layers is checked, activate bottom white layer then go to image and select canvas size, choose 500x500, click ok, this will give you some extra room to work and we can crop later.
Activate the Bottom Rectangle layer, selections, select all, select float, select defloat & paste a paper from the kit as a new layer, resize to your liking, once happy hit delete on your keyboard then go to selections and select none. Delete the original layer now.
Repeat the step above for the layers named Circle, Rectangle & also the Narrow Rectangle. Use different papers from the kit for each layer and delete original layers as you go along.
I left all Frame layers Black but depending on your tube and colours you might want to change the colour, to do this step go to selections, select all, select float, select defloat then go to layers and select add new raster layer then go to your tool palette and grab your floodfill tool then on your foreground tab in the colour palette choose a colour of your choice, go to your canvas and click inside the marching ants to fill frame with choosen colour. Add a dropshadow if you wish.
Activate the Squares layer, selections, select all, select float, select defloat & paste a paper from the kit as a new layer, resize to your liking, once happy hit delete on your keyboard then go to selections and select none. Delete the original layer now.
Activate the Squares Frame layer, I left these white and added a gradient glow, to do this go to effects select eye candy 400, gradient glow and use the following settings :-
Glow Width - 3.00 .... Soft Corners - 25 .... Overall Opacitiy - 100 .... Colour - Black.
If you have coloured the other frame layers then repeat the step you did for that to make this layer the same.
Activate the bottom white layer now, go to layers, add new raster layer, grab your floodfill tool and choose black as your foreground colour then fill the new layer with black, go to layers, load mask from disc, then find the first mask we loaded at the start (WSL Mask #79) Make sure the following settings are set...
Fit to canvas - checked .... Source luminace - checked .... Invert transparency - unchecked Hide Mask - checked. Click ok. go to layers, merge group and then use your deform tool if needed to stretch it out & shape it to suit your template. (see mine).
Activate your top layer and paste your tube as a new layer, resize as needed, remember to resize tubes bicubic and not smartsize, place tube where it looks good, add a dropshadow.
Add some elements now, remember to resize them (smartsize) to your liking and place where you want around your tag. I also added the gradient glow to a few elements.
Crop or resize your tag if you want to to your preffered size in the usual way. I resized at start but cropped a little at this point.
Add your name, artist info & copyright info.
Save as jpeg or .png. and we're done lol.
Thanks for trying my tutorial and i hope you enjoyed it would love to see your results, hippiedaze@hotmail.com
Posted by hippiedaze at 09:06 0 comments
Labels: Tutorials - PTU
Sweet Watermelon
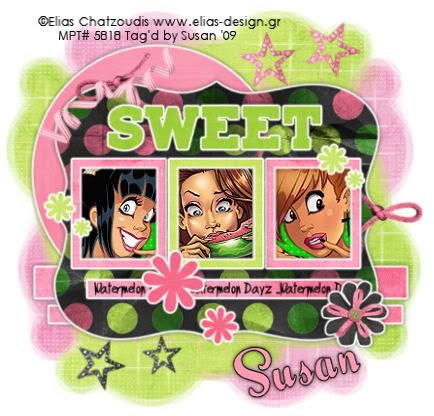
This tutorial was written on May 7th 2009 by Susan aka Hippiedaze.
The idea for this tag is off my own head and any resemblance is purely coincidence.
General Knowledge of psp is required, tutorial was written in psp 9 but will work in other versions.
Supplies Needed
Tubes of Choice I used the artwork of Elias Chatzoudis, you must have a proper license to use his work please visit MPT - mypsptubes - HERE .
FTU Scrap Kit 'May Goodie Train' collab part by Pimp'd Designz - HERE .
Template Used - Teresa's Template #10 by Teresa - I'm sorry the blog has been removed so until i hear back from Teressa I cant supply a link, sorry.
Mask Used - WSL Mask #99 by Chelle @ Wee Scots Lass Creations - HERE .
Font of Choice.
Effects Used - Textured Effects, Weave.
Plugin - Eye Candy 4000, Gradient Glow.
(save mask to psp folder before you start)
Lets Begin...
Open your template, hit shift & d on the keyboard to duplicate, now you can close the original template. Delete info layer. I resized here, go to image, resize and make sure resize all layers is checked, resize by around 65%. (This depends on the size you like your tags).
Click on the white background layer, go to image, canvas size and resize to 500x500, floodfill white, this gives us more room to work and you can crop & resize finished tag later on (my sizes are just a guide and you can resize to your liking) .
Click on the circle layer, go to selections, select all, select float, select defloat and paste paper of choice as a new layer, resize it till your happy with it then selections, invert & hit delete on the keyboard, selections, select none.
Repeat the step on the Strip1, Strip 2 & Strip 3 layers, I used the same papers for these. Repeat again on the Bracket layer, Sweet Wordart layer, Flower layers & finally the Frame 1,2 & 3 layers using different papers of your choice.
On all the above layers add eye candy, gradient glow with the following settings :-
Glow Width - 3.00 .... Soft Corners - 25 .... Overall Opacity - 100 ... Settings - Fat .... Colour - White.
Now add a small dropshadow to all these layers.
Activate the Photo Mat layer, grab your magic wand from the tool palette and click one of the grey squares, paste your tube part as a new layer and resize as needed, place where you like it inside the marching ants then go to selections, select invert then hit delete on your keyboard, select none.
Do this with each square remembering to click back on the photo mat layer before selecting with magic wand. Now activate the photo mat layer one more time, go to adjust, select hue/saturation/lightness, select colourise and colour to match your tubes.
Now go to effects, select textured effects, select weave and use the following settings :-
Gap Size - 2 .... Width - 5 .... Opacity - 9 .... Weave Colour - to match your tube .... Gap Colour - same as weave colour .... Fill Gaps - Checked.
Now click on the bottom white layer, paste a paper from the kit, go to layers, load mask from disk and find the mask we loaded at the start (WSL #99). Make sure the following settings are set...
Fit to canvas - checked .... Source luminace - checked Invert transparency - unchecked .... Hide Mask - checked go to layers, merge group.
Repeat the mask step with a different paper, then go to image, select mirror.
Now click back to your top layer and add any elements you wish from the kit, resize if needed and dropshadow, i also added the gradient glow to my flower element.
Words I added in the rectangle bar is optional.
Now crop or resize if you want to in the usual way.
Add your name, artist info and copyright info.
Save as jpeg or .png. and we're done i think lol.
Thanks for trying my tutorial and i hope you enjoyed it would love to see your results, hippiedaze@hotmail.com
Posted by hippiedaze at 08:21 0 comments
Labels: Tutorials - FTU
