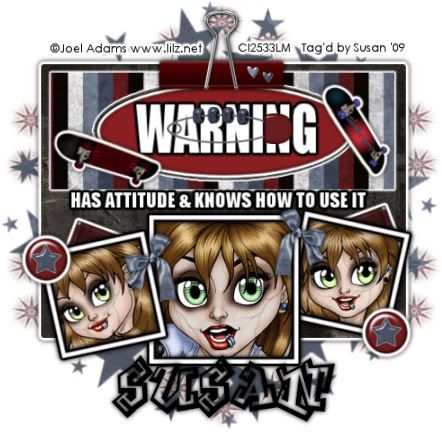
This tutorial was written on April 23rd 2009 by Susan aka Hippiedaze.
My 4th attempt at tutorial writing so I'm still new to this so please be kind lol.
The idea for this tag is off my own head lol and any resemblance is purely coincidence.
General Knowledge of psp is required, tutorial was written in psp 9 but will work in other versions.
Supplies Needed
Tube of Choice I used the artwork of Joel Adams, you must have a proper license to use his work please visit CILM HERE
FTU Scrapkit ' Ska8ter Girl' by Simone @ Scrappybitoffun HERE
Template #30 by Melissa @ Melissas Creations HERE
2 Masks used - Sophisticated Simone Mask #14 & #22 HERE
Font of Choice.
Eye Candy Gradient Glow (optional)
Load Masks to psp folder before you start.
Lets Begin
Open the template, hit shift & d on your keyboard,this pastes the template as new image, close the original template. Delete info layer, add a new raster layer and floodfill with white then send to bottom, we can resize later
Activate layer 1 on the template, grab your magic wand and click inside the white area, get paper 15 from the kit and paste as a new layer, go to selections, select invert, then hit delete on your keyboard to remove excess, now select none. Add Effects - Eye Candy - Gradient Glow with the following settings ...
Glow Width - 3.00 Soft Corners - 25 Overall Opacitiy - 100 Colour - White
Add a small dropshadow to this layer.
Still on layer 1, Grab your magic wand and click inside the darker grey rectangle area, get paper 7 from kit and paste as a new layer, selections invert then hit delete on your keyboard and select none. Apply the gradient glow to this layer, same settings. Add dropshadow.
Activate the wordart layer, selections, select all, select float, select defloat then i floodfilled white, you can change colour to suit your tube if you wish, select none. Apply the gradient glow to this layer, same settings but this time change the colour to black.
Activate the right square background layer, click inside with magic wand, paste one of your chosen tubes as a new layer, you may need to resize a bit to get her fitting in the frame, once happy with position, selections, select invert then hit delete on the keyboard, selct none.
Do this with your 2 other tubes on the middle & left square background layers, if your tubes are smaller than the frames then colourise the square background layers to suit
Select the right square frame layer now and go to adjust, brightness/contrast, move the slider on the brightness to 255, this will change frame to white, you can use any colour you wish tho
Do this for the other 2 frame layers and add the gradient glow with same settings as before, colour black, on all 3 frame layers. Add a small dropshadow to all 3 frames too.
Ok lets go to the bottom white layer, paste a paper of choice from the kit as a new layer, layers, load mask from disk and find sophisticated simone mask #14 which we loaded earlier, settings should be as follows ...
Fit to canvas - checked Source luminace - checked Invert transparency - unchecked Hide Mask - checked go to layers, merge group & you can use the deform tool to resize to suit your tag.
Now paste another paper of choice from the kit, layers, load mask from disk, this time load mask #22, repeat same settings for this layer. go to layers, merge group & you can use the deform tool to resize to suit your tag.
Time to add elements and decorate your tag, make sure your on the top layer, Choose a few elements, resize as needed and place where you like on the tag, mines just a reference lol, be creative.
Add a small dropshadow to your elements.
Time to crop & resize your tag if you wish to, I usually resize to near 500x500.
Add your name, I used a graffitti font for boldness lol
Add artist info & copyright.
Save as jpeg or .png. and we're done lol.
Thanks for trying my tutorial and i hope you enjoyed it would love to see your results, hippiedaze@hotmail.com


0 comments:
Post a Comment