
This tutorial was written on June 8th 2009 by Susan aka Hippiedaze.
The idea for this tag is off my own head lol and any resemblance is purely coincidence.
General Knowledge of psp is required, tutorial was written in psp 9 but will work in other versions.
Supplies Needed
4 Tubes of Choice by the same artist, I used the artwork of Keith Garvey, you must have a proper license to use his work please visit MPT, mypsptubes - HERE .
FTU Scrap Kit ' Rock Kit' by Sara @ Sara's Scraps - HERE .
Template Used - Template #2 by Lori @ Wacky Scraps - HERE .
Mask Used - WSL Mask #89 by Chelle @ Wee Scots Lass Creations - HERE .
(Open all supplies and save mask to psp folder before you begin)
Lets Get Started
Open the template, hit shift & d on your keyboard,this pastes the template as new image, close the original template. Delete the info layer.
Go to image and choose resize, select width & height to 70%, smartsize checked and make sure the tab resize all layers is checked, click ok. Whether you resize here or at the end is up to you, i just find it easiest working this size.
Activate the bottom oval layer, go to selections, select all , select float, select defloat then choose a paper from the kit and paste as a new layer, go to selections again and select invert then hit delete on your keyboard, back to selections, select none, delete the original oval layer.
Repeat that step with the layers named large middle rectangle and also the top rectangle, use different papers for each layer and delete the original layers as you go along, on the middle rectangle i used a light grey paper then went to adjust, choose hue/saturation/lightness and then choose colourise, i changed colour to a light blue but this is up to you.
Go to effects, choose eye candy 4000, gradient glow with the following settings :-
Glow Width - 3.00 .... Soft Corners - 25 .... Overall Opacity - 100 .... Colour - Black. click ok.
Add that glow to both rectangle layers you created.
Activate the 1st photo mat layer, grab your magic wand from the tool palette and click the black area inside the frame so you should have the marching ants blinking around the square, take one of your tubes and paste as a new layer, i didnt resize mine on this one but you can if needed, place how you like it inside the frame then go to selections and select invert then hit delete on your keyboard, selections again and select none.
Work your way through the other 3 photo mat layers repeating the step above, use different tubes from the same artist, remember to click on the original photo mat layers before selecting with your magic wand.
Now activate the 1st photo layer again and repeat the very first step of pasting a paper of choice, do this with the other 3 photo layers also then delete the original layers.
Activate the 1st photo frame layer, go to adjust, select brightness/contrast and move the brightness slider all the way to the left (-255) this will change the frame to black, add a small dropshadow to the frame, now do this step with the other 3 photo frame layers.
I used that same step on the Garv wordart layer then went to effects, choose eye candy 4000, gradient glow with the following settings :-
Glow Width - 3.00 .... Soft Corners - 25 .... Overall Opacity - 100 .... Colour - White. click ok.
Activate the Rock wordart layer and leave this white, go to effects and choose the gradient glow again, same settings but change the colour to Black, click ok.
Take the element Frame 1 from the kit and paste as a new layer on your canvas, resize down as needed till it sits nicely around your tag how you like it, move this layer down to just above the white background layer, now go to effects, select eye candy 4000, gradient glow and use the following settings :-
Glow Width - 6.00 .... Soft Corners - 25 .... Overall Opacity - 100 .... Colour - White. click ok.
Repeat the gradient glow but change the width to 4.00 and colour to black this time.
Activate your bottom white layer, paste a paper of your choice as a new layer, go to layers, select load mask from disc and choose the mask you saved at the start (WSL Mask #89) and use the following settings :-
Fit to canvas - checked .... Source luminace - checked .... Invert transparency - unchecked .... Hide Mask - checked, click ok, go to layers, merge group.
Grab your deform tool and pull mask in from one side to around the middle then move it to the left a bit, go to layers, select duplicate, go to image, select mirror so you have a mask layer on both sides.
Back on your top layer, add any elements you want from the kit, resize each element as needed and place around your tag, add a dropshadow or use the gradient glow on some elements, the choice is yours here.
Now crop or resize your tag in the usual way if you want to.
Add your name, artist info and copyright info.
Save as jpeg or .png.
and we're done i think lol.
Thanks for trying my tutorial  and i hope you enjoyed it
would love to see your results,
hippiedaze@hotmail.com
Friday, 19 June 2009
Born To Rock
Thursday, 18 June 2009
Template 016
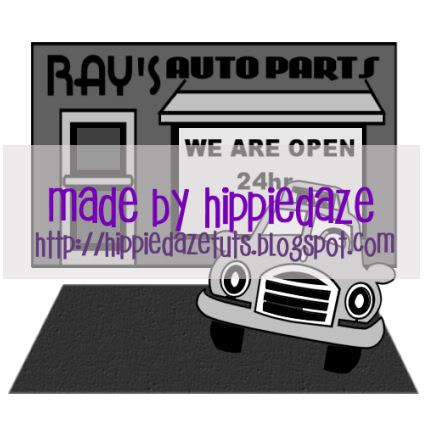
Well this template was fun and hope some of you can use it,
have posted a tut below using it as an example and the download link is posted under the review for you all...
Download - HERE
Auto's Shop

This tutorial was written on June 6th 2009 by Susan aka Hippiedaze.
The idea for this tag is off my own head lol and any resemblance is purely coincidence.
General Knowledge of psp is required, tutorial was written in psp 9 but will work in other versions.
Supplies Needed
Tubes of Choice I used the artwork of Keith Garvey, you must have a proper license to use his work please visit MPT - mypsptubes - HERE .
No Scrap Kit Used.
Template Used - Hippiedaze Template #016 by Me which you can d/l from 4shared - HERE .
Mask Used - WSL Mask #238 by Chelle @ Wee Scots Lass Creations - HERE .
Effects Used - Textured Effects , Blinds.
Plugin Used - Eye Candy 4000, Gradient Glow.
Font of Choice.
(save mask to psp folder before you begin)
Lets Get Started
Open the template, hit shift & d on your keyboard,this pastes the template as new image, close the original template. Go to image, select resize, resize by 90% smartsize and make sure resize all layers is checked, click ok. Activate the bottom white layer then go to image again, select canvas size and choose 500x500, this will give you a little extra room to work.
Activate the Road layer, go to adjust, choose hue/saturation/lightness, select colourise, choose a colour that matches your tube, click ok.
Grab your pen tool, choose dashed line, width 5.00, mitre limit 15.00, colour white & draw a straight line from one end of the road layer to the other end, if you hold shft key down while drawing the line it will give you a perfect straight line, go to layers, select duplicate, move the duplicated layer up a little so you have 2 white lines on the road, you may have to erase a little of the duplicate layer at both sides to fit nicely.
For the backing layer I have included a layer with 'bricks effect' if you want to use that or theres a plain backing layer to use as you wish, if using the bricks layer, unhide it and go to adjust, select hue/saturation/lightness and then choose colourise, select a colour of choice that matches the tube, click ok.
Activate the Canopy Top layer, grab your floodfill tool, click your foreground tab and in the box that opens choose your colour then tick the textures box in the materials properties and choose concrete texture with default settings, click ok, now click on the top canopy to fill with textured colour.
Repeat that step for the Canopy thin layer & also the Door Outline layer.
Activate the Door Windows layer, grab your floodfill tool and then choose a colour that matches your tube in the foreground tab, this time make sure you uncheck the textures box so the colour will fill solid, click inside both window parts on the door then go to effect, select textured effects, blinds and use the following settings :-
Width - 8 .... Opacity - 49 .... Colour - White .... Horizontal - Unchecked .... Light from Top - Checked, click ok.
Activate the Front Window layer and add the same blinds effect but change the width to 10.
Activate the Backing Outline layer, go to effects, select eye candy 4000, gradient glow and use the following settings :-
Glow Width - 5.00 .... Soft Corners - 25 .... Overall Opacitiy - 100 .... Colour - White . click ok.
Add the same gradient glow to both wordart layers.
Back to the backing outline layer, grab your magic wand and click inside each letter of the 'Ray's Auto Part's' so you have marching ants around all the letters, go to effects, select tectured effects, blinds and use the following settings :-
Width - 2 .... Opacity - 49 .... Colour - Red .... Horizontal - Unchecked .... Light from Top - Checked, click ok.
Activate the Taxi layer, grab you colour to target brush from the tool palette and in your foreground colour tag choose a colour of your choice, drag your mouse over the car to change to target colour, now grab your floodfill tool and go to foreground tab once more, tick the texture box this time, choose the texture named sidewall (or choose your own texture if you prefer), click ok. Now click the Taxi layer and you should have the car filled with colour and textured effect.
Add a dropshadow to the Taxi layer.
Activate the car windows layer, grab your floodfill tool, go to foreground colour tab and choose gradient from the box that opens, choose a silver gradient and click ok, now click in the window bits layer and fill with gradient, go to layer properties and reduce the opacity down to around 75, click ok.
Activate the bottom white layer, go to layers, select add new raster layer and fill with a colour of your choice, i used red to blend with the rest of my tag but this is up to you, go to layers, select load mask from disc and find the mask you saved at the start (WSL Mask #238) and make sure you have the following settings checked :-
Fit to canvas - checked .... Source luminace - checked .... Invert transparency - checked
Hide Mask - checked. Click ok.
Go to layers, merge group & resize to suit your tag using the deform tool if needed till you get it how you want it.
Back to your top layer & paste your tube as a new layer, resize as needed, remember resize bicubic and place where you want it, add a dropshadow.
There was no outside elements used in this tag but i did add a wire mesh effect to my front window and a couple of tyre shapes (theyre not too hot lol) but decorate your tag any way you wish to.
Crop or resize your tag now if you wish.
Add you name, artist info and copyright info.
Save as jpeg or .png.
and we're done lol.
Thanks for trying my tutorial and i hope you enjoyed it
would love to see your results,
hippiedaze@hotmail.com
Wednesday, 17 June 2009
At The Fair
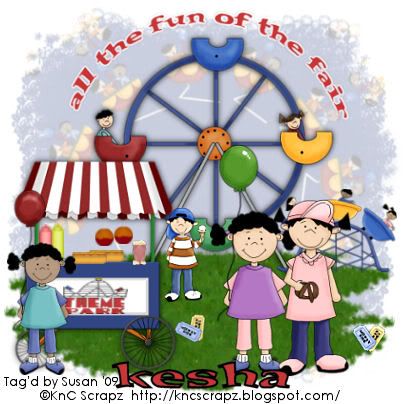
This tutorial was written on 17th June 2009 by Susan aka Hippiedaze.
The idea for this tag is off my own head lol and any resemblance is purely coincidence.
General Knowledge of psp is required, tutorial was written in psp 9 but will work in other versions.
Supplies Needed
PTU Scrap Kit - 'Kiddie Karnival' by Kesha @ KnC Scrapz, you can purchase this awesome fun kit from Scrap Heaven Boutique - HERE .
No Template Used.
PSP Standard tube - Lawn, this comes within the psp programme.
Mask Used WSL Mask #282 by Chelle @ Wee Scots Lass Creations - HERE .
No other effects or Plugins needed.
(open mask and save to your psp folder before you begin if you dont already have it)
Lets Get Started...
In your psp workspace go to file, select new and choose 500x500 canvas size, white image, click ok, my sizes are based on what Im comfortable working with but you can choose whatever size you wish therefore resizing maybe different to mine.
Take the Ferris Wheel element from the kit and paste as a new layer on your working canvas, the kit is huge so i resized by quite a lot, go to image and select resize, choose a size to fit with your canvas, elements should be resized smart size, when happy with size click ok then move the ferris wheel up towards the top of your canvas a little (see mine), add a dropshadow to this layer.
Open the psp picture tube tool from the tool bar and find the tube named lawn, paste this as a new layer on your working canvas, I moved mine to the left a little then went to layers and select duplicate, go to image and select mirror then position the grass how you like near the bottom of your canvas, move both layers below the ferris wheel layer.
Take the Roller Coaster element and paste as a new layer, resize as needed and place to the right side of your canvas, I made mine quite small, add the same dropshadow to this layer.
Paste the Vendor Cart as a new layer and resize as needed, position where you want it or see mine as an example, now take the hot dog element, paste as a new layer and resize small again lol, i resized about 10% of the original, sharpen if you need to and place on the vendor cart counter, go to layers, select duplicate and move just a tiny bit lol, place close to the first one, I also used the mustard, ketchup, candy appl and popcorn elements and place them on the counter.
Take the Midway ride ticket element and paste as a new layer, go to image and select resize, resize this by around 10%, sharpen if needed and place on the grass where you want.
Paste the Theme Park wordart as a new layer, go to image and choose resize, again quite small lol, go to adjust, select sharpen and place on the white part of the vendor cart (see mine).
Activate the bottom white layer, paste a paper of choice from the kit as a new layer, resize a bit then go to layers, select load mask from disc and find the mask that you saved at the start (WSL Mask #282 ) use these following settings :-
Fit to canvas - checked .... Source luminace - checked .... Invert transparency - unchecked.... Hide Mask - checked. Click ok, use the deform tool to stretch it out a little if needed.
Activate the top layer of your canvas and choose a few of the little kiddie tubes from the kit and paste each as a new layer, resize each around 10% smartsize and sharpen if needed, place around your tag where you like them.
Grab your eclipse tool from the tool palette, set foreground tab to black and background tab to null in your colour palette then draw out a largish circle on your canvas, do not convert to raster layer yet...
take your text tool and click on the circle, you should see a little half moon shape, choose your words and type out the phrase, make sure text selection is set to floating, before you select none add a new raster layer and move below the floating selection layer then go to selections and select none, delete the circle layer now and your text should be on a curve (see mine as example).
Crop or resize if you wish to now.
Add your name, Add artist info & copyright info.
Save as jpeg or .png. and we're done lol.
Thanks for trying my tutorial and i hope you enjoyed it would love to see your results,
hippiedaze@hotmail.com
Paper Pack 003
Heres another freebie pack of papers for you all, just for fun lol
hope some of you can use them for something and be sure to send me anything you make from them ...
download link is below the preview
enjoy
Download - HERE
Tuesday, 16 June 2009
Star Power
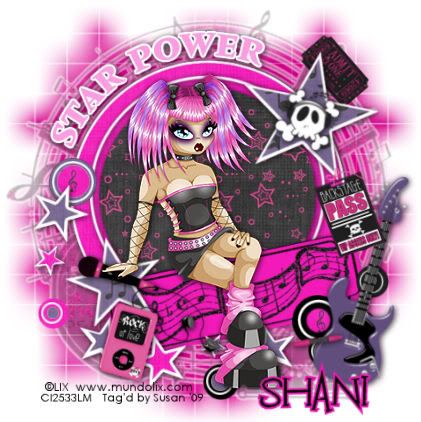
This tutorial was written on June 7th 2009 by Susan aka Hippiedaze.
The idea for this tag is off my own head lol and any resemblance is purely coincidence.
General Knowledge of psp is required, tutorial was written in psp 9 but will work in other versions.
Supplies Needed
Tube of Choice I used the artwork of Lix, you must have a proper license to use this work please visit CILM - HERE
FTU Scrap Kit 'Rock of Love' by Kirstin @ Kirstins Wicked Scrapz - HERE .
Template Used - Template #20 - by BeckyP @ Becky's Creations - HERE
Mask Used - WSL Mask #84 by Chelle @ Wee Scots Lass - HERE
2nd Mask Used - BflyFlby Mask #67 - HERE .
Plugin Used - Eye Candy 4000 - Gradient Glow.
Font of Choice.
(Save Mask into psp folder before you start)
Lets Begin
Open the template, hit shift & d on your keyboard,this pastes the template as new image, close the original template. Delete info layer, go to image, select resize and choose resize by 90% smartsize and make sure the tab that says resize all layers is checked, now click on the bottom white layer and go to image again, select canvas size this time and choose 500x500, click ok.
Activate the layer named large Black Circle, go to selections, select all, select float, select defloat then paste a paper from the kit as a new layer, go to selections again, select invert then hit delete on your keyboard, delete the original layer.
Repeat that step on ALL template layers (there is a lot) bit not the ring layers that are already white, choose different papers for each layer and delete the original layers as you work, add a small dropshadow to each new layer created.
On each ring layer simply add the dropshadow.
Activate the text layer, go to adjust, select brightness/contrast and move the brightness slider along to the right a bit to lighten the wordart, now go to your colour palette and choose a colour that matches your tube as the foreground layer, grab your change to target brush tool and drag your mouse over the text to colourise your choosen colour, go to effects, select eye candy 4000, gradient glow and use the following settings :-
Width 4.00 .... Soft Corners - 25 .... Overall Opacity - 100 .... Colour - White, click ok.
Activate the bottom white layer, go to layers, select add new raster layer, grab your floodfill tool and choose a bright colour to match your tube as the foreground colour then click on the canvas to fill layer with colour, go to layers again, select load mask from disc and find the first mask you saved at the start (WSL Mask#84) use the following settings :-
Fit to canvas - checked .... Source luminace - checked .... Invert transparency - unchecked .... Hide Mask - checked. go to layers, merge group, click ok.
Now paste a paper of choice as a new layer, go to layers, select load mask from disc again and this time find the 2nd mask you saved at the start (Bfly Flby Mask #67) and use the same settings as before on this mask layer, use your deform tool to stretch it to fit to your liking.
Activate the top layer and paste your tube as a new layer, resize as needed and place where you like it, add a dropshadow.
Add any elements you want from the kit and place around your tag, resize each element as needed and add the dropshadow to each layer.
Now crop or resize if you want to.
Add your name,
Add artist info and copyright info.
Save as jpeg or .png.
and we're done i think lol.
Thanks for trying my tutorial and i hope you enjoyed it
would love to see your results,
hippiedaze@hotmail.com
Template 015
Morning All.
Today I have a new template for you all to play with and hope some of you will enjoy this one
I have wrote a tut as an example using it which is posted below
Heres a preview of the template and the download link is below the preview
Enjoy, Hugs Susan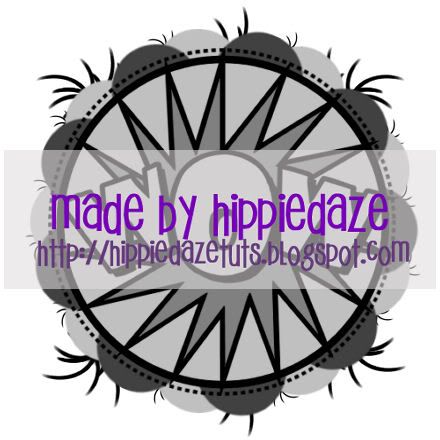
Download - HERE .


