This tutorial was written on May 21st 2009 by Susan aka Hippiedaze.
The idea for this tag is off my own head lol and any resemblance is purely coincidence.
General Knowledge of psp is required, tutorial was written in psp 9 but will work in other versions.
Supplies Needed
Tubes of Choice I used the artwork of Heather Martin, you must have a proper license to use her work please visit MPT, mypsptubes - HERE .
FTU Scrp Kit 'Feel The Music' blogtrain collaboration kit, some designers are only offering free for 1 week so hurry lol - HERE .
Template Used - Template #1 by Kitties Sinful Designs - HERE .
Mask Used - WSL Mask #84 by Chelle @ Wee Scots Lass Creations - HERE .
Plugin Used - Eye Candy 4000 - Gradient Glow.
Effects Used - Textured Effects - Weave.
Font of Choice.
(Open all supplies and save mask to psp folder before you begin)
Lets Get Started
Open the template, hit shift & d on your keyboard,this pastes the template as new image, close the original template. Delete the info layer. I resized all layers by 80% smart size at this point. ( optional) to do this step, go to image, select resize then choose width & height to 80 and make sure the tab that says resize all layers is checked, click ok.
Go to layers, choose select new raster layer, make sure its set to transparent, click ok, grab your flood fill tool and in your colour palette set your foreground colour to white then click on your canvas to fill the layer white, move this layer all the way to the bottom of your canvas (this will be your background layer) now go to image and select canvas size, choose 500x500, click ok, if you have any transparent canvas showing then click to fill white.
Activate the Small Circle layer, go to selections, select all, select float, select defloat (you should now have marching ants around the circle) then paste a paper of your choice as a new layer, go to selections, select invert then hit delete on your keyboard, select none & delete the original circle layer.
Repeat the step above for the Large Circle layer, Rectangle 1, Rectangle 2, Outer Rec Frame & Inner Rec Frame layers, use different papers for each layer and delete the original layers as you go along.
Go to effects, select eye candy 4000, gradient glow and use these following settings to add a gradient glow to all the above layers you just created :-
Glow Width - 3.00 .... Soft Corners - 25 .... Overall Opacitiy - 100 .... Colour - Black. Click ok.
Activate one of the Stars layers, I left all the stars black and added the dots by using the weave effect, you can colourise or fill with a paper of choice, this is up to you, to add the effect go to effects, select textured effects, choose weave and use the following settings :-
Gap - 2 .... Width - 4 .... Opacity - 9 .... Weave Colour - White .... Gap Colour - White .... Fill Gaps - Checked. Click ok.
Activate your bottom white layer, paste a paper of your choice as a new layer, resize a bit, go to layers, load mask from disc, then find the mask you chose at the start( WSL Mask #84). Make sure the following settings are set...
Fit to canvas - checked .... Source luminace - checked .... Invert transparency - unchecked Hide Mask - checked. click ok. Go to layers, merge group & resize to suit your tag using the deform tool if needed till you get it how you want it.
I also repeated the mask layer with a different paper then mirrored and flipped the layer, this is up to you.
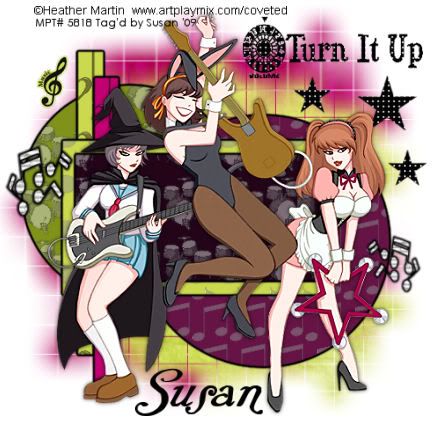
Activate the top canvas layer, Take the Turn it up wordart from the kit and paste as a new layer, resize as needed and move to top right side of your canvas, (see mine), go to effects, select textured effects, choose weave and use the same settings we used on the stars layers.
Add your tube/s as a new layer, resize as needed and place where you like on your canvas, add a dropshadow.
Now decorate with any elements you want to use from the kit, resize, sharpen, and place where you like them, add small dropshadow to each layer. I only used a few elements on this tag.
Crop or resize your tag if you want to to your prefered size in the usual way.
I resized at start but cropped a little at this point.
Add you name, artist info & copyright info.
Save as jpeg or .png. and we're done lol.
Thanks for trying my tutorial and i hope you enjoyed it would love to see your results, hippiedaze@hotmail.com
Thursday, 21 May 2009
Turn It Up
You So Rock
This tutorial was written on May 6th 2009 by Susan aka Hippiedaze.
The idea for this tag is off my own head lol and any resemblance is purely coincidence.
General Knowledge of psp is required, tutorial was written in psp 9 but will work in other versions.
Supplies Needed
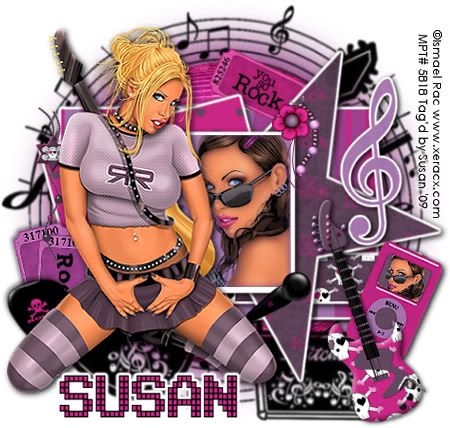
Tube of Choice, I used the artwork of Ismael Rac, you must have a proper license to use his work please visit MPT - mypsptubes HERE .
FTU Scrap Kit 'You Rock by Bea @ Bea's Creations - HERE .
Template Used - Template #43 by Sara @ Sara's Scraps - HERE .
Mask Used - Bfly Fbly Mask #67 - HERE .
Font of Choice. Plugin Used - Eye Candy 4000 - Gradient Glow.
2nd Plugin Used - Xero - Porcelain.
(open all supplies and place mask into your psp folder before we start)
Lets Get Started
Open the template, hit shift & d on your keyboard, this pastes the template as new image, close the original template. Delete info layer, add a new raster layer and floodfill with white then send to bottom, I resized mine a little at this point, go to image, resize, change width & height to around 75%, smartsize and make sure resize all layers is checked, go to bottom white layer and then image, canvas size and change to 550x550, click ok, if theres any transparent canvas showing then grab your floodfill tool and fill white.
If you prefer you can skip the resizing and can resize later, i just find it easier working with it at this size.
Click on the Rectangle 1 layer, selections, select all, select float, select defloat & paste a paper from the kit as a new layer, resize to your liking, once happy hit delete on your keyboard then go to selections and select none.
Go to effects, Eye Candy 4000 - Gradient Glow use following settings :_
Glow Width - 3.00 .... Soft Corners - 25 .... Overall Opacitiy - 100 .... Colour - White.
Do this gradient glow once more to make bolder. I also added a smal dropshadow to this.
Repeat the step above on the Rectangle 2, Star & Rectangle 3 layers using different paper for each layer. Add the same gradient glow to these layers, twice & dropshadow if you like.
Click on the Frame Background layer, grab your magic wand and click the black area so you have marching ants around it, paste a tube of choice, a close up tube will work well here, resize if needed and place where liked inside the marching ants, once happy go to selections, select invert then hit delete on your keyboard & selections, select none.
Activate the Frame Background layer again, go to adjust, select brightness/contrast, move the brightness slider to around (98), click ok. Go to adjust again, select hue/saturation/lightness this time, select colourise and choose a colour that matches your tube, click ok.
Activate the Music Note layer and colourise this in the same way as last layer. Add the gradient glow to this layer, twice & dropshadow if you want.
Activate the Staple layer, go to adjust, select brightness/contrast and move brightness slider all the way to the left (-255) staple should now be black. Dropshadow this layer.
Activate the Background Frame layer, as I choose white for my gradient glow on the other layers I simple left this layer white and added a dropshadow.
Go back and activate your tube layer inside your frame, go to effects, select xero, porcelain and use the following settings :-
Softness - 50 .... Strength - 128 .... Brightness - 128 .... Red Channel - 0 .... Green Channel - 0 .... Blue Channel - 255. click ok.
Ok lets add the mask layer, Click on bottom white layer, go to layers, add new raster layer, grab your floodfill tool and choose black as your foreground colour then fill the new layer with black, go to layers, load mask from disc, then find the first mask we loaded at the start (Bfly Fbly Mask #67) Make sure the following settings are set...
Fit to canvas - checked .... Source luminace - checked .... Invert transparency - unchecked Hide Mask - checked. Click ok. go to layers, merge group and then use your deform tool if needed to stretch it out & shape it to suit your template. (see mine).
Now activate the bottom layer again, grab your eclipse tool from the tools palette, set your foreground colour to null & background colour to c olour that matches your tube, draw out a circle, not too big, just so it sits nicely insied the mask inner circle, once happy, go to layers and select convert to raster layer, you can resize more if needed with your deform tool. Now go to adjust, select blur, gaussian blur and set radius to 20.00 .
Activate your mask layer and paste the disco ball as a new layer, resize this a bit, again so it sits inside the inner circle of the mask layer. No glow or shadow was used on this layer.
Click on the Top layer of your canvas now and paste your main tube as a new layer, resize if needed and place where you like it. Add a droshadow.
Add some elements now, remember to resize them to your liking and place where you want around your tag. Dropshadow elements.
(I made the Ipod by pasting the element as a new image in my psp workspace, shift & d to duplicate it, close original, I drew out a rectangle just slightly bigger than the ipod window with a colour of choice, convert to raster layer then moved it under the ipod layer, with magic wand, click inside ipod window area, selections, modify, expand by 1, click ok, paste a tube part of choice then selections invert and hit delete on the keyboard, move this under the ipod layer but above the rectangle layer, go to layers, select merge and choose merge visible. Your ipod is ready to paste on your tag now. Remeber to sharpen when resizing by a lot) .
Crop or resize your tag if you want to to your preffered size in the usual way. I resized at start but cropped a little at this point.
Add your name, artist info & copyright info.
Save as jpeg or .png. and we're done lol.
Thanks for trying my tutorial and i hope you enjoyed it would love to see your results, hippiedaze@hotmail.com
Army of One
This tutorial was written on May 5th 2009 by Susan aka Hippiedaze.
The idea for this tag is off my own head lol and any resemblance is purely coincidence.
General Knowledge of psp is required, tutorial was written in psp 9 but will work in other versions.
Supplies Needed
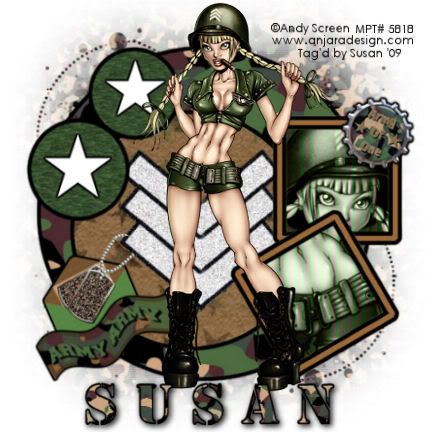
Tubes of Choice, I used Anjara (Andy Screen), you must have a proper license to use his work please visit MPT - mypsptubes - HERE .
FTU Scrap Kit 'Army of One' @ Simply Devilish Scrapz - HERE .
Template Used - Template #6 by Caitlin @ Cupcake Sprinkles - HERE .
Mask Used - Mask # 16 by Babe @ Babes Designz - HERE .
Effects Used - Textured Effects - Blinds.
Plugin Used - Eye Candy 4000 - Gradient Glow.
Fonts of Choice.
(save mask in psp folder before beginning)
Lets Get Started
Open the template, hit shift & d on your keyboard,this pastes the template as new image, close the original template. I resized all layers by 90% smart size at this point. (optional) Delete info layer, go to layers, add new raster layer, choose floodfill tool and floodfill this layer white, go to image, select canvas size, i choose 500x500. If theres any transparent showing then select floodfill tool and fill white.
Activate Large Circle layer, go to selections, select all, select float, select defloat then paste paper of choice, resize it a little if needed then go to selections, invert, hit delete on the keyboard and then select none. Now you can delete the original layer.
Go to effects, select eye candy 4000, gradient glow and use the following settings :-
Glow Width - 5.00 .... Soft Corners - 25 .... Overall Opacitiy - 100 .... Colour - Black .... Setting - Fat.
I added the gradient glow twice for a bolder border, the choice is yours .
Repeat the same step for the Small Circle layer and also the 2 Black Circle layers, choose different papers on each layer, add the same gradient glow to all these layers.
Activate one of the Squares layers, grab your magic wand and click inside one of the squares, paste your tube, resize if needed, place where it looks best inside the marching ants then go to selections, select invert then hit delete on your keyboard, select none. Now activate one of the new tube layers, go to effects, select textured effects, choose blinds and use the following settings :-
Width - 10 .... Opacity - 100 .... Colour - Choose a colour from your tube .... Horizontal - Unchecked .... Light from top - Checked, click ok.
Click back on the square layer, go to adjust, select hue/saturation/lightness, select colourise and choose a colour that compliments your tube.
Repeat the same step on the 2nd square using a different part of the tube.
Activate a Frame layer, go to adjust, select brightness/contrast and move the brightness slider to around (-144) so the frame is a darker shade, now select your colour to target brush from the tool palette, go to your colour palette and select a colour you like from your tube as the foreground colour, now move the mouse over the frame and colourise it to target.
Add the gradient glow to this layer with the same settings as before.
Repeat that step on the 2nd Frame layer. Add the gradient glow to this layer too. I left both stars white and simply added the gradient glow but only once this time, you can colourise or paste a paper in the usual way if you wish.
Click on bottom white layer now, paste another paper, go to layers, load mask from disc, then find the first mask we loaded at the start (Babes Designz Mask #16) Make sure the following settings are set...
Fit to canvas - checked .... Source luminace - checked .... Invert transparency - unchecked Hide Mask - checked.
Go to layers, merge group & resize to suit your tag using the deform tool if needed till you get it how you want it.
Click on the top layer of your canvas and paste your tube as a new layer, resize if needed and place where you want it, add a dropshadow.
Add a few elements from the kit and place where you want them, resize if needed and add dropshadow to each layer.
Crop or resize your tag if you want to to your preffered size in the usual way. I resized at start but cropped a little at this point.
Add your name, artist info & copyright info.
Save as jpeg or .png. and we're done lol.
Thanks for trying my tutorial and i hope you enjoyed it would love to see your results, hippiedaze@hotmail.com
Good Morning
Hi all,
Well I woke with great intentions this morning lol, I was all set to check emails, reply and such then write a tut......
Does things ever go the way you want them - Nope not for me anyways. I have a problem with internet explorer i think, ive had to do a system restore and then discovered i was still using IE 6 omg that is old huh, i checked for new updates and its now installed IE 8, while it was installing i was scared to look lol, but it does look ok so far and the pages that werent opening for me opened so methinks yeaaaa all is ok.
Went to another blog and what do i get but the same internet explorer msg, grrrrrr am losing patience lol, I do have a few more tuts to post and also some emails that i gotta reply to as soon as i get this sorted so pls bear with me today if theres nothing new posted, also today is my avon day, i have to submit my order later on so will be busy with that for an hour or 2 when i get this all sorted out....
Meanwhile its back to the help and troubleshooting pages for me
Hope everyone has a good day
hugs Susan
Wednesday, 20 May 2009
At The Beach
This tutorial was written on May 5th 2009 by Susan aka Hippiedaze.
The idea for this tag is off my own head lol and any resemblance is purely coincidence.
General Knowledge of psp is required, tutorial was written in psp 9 but will work in other versions.
Supplies Needed
Tubes of Choice I used the artwork of Rion (pinuptoons), you must have a proper license to use his work please visit CILM - HERE .
FTU Scrap Kit 'Helen Moore' part of the friendship collection by Bel Vidotti - HERE .
Template Used - Template #25 by Lacarolita @ Lacarolitas Designz - HERE .
Mask Used - Babes Designz Mask #16 by Marcia @ Babes Designz - HERE .
No Plugins Used.
Font of Choice.
Dropshadow all layers throught out.
(Open all supplies and save mask to psp folder before you begin)
Lets Get Started Open the template, hit shift & d on your keyboard,this pastes the template as new image, close the original template. I resized all layers by 75% smart size at this point. ( optional) Delete info layer, activate the bottom white layer, go to image, select canvas size, choose 500x500, click ok, if theres any transparent canvas showing grab your floodfill tool and fill white.
Activate Raster layer 1, go to selections, select all, select float, select defloat then paste paper of choice, resize it a bit if you want to, go to selections, select invert, hit delete on the keyboard and then select none. Now you can delete the original layer.
Repeat the same step for Raster layers 5 & 7, use different papers each time.
Activate Raster layer 3, go to selections, select all, select float, select defloat then paste wave element as a new layer, resize a little then when happy go to selections, select invert and then hit delete on your keyboard. Do not deselect yet.
Re-activate Raster 3 layer and paste a paper of your choice as a new layer, resize then hit delete on your keyboard, go to selections, select invert and then hit delete on the keyboard, select none now.
Activate Raster 2 layer, repeat the same step for raster 1 layer and use different paper. Delete the original layer.
Now do the same on all Frame layers. Add a small dropshadow to these layers.
Activate the bottom white bg layer, paste a paper from the kit, go to layers, load mask from disc, then find the first mask we loaded at the start (BabesDesignz Mask #16) Make sure the following settings are set...
Fit to canvas - checked .... Source luminace - checked .... Invert transparency - checked .... Hide Mask - checked.
Go to layers, merge group & resize to suit your tag using the deform tool if needed till you get it how you want it.
Go back to your top layer and paste your tube, resize and place where you like it, add dropshadow.
Add some elements from the kit,remember to resize them to your liking and place where you want around your tag, (see mine) ,Dropshadow elements.
Crop or resize your tag if you want to to your preffered size in the usual way. I resized at start but cropped a little at this point.
Add your name, artist info & copyright info.
Save as jpeg or .png. and we're done lol.
Thanks for trying my tutorial and i hope you enjoyed it would love to see your results, hippiedaze@hotmail.com

Such A Star
This tutorial was written on May 19th 2009 by Susan aka Hippiedaze.
The idea for this tag is off my own head lol and any resemblance is purely coincidence.
General Knowledge of psp is required, tutorial was written in psp 9 but will work in other versions.
Supplies Needed
Tubes of Choice I used the artwork of Kenny Kiernan, you must have a proper license to use his work please visit AMI - HERE .
PTU Scrap Kit 'Still Dreaming' by Vassia @ Vassia Designs and you can purchase the kit at Scrap Heaven Boutique - HERE .
Template Used - #28 by Lou @ Simply Devilish Scrapz - HERE .
Wordart Used - Wordart #17 by Missy @ Divine Intentionz - HERE .
Mask of Choice.
Font of Choice.
Plugin Used - Eye Candy 4000, Gradient Glow.
Effects Used - Textured Effects, Blinds.
Preset Shape Used - Star Shape of your choice.
(save mask to psp folder before you start)
Lets Begin...
Open your template, hit shift & d on the keyboard to duplicate, now you can close the original template. Delete info layer. Go to image, select resize and choose to resize by 75% smartsize, make sure resize all layers tab is checked, now activate your bottom white layer and go to image, select canvas size this time and coose 500x500, this will give you room to work and you can always crop layer.
Activate the Square 1 layer, go to selections, select all, select float, select defloat then paste a paper of choice from the kit as a new layer, resize if needed but not smaller than the marching ants lol, when happy with it go to selections and select invert then hit delete on your keyboard, back to selections, select none. You can delete the original layer now.
Repeat this step on the Star layer then go to effects, select eye candy 4000, gradient glow and use the following settings :-
Glow Width - 5.00 .... Soft Corners - 25 .... Overall Opacity - 100 .... Colour - choose colour to match your tube.
Repeat the glow on the square layer you created as well.
Activate the Middle Shape layer, grab you magic wand from the tool palette and click inside the darker area of the shape, paste a paper of your choice from the kit as a new layer, resize a little if needed and then go to selections, select inver then hit delete on your keyboard, go back to selections and select none.
I left the white boarder part as it was and then added the same gradient glow as before to this layer.
Activate the Square 2 layer, go to selection, select all, select float, select defloat then go to layers, choose add new raster layer, make sure its transparent, click ok, now grab your floodfill tool and choose a colour to match your tube in your foreground tab, click inside the marching ants on each square to fill with your choosen colour, now go to effects and choose textured effects, blinds and use the following settings :-
Width - 5 .... Opacity - 62 .... Colour - to match your tube and gradient glow .... Horizontal - unchecked .... Light from Top - Checked.
I added the same glow to this layer. Delete the original layer.
Activate the very bottom white layer now, paste a paper of choice as a new layer, go to layers, select load mask from disc and select the mask you choose at the start,check the following settings :-
Fit to canvas - checked .... Source luminace - checked .... Invert transparency - unchecked .... Hide Mask - checked. go to layers, merge group.
Choose a paper of choice from the kit and open as a new image in your psp workspace, minimise the paper, now grab your preset shape tool from the tool palette and choose a star shape of your choice, go to your colour palette and click the background colour tab, choose pattern from the box that pops up and look for the paper you minimised, select this as the background colour, foreground tab set to null, then holding your mouse down draw out a large star shape on your canvas, when your happy with the shape go to layers and select convert to raster layer, place in centre of the canvas and move layer down to just above the mask layer. Add the same gradient glow to this layer.
Take the brown splatter stain element and paste as a new layer, resize a little if needed and place to the right side of your canvas, move to btwn the mask and shape layer, when happy with placement go to layers, select duplicate, go to image, select mirror and place how you like it on the left side.
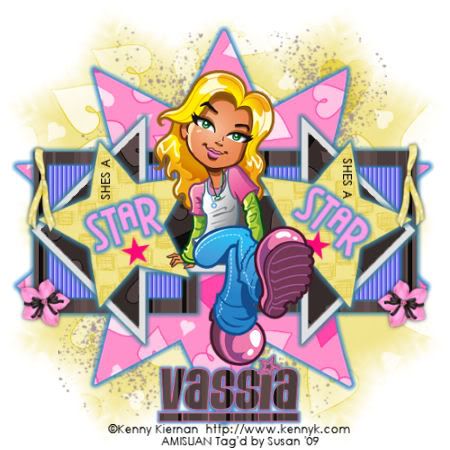
Take the Missy Wordart 'Star' word and paste as a new layer just above the left star (see mine), resize as needed, go to image, select rotate, free rotate and choose 20.00 left, go to adjust, select hue/saturation/lightness, select colourise and choose a colour that matches your tube. Go to layers, select duplicate, move the duplicated layer over to the right star, go to image select rotate and choose free rotate 20.00 right, repeat rotate right once more so the word sits nicely inside the stars. Add the gradient glow to both word layers.
Take the 'Shes A' word from Missy wordart, paste as a new layer, resize as needed and place inside the left star, (see mine), go to layers, select duplicate, go to image, select rotate, free rotate, 90.00 right, and once more rotate right, place inside right star.
Take the small star from Missys wordart and paste as a new layer, place inside left star, go to adjust, select hue/saturation/lightness, select colourise and choose colour to match your tube, go to layers, select duplicate and then go to image and select mirror, place inside right star (see mine).
Activate your top layer now and paste your tube as a new layer, resize as needed, remember tubes should be resized bicubic, place where you like and add a dropshadow.
Now add any elements you wish from the kit, resize if needed and dropshadow.
Now crop or resize if you want to.
Add your name, i used a paper from the kit as my background fill on my name, to do this, open a paper of your choice in your psp workspace and minimise then go to background tab on your colour palette and select pattern then look for the paper you choose and select that as your fill, choose a colour to match your tube for the foreground text colour, add the gradient glow to your text but reduce the glow width to 3.00.
Add artist info and copyright info.
Save as jpeg or .png. and we're done i think lol.
Thanks for trying my tutorial and i hope you enjoyed it
I would love to see your results, if you wish to send them to my addy on the right >>>>
Tuesday, 19 May 2009
Hello
Hi Everyone,
Hope all is well with you, its been another busy day for me today so haven't did much on the pc but have posted another 2 tuts for you all, the first is an awesome little cutie made with Maurine's Kit 'Grandma's Farm' I loved working with this and the tut should be nice, quick and easy for you to follow, pls be sure to read Maurine's TOU before using :).
The 2nd tut is another rock lol my fav kind of tags so hope you'll give them both a try and be sure to send me the results so i can post on the new slideshow at the bottom of the blog, this is where i'll be posting all the results that come my way.
Am honoured that a few sites are using my tuts in challenges also, its fantastic to see the many many different creations you all do, so keep up the great work ladies :D


