This tutorial was written on December 2nd 2009 by Susan aka Hippiedaze.
The idea for this tag is off my own head lol and any resemblance is purely coincidence.
General Knowledge of psp is required, tutorial was written in psp 9 but will work in other versions.
Supplies Needed
No outside tubes used.
PTU Scrap Kit 'Winter Wishes' by Tishia and you can purchase this kit - HERE
No Template used.
No Mask Used.
Brush of Choice (optional)
Plugin Used - Eye Candy 4000, Gradient Glow.
Ready...
Open a new image in your psp workspace by clicking file then select new, choose 500x500 and white for colour then click ok.
You may prefer to work with a larger or smaller canvas so my size is just a guide, select which size you feel good to work with, the kit is rather large so we will be resizing throughout.
Choose one of the frame elements and paste as a new layer then go to image and select resize, resize to your liking but not too large, click ok then go to layers and select duplicate, go to image and select rotate then choose free rotate and set to 15% left, go to image again and select mirror, you should now have 3 frame layers like mine, close off the white background layer and then go to layers and select merge visible, you can unhide the white layer again after doing this.
Grab your magic wand tool from the tool palette and click inside the middle area of the merged frames, also click the transparent parts around the merged frames making sure youve click them all you will see the marching ants blinking, now go to selections and select modify then choose expand by 4, take a paper of your choice from the kit and paste as a new layer, resize around 30% smartsize then go to selections and select invert then hit delete on your keyboard, go to selections again and select none then move this paper layer down below the frame layer, add a dropshadow of your choice to the frame layer.
Take the sledge element from the kit and paste as a new layer, make sure your on the top layer of the canvas, resize the sledge to your liking and place near bottom right corner then grab the deform tool and rotate slightly to the right like mine, add a small dropshadow to this layer if you wish.
Take the snowman element from the kit and paste this as a new layer in the centre of your canvas, go to image and select resize then resize to your liking and add the dropshadow.
Take the wordart from the kit and paste as a new layer, resize as needed and place above snowman but inside the frame, resize more till it fits how you like it and add a dropshadow.
Take the penguin element and paste as new layer, resize as needed and place a bottom of the sledge and dropshadow.
Pick a bird element and paste as new layer then resize as needed and place in bottom left side of the canvas, add dropshadow to this as well.
Take the second bird element and paste as new layer, resize as needed and place on the sledge then dropshadow.
Choose a bow from the kit, paste as a new layer and resize as needed, place this on the frame and dropshadow.
Now make sure you are on the paper layr and take a snowflake from the kit, paste as a new layer, resize this quite small and place like mine, I didnt add a dropshadow to mine but you can do so if you wish to, i also duplicated the snowflake and resized a little smaller, do this a few times and place around the inside of the frame like mine.
Activate the bottom white layer and choose a splatter brush of your choice, add a new raster layer then place some splatters around the edges of the frame.
Time to crop or resize your tag if needed but remember to leave space for your name and copyright info lol.
Add your name in your font of choice, I added a gradient glow to my name with the following settings :-
Glow Width - 5.00 ... Soft Corners - 25 ... Opacity - 100 ... Colour - White, click the colour tab and move the slider about halfway to the middle of the grid, this will make the glow a little bolder,click ok.
Add artist info, copyright info and your own info.
All done.
Save your tag as a jpeg or png file.
Thanks for trying my tutorial, I hope you enjoyed it and as always id love you to send your creations, addy is over there on the right>>>>
Wednesday, 2 December 2009
Wintertime Wishes (ptu)
Wednesday, 21 October 2009
Falling For U (PTU)

This tutorial was written on October 21st 2009 by Susan aka Hippiedaze.
The idea for this tag is off my own head lol and any resemblance is purely coincidence.
General Knowledge of psp is required, tutorial was written in psp 9 but will work in other versions.
This tutorial is fairly basic and hopefully easy for beginners to follow.
Supplies Needed
No Outside Tubes Used.
PTU Scrap Kit 'Falltastic' by Tishia @ Designs by Tishia, this kit is available in Full Size & Tagger Size it can be purchased from Scrappin Bratz Store - HERE.
Template Used - #87 by Lou @ Truly Toxic, check out all the fabulous templates while your here and you can download this from Lou's blog - HERE.
Mask Used - WSL Mask #84 by Chelle @ Wee Scots Lass Creations - HERE.
No Plugins Used.
Font of Choice for wordart & name.
Dropshadow optional.
Save mask to you masks folder before we begin if you dont already have it.
Ready....
Open the template, hit shift & d on your keyboard,this pastes the template as new image, close the original template, this will save the original untouched for future use,
Delete the info layer then go to image, select resize and choose to resize by around 80% smartsize and make sure you check the box that says resize all layers. Repeat the resize once more f you prefer working with smaller canvas.
Activate the layer named Heart 1, go to selections, select all, select float, select defloat then paste a paper from the kit as a new layer, resize a little if you want to but not smaller than the marching ants thats blinking around the heart shape, once your happy with the paper placement go to selections and select invert then hit delete on your keyboard to erase the excess paper, delete the original heart layer now and add a small dropshadow to the heart if you wish to.
Follow and repeat the step we just did on the heart layer for all other template layers, use different papers from the kit and mix n match, delete the original layers and add the dropshadow to each layer as you go along.
Told ya it was an easy one lol....
Ok now take one of the tree elements from the kit and paste as a new layer on your canvas, make sure your on the top layer above all the hearts layers, go to image, select resize and resize the tree as needed to your liking then place to one side of the canvas, i placed mine on the left but you decide how you want yours placed, add a small dropshadow to the tree now.
Take the owl element from the kit and paste this as a new layer on the working canvas, again resize as needed, i made mine quite small then place somewhere on the tree branches where you think it looks good, add the small dropshadow to this layer too.
Take the fence element and paste this as a new layer, resize as needed and move layer below tree layer but above hearts and add the dropshadow if you want to.
Take the tube/s of your choice from the kit paste as a new layer making sure your on the top layer lol, resize as needed and place where you like it/them and add the dropshadow if you want.
Grab your text tool and pick a font of your choice, type out a phase to go with your tag, i used 'falling for you', colours of your choice again and when happy with text click apply then move to where you want it on the tag, when happy with the placement go to layers and select convert to raster layer, add dropshadow to text (optional).
Activate the bottom white layer and paste a paper from the kit as a new layer, go to layers, select load mask from disc and find the 1st mask that you saved at the start (WSL #84) use the following settings :-
Fit to canvas - checked .... Source luminace - checked .... Invert transparency - unchecked .... Hide Mask - checked, click ok, go to layers, merge group.
Go to layers and select duplicate then go to image and choose mirror, go to image again and choose flip, dont get dizzy lol.
We are almost done, unless you want to add a few more elements to your tag, I used some leaves from the kit and also the leaf swirls, you can choose which elements you want to decorate your tag with.
Once your done adding the elements to your tag crop or resize if you didnt at the start.
Add your name, artist info & copyright.
Save as jpeg or .png.
And I think thats us about done.
Thanks for trying my tutorial and i hope you enjoyed it
would love to see your results,
hippiedaze@hotmail.com
Wednesday, 7 October 2009
SpookyBoo

This tutorial was written on Oct 7th 2009 by Susan aka Hippiedaze.
The idea for this tag is off my own head and any resemblance is purely coincidence.
General Knowledge of psp is required, tutorial was written in psp 9 but will work in other versions.
Supplies Needed
Tubes of Choice I used the artwork of Elias Chatzoudis, you must have a proper license to use his work please visit MPT, mypsptubes - HERE .
PTU Scrap Kit 'Halloweenie' by Tishia, the kit can be purchased @ Scrappin Bratz Store - HERE
Template Used - Halloween Template #4 by Ali @ Designs By Ali - HERE
Plugin Used - Eye Candy 4000, Gradient Glow.
Dropshadow - optional.
Lets Get Started...
Open the template, hit shift & d on your keyboard,this pastes the template as new image, close the original template. Delete info layer, go to image, select resize, choose resize 80%, choose smartsize and make sure the box resize all layers is checked, click ok.
You can add a new raster layer and fill with white, i did and merged as a jpeg at the end. Also delete the copyright info layer.
Activate the layer named back rectangle, go to selections, select all, select float, select defloat then go to layers and add a new raster layer, take one of the papers from the kit and paste as a new layer, you will need to resize a good bit but not smaller than the marching ants thats blinking, go to selections, select invert then hit delete on your keyboard, go to selections again and select none, delete the original rectangle layer.
Repeat that step for the smaller rectangles layer using a different paper of choice from the kit, delete the original small rectangle layer once done.
Activate the large rectangle frame layer, i simply added a dark dropshadow to this but you can colourise if you wish, the choice is yours. I also did the same with the small rectangle frame layer.
Activate the wordart layer and add the same dropshadow to this if you are leaving it white like mine or you can colourise the layer if you wish.
Activate the bottom mask layer and go to adjust, select brightness/contrast and move the brightness slider a little to the right to lighten the layer, now go to adjust again and choose hue/saturation/lightness then choose colourise and pick a bold colour that matches the tube.
Make sure you are on the top layer and paste your tube as a new layer, place in the centre of the large rectangle or where it looks best for your tag, i resized the tube by 80% smartsize. Go to image and select mirror so shes facing the other way then i added a dropshadow in white to this.
Take one of the ghost elements from the kit and paste as a new layer, resize to your liking but remember the elements are rather large so resize quite a bit, move to the right side of your tag and move layer down to the layer above the mask layer so its peeking out from behind the rectangle lol. Add a dropshadow.
Take the other ghost element and paste as a new layer then resize to your liking and move to the left side of the tag, i left this ghost on the top layer this time. Add dropshadow.
Paste the witches cauldron as a new layer now, make sure its the top layer of your canvas, resize as needed and place to the right of your tag nearer the bottom. Add the white dropshadow.
Take the spiders web and paste as a new layer then resize to your liking and move to the top right of your tag then move layer down to just above the mask layer.
Paste the dangling spider as a new layer, resize this as needed and move over to the right of the tag so it looks like its hanging from the web and over the cauldron ouch lol.
Paste the broom as a new layer now and resize this as needed, i placed the broom to the left side of my tag and added a dark dropshadow to this.
If you want to crop or resize then nows the time to do it but i didnt crop this one.
Add your name using a bold font and i used the plugin eye candy 4000, gradient glow with the following settings to my name :-
Glow Width - 3.00 .... Soft Corners - 25 .... Overall Opacity - 100 .... Colour - White, click ok.
Add artist info and copyright info.
Save as jpeg or .png.
Thanks for trying my tutorial and i hope you enjoyed it
would love to see your results,
hippiedaze@hotmail.com
Friday, 28 August 2009
Garv Girls Bar
This tutorial was written on August 27th 2009 by Susan aka Hippiedaze.
The idea for this tag is off my own head lol and any resemblance is purely coincidence.
General Knowledge of psp is required, tutorial was written in psp 9 but will work in other versions.
Supplies Needed
Tube/s of Choice, I used the artwork of Keith Garvey, you must have a proper license to use his work please visit MPT - mypsptubes - HERE .
PTU Scrap Kit 'Club Night' by Hippiedaze (me) @ Hippiedaze Tuts and you can purchase this kit from P4S - HERE .
No Template Used.
Mask Used - WSL Mask #314 by Chelle @ Wee Scots Lass Creations - HERE.
Font of Choice.
No Outside Plugins Used.
Open all supplies before you start ....
Lets Get Started....
Open a new image in your psp by going to file tab and select new, choose 500x500 white image, click ok.
Take one of the Round Frames from the kit and paste as a new layer in your new canvas, you may want to resize a little so to do this go to image, select resize, choose resize by around 80% smartsize or whichever size suits you, make sure resize all layers tab is unchecked, click ok.
Grab your magic wand from the tool palette and click inside the frame area so there will be marching ants flashing around the inside frame, take a paper from the kit and paste as a new layer, you can always resize the paper a little if you wish but not smaller than the 'ants', when your happy with the size of the paper go to selections, select invert then hit delete on your keyboard, go back to selections and select none, move the paper layer to below your frame layer.
Take one of the Bar Elements from the kit and paste this as a new layer in the middle of your canvas and middle of frame lol, resize this in the same way as before to suit your liking.
Take one of the signs elements and paste this as a new layer on your working canvas, resize as needed and move upwards to just about level with the frame.
Take a bar stool from the kit (make sure your on the top layer of the canvas now) and paste this as a new layer, resize as needed and place where you like it in front of the bar, i also duplicated the stool layer a few times to make more seats around the bar lol, you can do this by going to layers, select duplicate layer, do this as many ties as needed.
Take one of your chosen tubes and paste this as a new layer, i resized mine by 80% bicubic and moved the layer below the bar layer, make sure the legs arent showing at the bottom of the bar lol and if they are then grab your selection tool and select the parts that are showing then hit delete on your keyboard to erase, go to selections and select none.
Take your 2nd choosen tube, paste as a new layer on your working canvas, resize as needed and place her where you like, also do this with a third tube if you are following mine and place this where you want it.
Take a pool cue element from the kit and paste as a new layer, resize as needed and place at one end of the bar, do this with the other 2 coloured cue elements also and line them up so they are like agaings the wall lol.
Take the dartboard element and paste as a new layer on your canvas, resize as needed and move upwards and towards the oposite side of the bar so it looks like its hanging on the wall.
Now make sure you are on the layer just above the frame, choose a paper from the kit and paste as a new layer, go to layers select load mask from disc, look for the mask you loaded at the start, (WSL Mask #314) use the following settings to add the mask:-
Fit to canvas - checked .... Source luminace - checked .... Invert transparency - unchecked .... Hide Mask - checked, click ok, go to layers, merge group, use your deform tool to stretch the mask layer out a little till its how you want it & showing around your tag.
Now repeat the mask step with a different coloured paper and go to image, select mirror, you can move the layers slightly so they are sorta mixing lol, see mine as example.
I used the blank bar for this tag so I added some words to the front, this is entirely up to yourself.
Add another other elements from the kit that you want to use to decorate your tag more.
Add dropshadows to any layers you like or all if you want lol.
Crop or resize your tag now if you want to or didnt at the start but leave enough room for your name lol.
Add your name, artist info and copyright info.
Save as jpeg or .png.
and we're done i think lol.
Thanks for trying my tutorial and i hope you enjoyed it
would love to see your results,
hippiedaze@hotmail.com .

Sunday, 23 August 2009
I Sea

This tutorial was written on August 23rd 2009 by Susan aka Hippiedaze.
The idea for this tag is off my own head lol and any resemblance is purely coincidence.
General Knowledge of psp is required, tutorial was written in psp 9 but will work in other versions.
Supplies Needed
Tube of Choice I used the artwork of Suzanne Woolcott, you will need a proper license to use her work and can get one by visiting - HERE.
PTU Scrap Kit 'Ror Row Out to Sea' by Natasha @ Sticky Kisses, you can purchase this kit from Scrap Heaven Boutique - HERE.
Mask Used - Mask 178 by Cat @ Insatible Dreams - HERE
No Template Used.
No Plugins Used.
Font of Choice.
(Open all supplies and save mask to psp folder before you begin)
Lets Get Started
Open a new image in your psp workspace by clicking file and select new, choose image size 500x500 (or bigger if you prefer), white canvas and click ok.
Choose one of the frames from the kit and paste as a new layer in the centre of your working canvas, you will need to resize a little if using my sizes so click image and choose resize, make sure resize all layers is UNCHECKED, i resized mine by around 80%, click ok.
Grab your magic and tool from the tool palette and click inside the frame so you have the marching ants blinking around the edges, go to selections again, select modify and choose expand, select expand by 3 and click ok, now take a paper of your choice from the kit and paste as a new layer in your canvas, resize as needed but not smaller than the marching ants lol, once happy with size go to selections select invert then hit delete on your keyboard, do not deselect yet..... take the waves element from the kit and paste as a new layer move down to the bottom of the frame and then when happy hit delete on your keyboard again, this pastes the wave inside the frame, you need to move both the wave layer and paper layer to below the frame layer tho .
Take the seaweed element from the kit and paste as a new layer above the waves layer but below the frame lol, resize to your liking, i resized quite small and then duplicated the layer and moved to the right a little, also added a dropshadow to both seaweed layers.
Take the lighthouse element from the kit and paste this as a new layer on your canvas, resize a little and move to the left side of your tag, add a small dropshadow if you wish.
Take your tube and paste as a new layer, resize to your liking and move to the left beside the lighthouse, add a small dropshadow to your tube as well.
Take the fish element from the kit and paste as a new layer, resize as needed (made mine quite small again) move the fish to where you like it on the waves, i also used the deform tool to rotate a little, you can do this by grabbing your deform tool and rotate while holding the mouse over over the node that rotates, go to layers, select duplicate and move the second fish to where you like it in the waves, add a dropshadow to both fis layers.
Take the octopuss tube from the kit and paste as a new layer in your canvas, resize this to your liking and move to the right side of your canvas, add the same dropshadow to this layer.
I also used the sea word label and a bow from the kit to decorate a little more, simply paste as new layers and resize you your liking then place where you like on top area of the frame, dropshadow both layers.
Now activate bottom white layer, paste a paper of choice from the kit as a new layer, go to layers again, load mask from disc, then find the first mask we loaded at the start (178 Insatible Dreams) Make sure the following settings are set...
Fit to canvas - checked .... Source luminace - checked .... Invert transparency - unchecked
Hide Mask - checked.
Go to layers, merge group.
Take your deform tool and stetch the mask layer out to suit so it shows a little from behind all layers.
Crop or resize your tag if you want to to your preffered size in the usual way.
Activate the top layer of your canvas again & add you name, artist info & copyright info.
Save as jpeg or .png.
and we're done lol.
Thanks for trying my tutorial 
would love to see your results,
Thursday, 13 August 2009
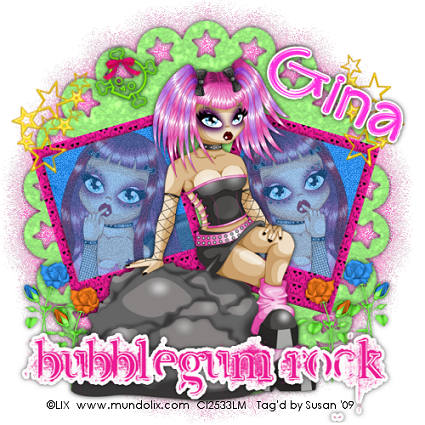
Bubblegum Rock
This tutorial was written on August 13th 2009 by Susan aka Hippiedaze.
The idea for this tag is off my own head lol and any resemblance is purely coincidence.
General Knowledge of psp is required, tutorial was written in psp 9 but will work in other versions.
Supplies Needed
Tube of Choice, I used the artwork of Lix, you must have a proper license to use his work please visit CILM - HERE .
Scrap Kit Used - 'Bubblegum Rock' by Gina @ , you can purchase this awesome kit from HERE.
No Templates Used.
No Masks Used.
Plugin Used - Eye Candy 4000, Gradient Glow.
2nd Plugin Used - Toadies, Blast n Blur.
Font of Choice.
Open all supplies before you start ....
Lets Get Started....
Open a new image in your psp by going to file tab and select new, choose 500x500 white image, click ok.
Take one of the mat elements and paste as a new layer in the centre of your canvas, resize around 85% smartsize, make sure resize all layers is unchecked then click ok.
Duplicate this layer and go to adjust, select hue/saturation/brightness and then choose a colour to match your tube/tag, click ok then go to effects, choose Toadies, blast n blur and use the default settings, click ok and move this layer below the first mat layer.
Take one of the frames from the kit and paste as a new layer, go to image, select rotate and rotate by around 20.00 left, duplicate this layer and then go to image and select mirror, position to your liking or see mine as example.
Grab your magic wand and click inside the frame area so the marching ants are blinking, go to selections, select modify and choose to expand by 2, click ok take a paper of choice from the kit and paste as a new layer, resize a little then go to selections again and select invert then hit delete on your keyboard, do not deselect yet, choose a tube and paste this as a new layer, resize a little then position how you like it inside the frame, when happy with placement simply hit delete on your keyboard to erase excess tube from around the frame.
Repeat that step for the other frame using the same tube mirrored or a different tube if you wish as long as its by the same artist.
On both tube layers i lowered the opacity down to around 60 but this is up to you. I also added some noise to both paper layers.
Take your main tube and make sure your on top layer of your canvas then paste tube as a new layer, resize as needed to your liking and place in middle of your canvas.
Take the bubblegum rock wordart from the kit and paste as a new layer, resize as needed and place at bottom of your canvas or where you like depending on what tube you use.
Add any elements you want to decorate your tag, or see mine as examples. I used some roses, stars and skull.
Add a drop shadow to any layers you wish.
Crop or resize your tag now if you want to but leave enough room for your name.
Add your name, artist info and copyright info.
Save as jpeg or .png.
Thanks for trying my tutorial and i hope you enjoyed it
would love to see your results,
hippiedaze@hotmail.com .
Friday, 7 August 2009
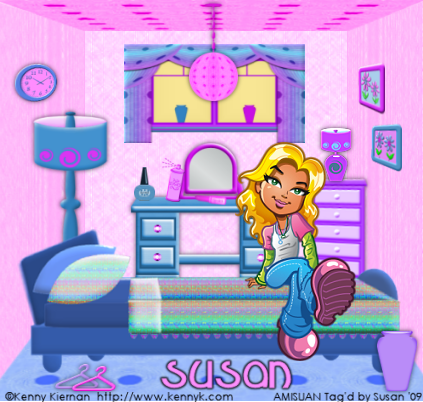
My Girly Room
This tutorial was written on July 25th 2009 by Susan aka Hippiedaze.
The idea for this tag is off my own head lol and any resemblance is purely coincidence.
Very quick and easy tut.
General Knowledge of psp is required, tutorial was written in psp 9 but will work in other versions.
Supplies Needed
Tube of Choice, I used the artwork of Kenny Kiernan, you must have a proper license to use his work please visit AMI - HERE.
PTU Scrap Kit Used - 'Room For The Girls' by Hippiedaze (me) @ Hippiedaze Scrappin Stuff and you can purchase this kit at P4S or Katelynns Designs stores
No Template Used.
Font of Choice.
(Open all supplies and save mask to psp folder before you begin)
Lets Get Started
For this tut the instructions are just a rough guide only, yours may differ depending on what sizes you like to work with.
Open a new canvas in your psp workspace by going to file, select new, choose white 500x500 and click ok.
I started with the bed element so paste this as new layer on your working canvas and go to image, select resize, resize this so its to your liking and place in centre near the bottom of your tag.
Take one of the dressing table elements and paste as a new layer, resize as needed and place layer behind the bed nearer the centre of your tag, you can follow mine as an example.
These 2 elements gave me a guide for the rest of the tag placement lol so we will move to the walls before adding anything else okkies ....
Choose a paper from the kit and paste as a new layer, move this layer all the way to the bottom of your canvas, resize down till you have a square in the centre of your canvas.
Choose a different paper or the same one if you like lol and paste this as a new layer on your canvas, resize a little but not too much, move to the bottom of your canvas, we will cut this paper in half now so take your selection tool and draw a rectangle on the right hand side of your tag, from the centre to the right lol and top to bottom, when happy with size hit delete on your keyboard to erase this half of the paper, select none, now grab your deform tool, now hold the shift key down and move your mouse over the top right node, the little icon should slant a bit, now keep holding the shift key down and pull the node down towards the centre, not too much tho lol, now do the same with the bottom right node but drag it up towards the centre, when happy with this pull the middle right side node to the left to make it narrower, (hope that all makes sense lol).
Duplicate this now and then go to image and select mirror, you should now have the back wall and 2 side walls right ? lol
Choose another paper from the kit, paste as a new layer resize a bit again and do the same step as above that we did for the walls except this time pull the top left and top right nodes in toward the centre, also pull the middle node down towards the bottom, this should give it a more flattened look,remember you can follow my tag as an example.
For the ceiling i simply duplicated the floor layer and then flipped it, you may have to use the deform tool again to pull the nodes slightly to fit with the top sections of the walls, I also changed the colour by going to adjust, select hue/saturation/lightness and then choose colourise, i used a pink to match the walls.
Whewwww now we have the room done lol lets add the window, paste this as a new layer, make sure its the top layer of your canvas, resize to your liking and move towards the top of your tag a little but keep in centre, when happy with placement take your selection tool and draw out a rectangle just a little bigger than the window frames but not bigger than the curtain edges, activate the back wall layer now and then hit delete on your keyboard this will remove the wall from behind the windows, keep selected and go to layers, add new raster layer, choose a colour for the foreground in your colour palette then takeyour floodfill tool and fill new layer with choosen colour, you should now have something like mine.
Take one of the ceiling light elements and paste as a new layer, resize as needed and place in centre of tag, move to near the top so its coming from the ceiling lol.
Take one of the floor lamps and paste as a new layer, resize as needed and place in left corner of your tag, make sure this layer is behind the bed.
Take a drawer chest element and paste this as a new layer, resize as needed and place in opposite corner of your tag.
Take one of the table lamps and paste this as a new layer, resize quite small till its sitting nicely on top of the drawers.
Choose your tube and paste this as a new layer, resize as needed and place where she looks best, I used a sitting tube lol so put her sitting on the bed but the choice is yours.
Decorate the tag with any other elements you want, place each element on a new layer and resize as needed.
I added a dropshadow to most layers but this is up to you.
Still with me lol ...
Crop or resize your tag now if you want to but leave enough room for your name lol.
Add your name, artist info and copyright info.
Save as jpeg or .png.
and we're done i think lol.
Thanks for trying my tutorial and i hope you enjoyed it
would love to see your results,
hippiedaze@hotmail.com .
Saturday, 1 August 2009
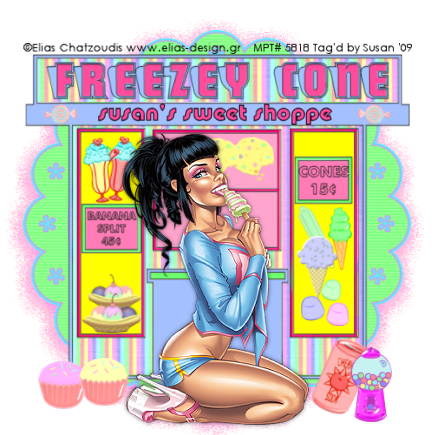
Sweet Treat Shoppe
This tutorial was written on July 31st 2009 by Susan aka Hippiedaze.
The idea for this tag is off my own head and any resemblance is purely coincidence.
General Knowledge of psp is required, tutorial was written in psp 9 but will work in other versions.
Supplies Needed
Tubes of Choice I used the artwork of Elias Chatzoudis, you must have a proper license to use his work please visit MPT, mypsptubes - HERE .
PTU Scrap Kit 'Sweet Tooth' by Hippiedaze (me), you can purchase this kit at P4S - HERE. and Katelynn Designs - HERE.
Template used - Template #26 by Hippiedaze (me) and you can get this from 4shared - HERE.
No Masks Used.
Plugin Used - Toadies.
Font of Choice for your name.
Lets Get Started...
Open the template, hit shift & d on your keyboard,this pastes the template as new image, close the original template. Delete info layer, go to image, select resize, choose resize 80%, choose smartsize and make sure the box resize all layers is checked, click on the bottom white layer, go to image again and select canvas size and choose 500x500 to give a little extra room to work or if you prefer you can resize later.
Activate the layer named Freezy cone background, go to selection, select all, select float, select defloat then paste a paper from the kit as a new layer, go to selections again and select invert then hit delete on your keyboard, back to selections and select none.
Activate the layer Freezy Cone main heading and go to adjust, select brightnes /contrast and move the brightness slider a little to the right to lighten the layer just a little bit as you want this to still be quite bold lol, then choose a bright colour that matches your tube in your foreground colour tab, grab the colour to target brush tool and move the mouse over the layer to colourise.
Repeat that step with the layer named shop header using a lighter colour this time.
Activate the layer named main shop front dark, go to selections, select all, select float, select defloat then paste the stripe paper from the kit as a new layer, go to selections, select invert then hit delete on your keyboard the back to selections and select none.
Activate the light shop front layer, grab the colour to target brush tool and pick a colour in your foreground tab then move the mouse all over the light shop background to colour to choosen colour.
Activate the left & right window layer and colourise in the same way as above with a bright colour to match the kit.
Also do the same step with the middle window layer & small left and right window layers, i used a pale colour for these windows but the choice is yours.
Using the same colour as the main header sign (mines a bright pink) colourise the window frame layer 7 small window frame layer with the colour to target brush tool.
You can either leave the main outline layer as it is or colourise this to your choice to match the rest of the tag.
Now activate your bottom white layer and take one of the round frames from the kit, paste this as a new layer and resize a little if needed till its sized as you want it then duplicate this layer and on the original frame layer go to effects, select Toadies, Blast n Blur effect and use the following settings :-
X Effect - 15 .... Y Effect - 17 and click ok.
Activate the top layer of your tag now and take your tube and paste as a new layer, resize this to your liking and place where you like, add a dropshadow to the tube.
Time to decorate your tag now so choose any element you likefrom the kit and paste as new layers, resize each element as needed and place in the 'windows' and around your tag.
When done with adding elements resize you tag if you didnt at the start.
Add a name if you wish, i added mine just under the header sign.
Add artist info and copyright info.
Save as jpeg or .png.
Thanks for trying my tutorial and i hope you enjoyed it
would love to see your results,
hippiedaze@hotmail.com
Saturday, 25 July 2009
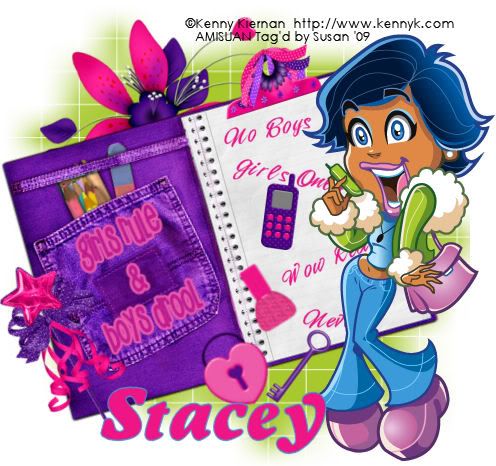
The Girl Rules
This tutorial was written on July 25th 2009 by Susan aka Hippiedaze.
The idea for this tag is off my own head, any resemblance is purely coincidence.
Easy to follow tut.
General Knowledge of psp is required, tutorial was written in psp 9 but will work in other versions.
Supplies Needed
Tube of Choice, I used the artwork of Kenny Kiernan, you must have a proper license to use his work please visit AMI - HERE.
PTU Scrap Kit Used - 'Girls Rule/Boys Drool' by Stacey @ Staceys Designs and you can purchase thos awesome kit at Scrap Heaven Boutique - HERE.
Mask Used - WSL Mask #84 by Chelle @ Wee Scots Lass Creations - HERE.
Effects Used - Eye Candy 4000, Gradient Glow.
Fonts of Choice.
(Open all supplies and save mask to psp folder before you begin)
Lets Get Started
Open a new canvas in your psp workspace by going to file, select new, choose white 500x500 and click ok.
Take the notebook element and paste as a new layer on your canvas, place in the centre then go to image, select rotate and rotate to the left by 25, click ok.
Choose a font and colour of your choice and type out some phrases for the notebook, once you have a phrase you like go to layers and choose convert to raster layer, use new layers for each phrase and then with the deform tool rotate slightly & place on the note page.
Using the same font in a bigger size type out another phrase you like, convert to raster layer and rotate a little then place this on the opposite note page, I added a small gradient glow to this text layer, go to effects, select eye candy 4000, gradient glow and the following settings :-
Glow Width - 3.00 .... Soft Corners - 25 .... Overall Opacity - 100 .... Colour - to match your tube, click ok.
Take your tube and paste this as a new layer, resize around 80% smartsize and place to the right side of your tag (see mine).
Take the nail polish element and place as a new layer, resize down till its to your liking and place this where you want it also rotate slightly using the deform tool.
Take the heart lock element and place this on your canvas as a new layer, resize as needed and place where you want it, you can rotate if you wish.
Take the key element and place this as a new layer, again resize, rotate & place where you like it.
Take the mobile phone element and place as a new layer, resize and place where you like.
I also used the magic wand element and the clip but you can choose which elements you want to decorate the tag with, paste each element as a new layer and resize to your liking.
Activate the bottom layer of your canvas and choose a doodle from the kit, paste as a new layer and resize as needed then place it so its showing from behind the notebook at the top left side.
Activate the bottom white layer again, i added a new layer and filled it green to match my tube but you can paste a paper from the kit as a new layer then go to layers, select load mask from disc then in the box that pops up look for the mask you saved at the start (WSL Mask #84) use the following settings to add the mask:-
Fit to canvas - checked .... Source luminace - checked .... Invert transparency - unchecked .... Hide Mask - checked, click ok, go to layers, merge group, use your deform tool to stretch the mask layer out a little till its how you want it & showing around your tag.
Crop or resize your tag now if you want to or didnt at the start but leave enough room for your name lol.
Add your name, artist info and copyright info.
Save as jpeg or .png.
and we're done i think lol.
Thanks for trying my tutorial and i hope you enjoyed it
would love to see your results,
hippiedaze@hotmail.com .
Tuesday, 21 July 2009
DJ Rocker
This tutorial was written on July 20th 2009 by Susan aka Hippiedaze.
The idea for this tag is off my own head lol and any resemblance is purely coincidence.
Very quick and easy tut.
General Knowledge of psp is required, tutorial was written in psp 9 but will work in other versions.
Supplies Needed
Tube of Choice, I used the artwork of Kenny Kiernan, you must have a proper license to use his work please visit AMI - HERE.
PTU Scrap Kit Used - 'DJ Superstar' by Hippiedaze @ hippiedaze tutorials, kit can be purchased at p4S - HERE.
Mask Used - WSL Mask #282 by Chelle @ Wee Scots Lass Creations - HERE.
Plugin Used - Eye Candy 4000, Gradient Glow.
Font of Choice.
(Open all supplies and save mask to psp folder before you begin)
Lets Get Started
Open a new canvas in your psp workspace by going to file, select new, choose white 500x500 and click ok.
Take one of the round frames from the kit and paste as a new layer in the centre of your working canvas, resize as needed to suit you, go to adjust, select brightness contrast and move the brightness slider all the way to the right so that the whole frame is now white, click ok, go to effects select eye candy 4000, gradient glow and add the following settings to the frame layer :-
Glow Width - 3.00 .... Soft Corners - 25 .... Overall Opacity - 100 .... Colour - Pink or one to match your tube ... move the colour slider half way along to the centre to give a bolder glow effect. click ok.
Click inside the frame area with your magic wand tool so the marching ants are blinking, go to selections, select mdoify and then choose expand, expand by 2 and click ok, take a paper from the kit and paste as a new layer, resize a little if needed and then go to selections, select invert then hit delete on your keyboard, go back to selections and select none.
I started with pasting my tube on this one and worked around that, so take your tube and paste as a new layer in the centre of your canvas, resize to your liking and add a dropshadow.
The following elements are just an example and you can place them in front of or behind your tube to suit your liking.
Take the record deck element and paste as a new layer, resize as needed and place behind the tube layer (see mine as example), add a dropshadow.
Take a speaker of choice and paste this as a new layer, resize as needed and place in bottom left of your tag, you can also use the deform tool to rotate to an angle if you like & add a dropshadow to this layer too.
Choose a wordart and paste as a new layer, resize as needed and place in top left of your tag, rotate as before using the deform tool and add the dropshadow.
Choose a keyboard element and paste as a new layer, resize as needed and place in bottom right of your tag, use the deform tool again to rotate to how you like it and add the dropshadow.
Choose a T Shirt and paste as a new layer then resize as needed and place this in top right of the tag, rotate with the deform tool if you want and add a dropshadow.
Activate the bottom white layer and paste a paper from the kit as a new layer, go to layers, select load mask from disc and fid the mask that you saved at the start (WSL Mask # 282)and use the following settings :-
Fit to canvas - checked .... Source luminace - checked .... Invert transparency - unchecked .... Hide Mask - checked, click ok, go to layers, merge group, use your deform tool to stretch the mask layer out a little till its how you want it.
Go back to your top layer of the canvas now and add any other elements you wish to use to decorate the tag, paste each element as a new layer and resize to suit then add a dropshadow to each element, I added the gradient glow to some elements here.
Crop or resize your tag now if you want to or didnt at the start.
Add your name, artist info and copyright info.
Save as jpeg or .png.
and we're done i think lol.
Thanks for trying my tutorial and i hope you enjoyed it
would love to see your results,
hippiedaze@hotmail.com .

Sunday, 12 July 2009
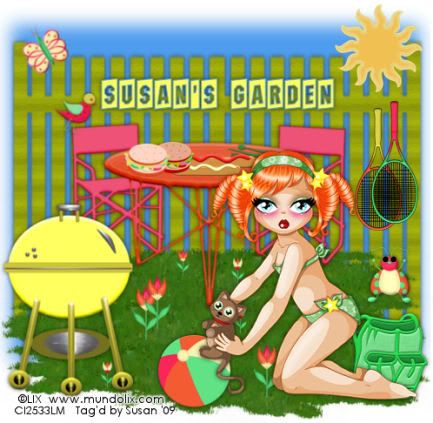
My Garden BBQ
This tutorial was written on July 12th 2009 by Susan aka Hippiedaze.
The idea for this tag is off my own head lol and any resemblance is purely coincidence.
General Knowledge of psp is required, tutorial was written in psp 9 but will work in other versions.
Supplies Needed
Tube of Choice, I used the artwork of Lix, you must have a proper license to use his work please visit CILM - HERE .
PTU Scrap Kit Used - 'One Summer Day' by Hippiedaze (me), you can purchase this kit from P4S - HERE.
No Template Used.
Mask Used - Vix Mask #133 by Vix - HERE.
Effects Used - Blur, Guassian Blur.
2nd Effect Used - Textured Effects, Woodgrain.
Standard Lawn Picture Tube (included with your psp program).
Font of Choice.
(open all supplies and save mask to psp folder before beginning)
Lets Start ....
Go to file in your psp tabs, select new and choose a white image whichever size you prefer to work with, i use 500x500 but select yours to suit yourself, click ok.
Take one of the table/chairs elements from the kit and paste as a new layer on your working canvas, resize as needed to suit your tag size and place in the middle, move up a little (you can reposition this later on).
Take one of the BBQ elements and paste this as a new layer, resize as needed and move to bottom left corner of your canvas, add a dropshadow.
Choose the hamburger and hot dog elements paste each as a new layer on your canvas, make sure your on the top layer lol, resize the elements as needed and place on the table.
Take the cutlery element and paste this as a new layer, resize as needed again and place on the table along with the food, i also used the deform tool on this element to 'flatten' the cutlery, simply click the deform tool then while holding your shift key down move the mouse to pull the nodes down and flatten.
Take one of the rucksack elements from the kit and paste this as a new layer on your canvas, resize as needed and place where you want it, dorpshadow this layer.
Now activate your bottom white layer, go to layers, select add new raster layer, now go to your picture tubes tool in psp, look for the lawn/grass tube and select this and click in your psp workspace, be sure to add the new raster layer or the tube will post on your background layer lol, click the tube and paste as many times as needed to fill the area you want for the 'grass'.
Take a flower element and paste as a new layer, resize as needed and place anywhere on the grass, duplicate this as many times as you want and place your flowers around the garden, i resized some flowers smaller than others.
Now paste your tube as a new layer,resize as needed and place where you want it on your tag, add a dropshadow to the tube layer.
Activate the bottom white layer, paste a paper from the kit as a new layer, go to layers and select load mask from disc, look for the mask you saved at the start (vix mask #133) select this and make sure the following settings are checked:-
Fit to canvas - checked Source luminace - checked Invert transparency - unchecked .... Hide Mask - checked. go to layers, merge group & you can use the deform tool to resize to suit your tag.
Still on the mask layer go to effects, select texture and look for the 'woodgrain' effect, choose this and your fence should now look a bit like wood lol, add a dropshadow to this layer.
Activate the bottom layer once more and take your Rectangle preset shape, choose a colour in your background tab and leave foreground tab to null, draw out a large rectangle on your canvas just a little bigger than the mask layer, go to adjust, select blur, guassian blur and set to 10.00, click ok.
Activate the top layer of your canvas now and add a few other elements of your choice, i used the bird, butterfly ,ladybug & Tennis Bat and place them around my tag, remember to resize each element and add the dropshadow.
Add your name in your chosen font and place on the fence, add a dropshadow to your name.
Add artist info & copyright info.
Save as jpeg or .png.
and we're done i think lol.
Thanks for trying my tutorial and i hope you enjoyed it.
would love to see your results,
hippiedaze@hotmail.com
Friday, 10 July 2009
Surfer
This tutorial was written on July 8th 2009 by Susan aka Hippiedaze.
The idea for this tag is off my own head and any resemblance is purely coincidence.
General Knowledge of psp is required, tutorial was written in psp 9 but will work in other versions.
Supplies Needed
Tubes of Choice I used the artwork of Michael Landefeld, you must have a proper license to use his work and you can get that by visiting CILM - HERE.
PTU Scrap Kit Used - 'Summertime Sunshine' by Sizzel @ Sizzels Designs, you can purchase the kit from Scrap Heaven Boutique - HERE.
Template Used - Template CMXC3T3 by Aiya (part of the misfits template challenge 3) you can get this from the creative misfits blog - HERE.
Mask Used - Mask #342 by Chelle @ Wee Scots Lass Creations - HERE.
Plugin Used - Eye Candy 4000, Gradient Glow.
2nd Plugin Used - Textured Effects, Weave.
Font of Choice.
(open all supplies and save mask to psp folder before beginning)
Lets Start ....
Open the template in your psp workspace, hit shift & d on your keyboard,this pastes the template as new image, close the original template. Delete the info layer.
Go to image and choose resize, select width & height to 80%, smartsize checked and make sure the tab resize all layers is checked, click ok.
Go to the bottom blue layer and delete this, go to layers, select add new raster layer, floodfill this layer white, go to image, select canvas size and choose 500x500, click ok, if you get any transparent image showing grab your floodfill tool and fill with white.
Whether you resize here or at the end is up to you, i just find it easiest working this size.
Activate the layer named circle back, go to selections, select all, select float, select defloat then paste your chosen close up tube as a new layer, resize a little if you want to then go to selections, select invert then hit delete on your keyboard, go to selections again and select none.
Activate the circle back layer again and go to adjust, select hue/saturation/lightness then select colourise and choose a colour that matches your tube.
Activate the circle frame layer and colourise in the same way as above, add a dropshadow to the frame.
Repeat the colourise step again for the wavelength layer, open circle layer & the closed circle layer. Choose colours that match your tube.
Activate the rectangle 1 layer (i used a gradient for the fill on this rectangle but you can fill by adding a paper, go to selections, select all, select float, select defloat then paste a paper of choice from the kit as a new layer, resize as needed and then go to selections, select invert, hit delete on your keyboard then go to selections again and select none.
Repeat the paper fill step above for the rectangle 2 and rectangle 3 layers, delete the original layers as you work and add a dropshadow to each layer.
Activate the bottom white layer and paste a paper of choice from the kit as a new layer, ( I choose a plain paper then colourised it), to add the dots effect go to effects, select textured effects, weave and use the following settings :-
Gap - 5 .... Width - 7 .... Opacity - 1 .... Colour - your choice .... Fill Gaps - Checked, click ok.
Now go to layers, select load mask from disk and then find the mask that you saved at the start ( WSL Mask #342) select this and make sure the following settings are set :-
Fit to canvas - checked .... Source luminace - checked .... Invert transparency - unchecked .... Hide Mask - checked. Click ok.
Activate the top layer of your canvas now and paste your main tube as a new layer, resize as needed and place where you like it, add a dropshadow.
Use any other elements from the kit to decorate your tag, place each element as a new layer, resize as needed and place where you like them, add the dropshadow to each element layer.
Crop and resize now if you wish to.
Add your name, I used a small gradient glow on my name but this is optional.
Add artist info and copyright info.
Save as jpeg or .png.
and we're done lol.
Thanks for trying my tutorial
would love to see your results,
hippiedaze@hotmail.com

Wednesday, 8 July 2009
V.I.P
This tutorial was written on July 7th 2009 by Susan aka Hippiedaze.
The idea for this tag is off my own head and any resemblance is purely coincidence.
General Knowledge of psp is required, tutorial was written in psp 9 but will work in other versions.
The tutorial is fairy quick and easy to follow.
Supplies Needed
Tubes of Choice I used the artwork of Ismael Rac, this artist has moved from MPT to Artistic Minds Inc, my tag has an MPT license from where I bought it but you can get Ismaels awesome tubes from AMI - HERE.
PTU Scrap Kit 'Hard Candy' By Pimptress @ Pimp'd Designs, the kit can be purchased from P4S store - HERE.
No Template Used.
No Mask Used.
Font of Choice.
Effects Used - 3d effects, Inner Bevel.
Lets Get Started...
Open a new canvas by going to file, select new, choose your size (mine was 500x500) white canvas, click ok.
Open the frame 10 element from the kit and paste as a new layer in the centre of your canvas, resize this as needed depending on what size you work with on your tags, grab your magic wand tool from the tool palette and click inside the middle area so that the marching ants are blinking, go to selections and select modify, select expand from the drop menu, choose expand by 2, click ok, take your close up tube and paste as a new layer, move this to where it fits inside the frame and when happy with position go to selections, select invert then hit delete on your keyboard, do not de select yet, activate the frame layer again and take a paper of your choice from the kit, paste this as a new layer, resize a little if needed then when happy with this hit delete on your keyboard, now you should have the paper layer behind the tube layer.
Activate the frame layer and add a dropshadow of choice.
Activate the top layer of your canvas and paste your main tube as a new layer, resize as needed and place this where you like it or follow mine if you are using the same tube also add a dropshadow to this layer.
Take the rock on wordart from the kit, paste as a new layer and resize as needed then place at top right of the frame.
Take the VIP pass and paste this as a new layer, resize as needed and place at top left side of the frame, use the eraser tool to eraser a little of the string so it looks like its threaded through the frame, add a dropshadow to this layer.
Paste the guitar element as a new layer and resize as you like, go to adjust, select hue/saturation/lightness and then choose colourise and select a colour that matches your tubes, click ok, i used the deform tool to rotate the guitar slightly against the frame.
Repeat the above step with the microphone element and place this beside the guitar, add a dropshadow to both layers.
I also used a couple of the star elements, resize these and paste where you like them.
Choose a font & colour for your name, go to effects, select 3d effects, inner bevel and play with the setting till its how you like it.
Add artist info & copyright info.
Save as jpeg or .png.
And I think thats us about done.
Thanks for trying my tutorial and i hope you enjoyed it
would love to see your results,
hippiedaze@hotmail.com
Sunday, 5 July 2009
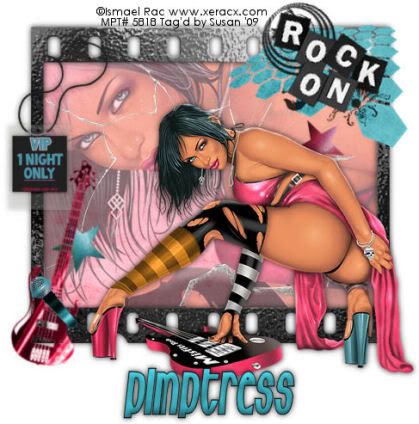
Rocker Chic
This tutorial was written on June 28th 2009 by Susan aka Hippiedaze.
The idea for this tag is off my own head lol and any resemblance is purely coincidence.
General Knowledge of psp is required, tutorial was written in psp 9 but will work in other versions.
Supplies Needed
Tube of Choice I used the artwork of Ismael Rac, this artist has moved from MPT to Artistic Minds Inc, my tag has an MPT license from where I bought it but you can get Ismaels awesome tubes from AMI - HERE.
PTU Scrap Kit 'Punk Rock Chic' by Susan aka Hippiedaze (me), this kit can be purchased from P4S - HERE.
No Template Used.
Masks Used - Bfly Flby Mask #9 & Bfly Flby Mask #67 by Butterfly Flutterby Creations - HERE.
Font of Choice, I used Egbert.
(open all supplies and save both masks to your psp folder before beginning)
Lets Start ....
Go to file and select new, choose white canvas, 500x500, click ok.
We will start this one with adding the mask layer first, choose a paper of choice from the kit and paste as a new layer on your canvas, go to layers, select load mask from disc and look for the mask that you saved at the start (Bfly Flby Mask #67) and use the following settings :-
Fit to canvas - checked .... Source luminace - checked .... Invert transparency - unchecked .... Hide Mask - checked, click ok, go to layers, merge group & you can use the deform tool to resize to suit yourself, i didnt need to do much deforming on this one.
Take a drum element from the kit and paste as a new layer, place in centre of your canvas & mask layer and resize as needed, depending on what size you make your tags, add a dropshadow to this layer.
Activate your bottom white layer and grab the eclipse tool from the tool palette, set your foreground colour tab to null and in your background colour tab choose a colour or you can use a paper from the kit as your fill (the paper should be open and minimised in your psp workspace for it to show in the patterns tab), now draw out a lage circle around the same size as the inner ring on the mask layer, when happy with size go to layers and choose convert to raster layer.
Choose a tube for your background, I used the close up of my main tube, paste tube as a new layer, resize as needed and place how you want it, mines in the centre of the circle and mask layers, go to layer properties and lower the opacity of the tube layer to around 50.
Activate the bottom white layer now and paste a paper from the kit as a new layer, resize this a bit but not smaller than the canvas, go to layers, select load mask from disc and find the 2nd mask you saved at the start (Bfly Flby Mask #9) use the following settings :-
Fit to canvas - checked .... Source luminace - checked .... Invert transparency - unchecked .... Hide Mask - checked
go to layers, merge group & you can use the deform tool to resize to suit your tag. I simple stretched it out a bit so that it was showing from behind all other layers.
Activate the top layer of your canvas and paste your main tube as a new layer, resize if needed and place where you want it on your tag, add a dropshadow to the main tube.
Take the rock pass element and paste as a new layer, resize as needed, take your deform tool and rotate it slightly, move up to the guitar on the mak layer and then take your eraser tool to erase a little of the ribbon to make it look like its hanging over the guitar, add a dropshadow to the layer.
Take any other elements from the kit, decorate how you wish, paste all elements on new layers, resize elements as needed and place where you like them, add a dropshadow or add the gradient glow to each element layer.
Now crop & resize your tag if you wish to if you didnt at the start.
Add your name, for my name i used text on a circle, to do this grab your eclipse tool and set foreground colour to anything, it wont matter lol it will be deleted later, make sure background colour tab is set to null, now draw out circle on your canvas in line with the top of the mask layer, take your text tool and move mouse over the circle till you see a little half moon shape with the text icon, when you see this click it and type your name, it should be on the circle lol, before you click apply make sure you set the text to floating selection, click ok and yourname should be on the curve with marching ants around it, go to layers, select add new raster layer then click ok and move this layer below the floating layer, now click back to the floating layer and go to selections, select none, move your text a little till its how you like it on the circle, go to effects, select 3d effects, inner bevel and use the following settings :-
Bevel Style - 4 .... Width - 5 .... Smoothness - 49 .... Depth - 5 .... Ambience - 0 .... Shininess - 0 .... Colour - White .... Angle - 332 .... Intensity - 50 .... Elevation - 30 . click ok.
Add artist info & copyright.
Save as jpeg or .png.
And I think thats us about done.
Thanks for trying my tutorial and i hope you enjoyed it
would love to see your results,
hippiedaze@hotmail.com

Punk Rock
This tutorial was written on June 28th 2009 by Susan aka Hippiedaze.
The idea for this tag is off my own head lol and any resemblance is purely coincidence.
General Knowledge of psp is required, tutorial was written in psp 9 but will work in other versions.
Supplies Needed
Tube of Choice I used the artwork of Popeye Wong, this artwork is FTU and you can grab Popeye's awesome tubes from - HERE .
PTU Scrap Kit 'Punk Rock Chic' by Susan aka Hippiedaze (me), this kit can be purchased from P4S - HERE.
Template Used - Hippiedaze Template #24 by Susan aka Hippiedaze (me) - HERE.
Mask Used - WSL Mask #254 by Chelle @ Wee Scots Lass Creations - HERE.
Plugin Used - Eye Candy 4000, Gradient Glow.
Font of Choice, I used Egbert.
(open all supplies and save mask to psp folder before beginning)
Lets Start ....
Open the template, hit shift & d on your keyboard,this pastes the template as new image, close the original template. Delete info layer, go to image, select resize, choose resize 80%, choose smartsize and make sure the box resize all layers is checked, click on the bottom white layer, go to image again and select canvas size and choose 500x500 to give a little extra room to work or if you prefer you can resize later.
Activate the layer named big circle, go to selections tab, select all, select float, select defloat then paste a paper from the kit as a new layer, resize this a little, i resized by 80% smartsize, when happy with size go to selections and select invert then hit delete on your keyboard, go to selections again and select none then delete the original circle layer.
Repeat that step on the layer named centre circle & rectangle layer, use different papers for each layer and delete the original layers as you work.
Again repeat step on the frame layers (big circle frame, small circle frame & rectangle frame), use different papers and delete the originals, now on each frame layer we will add a gradient glow, do this by going to effects tab, select eye candy 4000, gradient glow and use the following settings :-
Glow Width - 3.00 .... Soft Corners - 25 .... Overall Opacitiy - 100 .... Colour - Black, Click ok.
Colourise the skull layer by going to adjust, select hue/saturation/lightness and then choose colourise, pick a colour that matches your tube/tag, click ok.
Activate the Punk Rock wordart layer and you can either colourise this in the same way as the skull layer or go to selections, select all, select float, select defloat then paste a paper from the kit as a new layer, resize a little if needed then go to selections and select invert then hit delete on the keyboard, selections, select none, add the same gradient glow as before to the wordart layer.
I decided not to use the stars layer for this tag but this is up to you, either colourise or use a paper in the same way as above.
Activate the bottom white layer now and paste a paper from the kit as a new layer, resize this a bit but not smaller than the canvas, go to layers, select load mask from disc and find the mask you saved at the start (WSL Mask #254) use the following settings :-
Fit to canvas - checked .... Source luminace - checked .... Invert transparency - unchecked .... Hide Mask - checked
go to layers, merge group & you can use the deform tool to resize to suit your tag. I simple stretched it out a bit.
Back to your top layer now and paste your tube as a new layer, resize a little and place where you want it, add a dropshadow to the tube.
Choose any other elements from the kit, decorate how you wish, resize elements as needed and place where you like them, add a dropshadow or add the gradient glow to each element layer.
Now crop & resize your tag if you wish to if you didnt at the start.
Add your name, artist info & copyright.
Save as jpeg or .png.
And I think thats us about done.
Thanks for trying my tutorial and i hope you enjoyed it
would love to see your results,
hippiedaze@hotmail.com

Friday, 3 July 2009
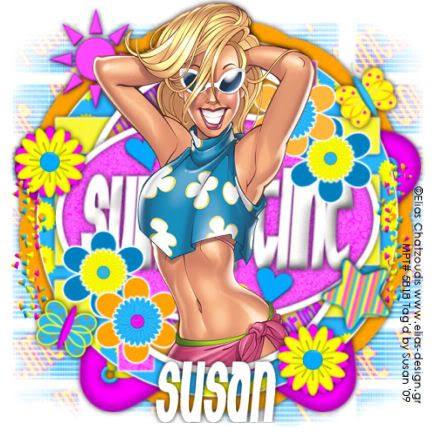
Bright Summertime
This tutorial was written on June 28th 2009 by Susan aka Hippiedaze.
The idea for this tag is off my own head lol and any resemblance is purely coincidence.
General Knowledge of psp is required, tutorial was written in psp 9 but will work in other versions.
Supplies Needed
Tube of Choice I used the artwork of Elias Chatzoudis, you will need a proper license to use his work, pls visit MPT - HERE.
PTU Scrap Kit Used - 'Summertime Brights' by Susan aka Hippiedaze (me), you can purchase this kit from P4S - HERE.
Template Used - Hippiedaze Template #20 by Susan aka Hippiedaze (me) - HERE.
Mask Used - Bfly Flby Mask #32 @ Butterfly Flutterby Creations - HERE.
Plugin Used - Eye Candy 4000, Gradient Glow.
Font of Choice.
(open all supplies and save mask to your psp folder before beginning)
Lets Start ....
Open your template, hit shift & d on the keyboard to duplicate, now you can close the original template.
Delete info layer.
I resized here, go to image, resize and make sure resize all layers is checked, resize by around 90% smartsize and check the box that says resize all layers, click ok. (This depends on the size you like your tags).
Activate the bottom white layer and go to image,select canvas size and choose 500x500, click ok, if you have any transparent image showing grab your floodfill tool and fill with white.
Activate the large circle layer, go to selections, select all, select float, select defloat and paste paper of choice as a new layer, resize it till your happy with it then selections, invert & hit delete on the keyboard, selections, select none. Delete the original layer now.
Go to effects, select eye candy 4000, gradient glow and use the following settings :-
Glow Width - 3.00 .... Soft Corners - 25 .... Overall Opacity - 100 .... Colour - White, move the slider to about half way along to the middle, click ok.
Add a small dropshadow to the layer.
Repeat the step on the layers named horizontal slats, vertical slats, black oval & grey oval & white oval part, use different papers for each layer and delete the original layers as you go along.
Add the same gradient glow & drop shadow to each new layer you created.
I didnt use the white oval part layer in this tag so if your following mine just delete this layer.
Activate the oval frame 1 layer, go to adjust, select brightness/contrast and move the brightness slider all the way to the right (255) this will change the frame to white, click ok then add the dropshadow.
Repeat that step for the oval 2 layer.
For all 4 flower layers, i colourised by going to adjust, choose hue/saturation/lightness, choose colourise and pick a nice bright colour to match the rest of your tag, add the gradient glow to these 4 layers also the dropshadow.
Activate the bottom white layer, paste a paper from the pack as a new layer, go to layers, select load mask from disc and use the mask that you saved at the start (Bfly Flby Mask #32), use the following settings :-
Fit to canvas - checked .... Source luminace - checked .... Invert transparency - unchecked .... Hide Mask - checked, click ok, go to layers, merge group.
Take one of the round frames from the kit and paste as a new layer just above your mask layer, resize as needed till its just showing from behind the circle layer (see mine), add the dropshodow to this layer but not the gradient glow.
I also added one of the star frame elements, resize as needed till it sits how you like it, add the dropshadow to this layer too.
Activate the centre oval layer you created, take one of the wordart layers and paste as a new layer, resize as needed so it fits nicely inside the oval, you can leave this layer coloured or if your following mine then go to adjust, select brightness/contrast and move the brightness slider all the way to the right (255) now the words will be white, go to effects, select 3d effects, inner bevel and use the following settings :-
Bevel Style - 4 .... Width - 5 .... Smoothness - 49 .... Depth - 5 .... Ambience - 0 .... Shininess - 0 .... Colour - White .... Angle - 332 .... Intensity - 50 .... Elevation - 30 . click ok.
Add the dropshadow to this layer.
Now take your tube and paste as a new layer, resize a little if needed and place where you like it within the circle, once happy with placement go to layers, select duplicate and move the duplicate layer down to the layer above the vertical oval, click back to the top tube layer and grab your eraser tool to eraser any tube bits that are hanging over the frame, add the dropshadow to the BOTTOM tube layer not the top one.
Take some flower elements & any other elements from the kit and paste each as a new layer, resize as needed and place where you like them to decorate your tag, i added the gradient glow to most element layers and the dropshadow, this is up to you.
Once you finish decorating your tag crop or resize if you didnt at the start.
Add your name, artist info & copyright.
Save as jpeg or .png.
And I think thats us about done.
Thanks for trying my tutorial and i hope you enjoyed it
would love to see your results,
hippiedaze@hotmail.com