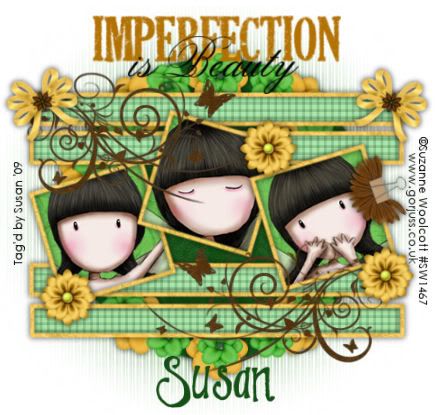
This tutorial was written on May 8th 2009 by Susan aka Hippiedaze.
The idea for this tag is off my own head lol and any resemblance is purely coincidence.
General Knowledge of psp is required, tutorial was written in psp 9 but will work in other versions.
Supplies Needed
Tubes of choice - I used the artwork of Suzanne Woolcott and you need a proper license to use her tubes, visit gorjuss.com - HERE .
FTU Scrap Kit ' FM Samjiva' which you can get by visiting Fantasy Moments - HERE .
Template Used - Melissa Template #36 by Melissa @ Melissa's Creations - HERE .
Mask of Choice.
Word Art Used - Wordart #7 by Melissa @ Melissa's Creations - HERE .
Plugin Used - Mura Meister - Copies.
Font of Choice.
(Save mask to your psp folder before you begin and open all other supplies you need)
Lets Get Started
Open the template, hit shift & d on your keyboard,this pastes the template as new image, close the original template. Delete info layer, I resized mine a little at this point, go to image, resize, change width & height to 85%, choose smartsize and make sure resize all layers is checked, click ok. Go to layers, add new raster layer, grab floodfill tool and fill the new layer with white, go to image, select canvas size and choose 500x500, click ok. this gives you more room to work.
Ok this ones really easy, all template layers (except the 3 squares layers) require the same following step :-
go to selcetions, select all, select float, select defloat then paste a paper of choice from the kit as a new layer, go to selections and select invert then hit delete on your keyboard, select none, this pastes the paper as a new layer so you can delete the orginial layers as you go through each layer. Give each of the new frame layers a dropshadow.
Activate one of the squares layers, grab your magic wand and click on the white area, paste a tube of choice as a new layer, resize a little if you need to, make it fit nice inside the frame, when happy with placement go to selections and select invert then hit delete on your keyboard, select none.
Repeat this with the other 2 squares layers with different tubes as long as they are the same artist. Now back on the square layer, selections, select all, select float, select defloat then paste a paper of choice, go to selections and select invert then hit delete on the keyboard, select none. No need for a dropshadow on this layer.
Repeat for the other 2 square layers. Now you can delete all the original square layers.
Take a flower element of choice from the kit and paste in the centre of your canvas, resize down around 20% smartsize, all layers UNCHECKED, now go to effects and select mura meister, copies, select encircle,change the number to 10 and change shift x&y to 60, leave all other settings the way they are, click ok. Move this layer down to just above the main circle layer.
(p.s if your using different size for your image from mine then you might have to play with the settings a bit to get the circle fitting).
Now take another flower from the kit, paste as a new layer, resize to around 15% smartsize, click ok and place in centre of your canvas, go to mura meister again, select encircle but this time change the number to 16, shift x&y should stay at 60. Place this layer just above the first flower layer (see mine).
Click on top layer of your canvas now and paste the wordart as a new layer, resize if needed, i resized mine by 80% smartsize, place at top of your tag or where you like it, go to adjust, select hue/saturation/lightness, select colourise and choose a colour that matches your tubes. I did this with both wordart layers.
Click on bottom white layer now, paste another paper from the kit as a new layer, go to layers, select load mask from disc and find the mask you choose at the start, check the following settings :-
Fit to canvas - checked .... Source luminace - checked .... Invert transparency - unchecked ....Hide Mask - checked, click ok.
Click back to your top layer now and add a few elements of your choice around your tag, resize elements as needed and add a dropshadow to each layer.
Do any cropping and resize now if you wish to.
Add your name, Add artist info and copyright info.
Save as jpeg or .png. and we're done lol.
Thanks for trying my tutorial and i hope you enjoyed it would love to see your results, hippiedaze@hotmail.com
Sunday, 24 May 2009
Inperfection
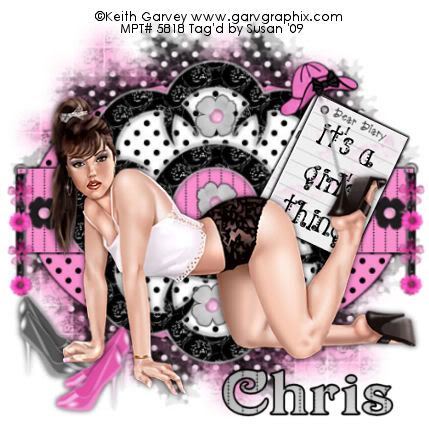
Girls Thing
This tutorial was written on May 22nd 2009 by Susan aka Hippiedaze.
The idea for this tag is off my own head lol and any resemblance is purely coincidence.
General Knowledge of psp is required, tutorial was written in psp 9 but will work in other versions.
Supplies Needed
Tubes of Choice I used the artwork of Keith Garvey, you must have a proper license to use his work please visit MPT - mypsptubes - HERE .
PTU Scrap Kit 'It's A Girl Thing' by Chris @ Katelynn's Designs, you can purchase the kit from - HERE .
Template Used - Template #3 by Sylly Creationz - HERE .
Mask Used - WSL Mask #78 & WSL Mask #84 by Chelle @ Wee Scots Lass Creations - HERE .
Plugin Used - Eye Candy 4000, Gradient Glow. Font of Choice.
(Open all supplies and save mask to psp folder before you begin)
Lets Get Started
Open the template, hit shift & d on your keyboard,this pastes the template as new image, close the original template. I resized all layers by 80% smart size at this point. ( optional) . Delete info layer, activate the bottom white layer, go to image, select canvas size, choose 500x500, click ok, if theres any transparent canvas showing grab your floodfill tool and fill white. This gives you a little room to work.
Activate the layer named Black Oval, go to selections, select all, select float, select defloat then paste paper of choice, resize it a bit as papers are quite big then go to selections, invert, hit delete on the keyboard and then select none. Now you can delete the original layer.
Repeat this step with all the other template layers, Use different papers of choice for each layer & delete the original layers as you work.
Activate the Black Oval layer you created, go to Effects, select eye candy 4000, gradient Glow and use the following settings :-
Glow Width - 3.00 .... Soft Corners - 25 .... Overall Opacitiy - 100 .... Colour - Black .
Activate the Rectangle layer you created and repeat the gradient glow on this layer & then activate the pink shape layer you created, add the gradient glow to this layer but change the colour to white & add a small dropshadow.
Activate the bottom white layer, paste a paper of choice from the kit as a new layer, go to layers, select load mask from disc then find the first mask we loaded at the start (WSL Mask #78) Make sure the following settings are set...
Fit to canvas - checked .... Source luminace - checked .... Invert transparency - unchecked Hide Mask - checked.
Go to layers, merge group & resize to suit your tag using the deform tool if needed.
Now activate the bottom white layer once, paste a different paper of choice then repeat the mask settings once more changing the mask to the 2nd mask we loaded at the start (WSL Mask #84). Merge group then resize how you want it.
Activate your top layer of canvas now and paste your tube as a new layer, resize a little if needed and place where you like it, add a dropshadow.
Take a 'dear diary' element from the kit and open as a new image in your psp workspace, resize quite smal then grab your text tool from the tool palette, select foreground colour to null and background colour to black, choose a font and type out any words you want on your diary sheet, when happy, convert to raster layer, go to layers and merge visible, now take the merged layer and paste on your tag, resize more if needed, using the deform tool rotate your paper a little to the right, remember to sharpen, duplicate this layer and grab deform tool again to move it very slighty so it looks like you have 2 pages, (see mine). Add the gradient glow to these 2 layers using the same settings as before with colour black.
Add any elements you wish and decorate your tag, resize elements as needed and add a dropshadow.
Crop or resize your tag if you want to to your preffered size in the usual way. I resized at start but cropped a little at this point.
Add you name, artist info & copyright info.
Save as jpeg or .png. and we're done lol.
Thanks for trying my tutorial and i hope you enjoyed it would love to see your results, hippiedaze@hotmail.com
Saturday, 23 May 2009
Rock Revolution Chick
This tutorial was written on May 8th 2009 by Susan aka Hippiedaze.
The idea for this tag is off my own head lol and any resemblance is purely coincidence.
General Knowledge of psp is required, tutorial was written in psp 9 but will work in other versions.
Supplies Needed
Tubes of Choice
I used the artwork of Martin Abel, you must have a proper license to use his work please visit CILM - HERE .
FTU Scrap Kit ' Rock Revolution' by Yvette @ Misfits Scrapz - HERE .
Template Used - Template #1 from Template Bundle by Caitlin @ Cupcake Sprinkles - HERE . Mask of Choice. ( I've had this mask a while and can't remember the link so can't share it, sorry) .
Font of Choice.
Plugin Used - Eye Candy 4000, Gradient Glow.
(Open all supplies and save your chosen mask to psp folder before you begin)
Lets Get Started
Open the template, hit shift & d on your keyboard,this pastes the template as new image, close the original template. I resized all layers by 95% smart size but this is optional depending what size you are comfy working with. Delete the info layer. Go to layers, add new raster layer, grab floodfill tool and floodfill the new layer white, move this layer all the way to bottom of your canvas, now go to image, select canvas size, choose 500x500, if theres any transparent image showing floodfill white.
Activate the Circle 1 layer, go to selections, select all, select float, select defloat (you should now have marching ants around the circle) then paste a paper of your choice as a new layer, go to selections, select invert then hit delete on your keyboard, select none & delete the original circle layer.
Repeat that step on the Circle 2 layer and the 3 rectangle layers, use different papers for each layer and delete the original layers as you go along.
Activate one of the Frame layers, I opted to leave these white but you can change them how you wish by doing the above step with a paper or even floodfill with different colour . I did all 3 frame layers the same.
Still on a frame layer, go to effects, select eye candy gradient 4000, gradient glow and use the following settings :-
Glow Width - 3.00 .... Soft Corners - 25 .... Overall Opacitiy - 100 .... Colour - Black .... Setting - Fat.
Go through the other template layers you created (except the Circle 2 layer) and add the same gradient glow to each layer.
I left the staples as they were, you can change if you wish.
Now paste your tube as a new layer, make sure its on the top layer lol, resize it if needed and place in the middle, dont worry if theres a bit hanging over the bottom we will post an element to cover that . Dropshadow your tube.
Now take the Rock Revolution label element from the kit, paste as a new layer above your tube layer so its covering the bottom, resize the label a bit so it fits nicely. I added the gradient glow to this but moved the 2nd slider to the left a bit so it wasnt so bold as the others.
Pick a wordart from the kit and paste as a new layer, resize a bit, remember to sharpen elements if you resize by a lot, place this at the top right of your canvas.
Now Activate the bottom white layer, paste a paper from the kit, resize a bit, go to layers, load mask from disc, then find the mask you chose at the start. Make sure the following settings are set...
Fit to canvas - checked .... Source luminace - checked .... Invert transparency - unchecked Hide Mask - checked. Go to layers, merge group & resize to suit your tag using the deform tool if needed till you get it how you want it.
Back on your top layer, time to decorate with any elements you want to use from the kit, resize, sharpen, and place where you like them, add small dropshadow to each layer.
Crop or resize your tag if you want to to your prefered size in the usual way. I resized at start but cropped a little at this point.
Add you name, artist info & copyright info.
Save as jpeg or .png. and we're done lol.
Thanks for trying my tutorial and i hope you enjoyed it would love to see your results, hippiedaze@hotmail.com

Weekend & Thank You's
Good Morning everyone,
Yeaaa its the weekend and after the week i had with the pc i think i deserve some time out tonight hehe, will be here most of today inbetween housework and stuff so hope to post a couple of tuts for you all before i go out later.
I also wanted to say Thank You all so much for all the comments on my tuts, Im truly overwhelmed at how many people are stopping by to have a peek :D its been awesome hearing from you and is fab to see so many blogs featuring my tuts, i never thought they would be so popular lol.
I have accepted an invitation to join the CT team over at Katelynns Designs, so im looking forward to getting started there very soon :D and a big thank you to Chris for the invite...
Time for me to get a tut or 2 on the go lol so hope you all have a wonderful weekend and take care
hugs Susan
Chickz Rock
This tutorial was written on May 7th 2009 by Susan aka Hippiedaze.
The idea for this tag is off my own head lol and any resemblance is purely coincidence.
General Knowledge of psp is required, tutorial was written in psp 9 but will work in other versions.
Supplies Needed
Tube of Choice. I used the artwork of Elias Chatzoudis, you must have a proper license to use his work please visit MPT - mypsptubes - HERE .
FTU Scrap Kit 'You Rock' by Bea @ Bea Creations - HERE .
Template Used - Template #74 by Beth @ Blissfully Beth - HERE .
Mask Used - WSL Mask #84 by Chelle @ Wee Scots Lass Creations - HERE .
Font of Choice .
Plugin - Eye Candy 4000, Gradient Glow.
(save mask to psp folder before you start)
Lets Get Started ...
Open your template, hit shift & d on the keyboard to duplicate, now you can close the original template. Delete info layer. I resized here, go to image, resize and make sure resize all layers is checked, resize by around 80%. You can always crop & resize finished tag later on .
Activate Triple Squares Bottom layer, go to selections, select all, select float, select defloat and paste paper of choice as a new layer, resize it till your happy with it then selections, invert & hit delete on the keyboard, selections, select none. You can delete the original layer now.
Activate Triple Squares Top layer and repeat the step above.
Now do the same step on all 3 Black Line layers, use different papers for each layer if you wish. Remember to delete the original layers as you go along. Go to effects, select eye candy 4000, gradient glow and add the following gradient glow to all the layers you just created :-
Glow Width - 3.00 .... Soft Corners - 25 .... Overall Opacity - 100 .... Settings - Fat .... Colour - White.
Now add a small dropshadow to each layer.
Activate the Dashed Lines layer, go to adjust, select brightness/contrast and move the brightness slider all the way to the right (255) the lines will now be white. Add a small dropshadow to this layer.
Activate one of the Circle Frame layers, grab your magic wand and click in the middle of the circle, go to selections, select modify, select expand and expand by 1, paste a paper of choice as a new layer, go to selections, select invert then hit delete on your keyboard.
Repeat this with the 2nd circle frame layer.
Now activate the Circle frame layer again and add the gradient glow we used before, do this on 2nd circle frame layer too.
Activate the Wordart layer, I simply add a small dropshadow to this layer. Now click on the bottom white layer, paste a paper from the kit, go to layers, load mask from disk and find the mask we loaded at the start (WSL #84). Make sure the following settings are set...
Fit to canvas - checked .... Source luminace - checked .... Invert transparency - unchecked .... Hide Mask - checked, then go to layers, merge group.
Click back to your top layer and paste your tube as a new layer, resize if you want to, place where liked and add a dropshadow.
Add any other elements you want to from the kit and place where liked, dropshadow the elements.
Crop or resize now if you want to. My finished tags are around 500x500.
Add your name, artist info and copyright info.
Save as jpeg or .png. and we're done i think lol.
Thanks for trying my tutorial and i hope you enjoyed it would love to see your results, hippiedaze@hotmail.com

Friday, 22 May 2009
Cute Bug Luv
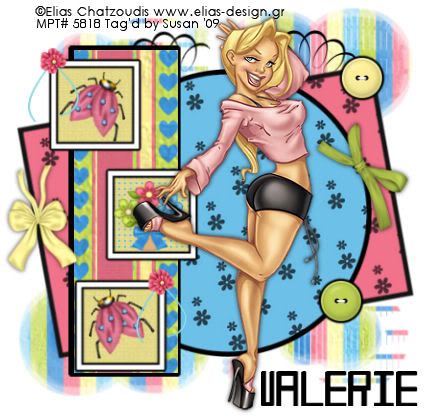
This tutorial was written on May 21st 2009 by Susan aka Hippiedaze.
The idea for this tag is off my own head lol and any resemblance is purely coincidence.
General Knowledge of psp is required, tutorial was written in psp 9 but will work in other versions.
Supplies Needed
Tubes of Choice, I used the artwork of Elias Chatzoudis, you must have a proper license to use his work please visit MPT - mypsptubes HERE .
PTU Scrap Kit 'Ladybugluv' by Valerie @ BabyV Dezign, you can purchase this kit by visiting P4S - HERE .
Template Used - MC Template #51 by Melissa @ Melissa's Creationz - HERE .
Mask Used - WSL Mask #79 by Chelle @ Wee Scots Lass Creations - HERE .
Plugin Used - Eye Candy 4000, Gradient Glow.
Font of Choice.
(open all supplies and place mask into your psp folder before we start)
Lets Get Started
Open the template, hit shift & d on your keyboard, this pastes the template as new image, close the original template. Delete info layer, go to image, select resize, choose 85% smartsize and make sure resize all layers is checked, activate bottom white layer then go to image and select canvas size, choose 500x500, click ok, this will give you some extra room to work and we can crop later.
Activate the Bottom Rectangle layer, selections, select all, select float, select defloat & paste a paper from the kit as a new layer, resize to your liking, once happy hit delete on your keyboard then go to selections and select none. Delete the original layer now.
Repeat the step above for the layers named Circle, Rectangle & also the Narrow Rectangle. Use different papers from the kit for each layer and delete original layers as you go along.
I left all Frame layers Black but depending on your tube and colours you might want to change the colour, to do this step go to selections, select all, select float, select defloat then go to layers and select add new raster layer then go to your tool palette and grab your floodfill tool then on your foreground tab in the colour palette choose a colour of your choice, go to your canvas and click inside the marching ants to fill frame with choosen colour. Add a dropshadow if you wish.
Activate the Squares layer, selections, select all, select float, select defloat & paste a paper from the kit as a new layer, resize to your liking, once happy hit delete on your keyboard then go to selections and select none. Delete the original layer now.
Activate the Squares Frame layer, I left these white and added a gradient glow, to do this go to effects select eye candy 400, gradient glow and use the following settings :-
Glow Width - 3.00 .... Soft Corners - 25 .... Overall Opacitiy - 100 .... Colour - Black.
If you have coloured the other frame layers then repeat the step you did for that to make this layer the same.
Activate the bottom white layer now, go to layers, add new raster layer, grab your floodfill tool and choose black as your foreground colour then fill the new layer with black, go to layers, load mask from disc, then find the first mask we loaded at the start (WSL Mask #79) Make sure the following settings are set...
Fit to canvas - checked .... Source luminace - checked .... Invert transparency - unchecked Hide Mask - checked. Click ok. go to layers, merge group and then use your deform tool if needed to stretch it out & shape it to suit your template. (see mine).
Activate your top layer and paste your tube as a new layer, resize as needed, remember to resize tubes bicubic and not smartsize, place tube where it looks good, add a dropshadow.
Add some elements now, remember to resize them (smartsize) to your liking and place where you want around your tag. I also added the gradient glow to a few elements.
Crop or resize your tag if you want to to your preffered size in the usual way. I resized at start but cropped a little at this point.
Add your name, artist info & copyright info.
Save as jpeg or .png. and we're done lol.
Thanks for trying my tutorial and i hope you enjoyed it would love to see your results, hippiedaze@hotmail.com
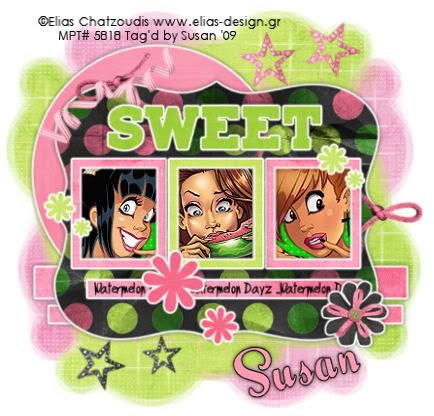
Sweet Watermelon
This tutorial was written on May 7th 2009 by Susan aka Hippiedaze.
The idea for this tag is off my own head and any resemblance is purely coincidence.
General Knowledge of psp is required, tutorial was written in psp 9 but will work in other versions.
Supplies Needed
Tubes of Choice I used the artwork of Elias Chatzoudis, you must have a proper license to use his work please visit MPT - mypsptubes - HERE .
FTU Scrap Kit 'May Goodie Train' collab part by Pimp'd Designz - HERE .
Template Used - Teresa's Template #10 by Teresa - I'm sorry the blog has been removed so until i hear back from Teressa I cant supply a link, sorry.
Mask Used - WSL Mask #99 by Chelle @ Wee Scots Lass Creations - HERE .
Font of Choice.
Effects Used - Textured Effects, Weave.
Plugin - Eye Candy 4000, Gradient Glow.
(save mask to psp folder before you start)
Lets Begin...
Open your template, hit shift & d on the keyboard to duplicate, now you can close the original template. Delete info layer. I resized here, go to image, resize and make sure resize all layers is checked, resize by around 65%. (This depends on the size you like your tags).
Click on the white background layer, go to image, canvas size and resize to 500x500, floodfill white, this gives us more room to work and you can crop & resize finished tag later on (my sizes are just a guide and you can resize to your liking) .
Click on the circle layer, go to selections, select all, select float, select defloat and paste paper of choice as a new layer, resize it till your happy with it then selections, invert & hit delete on the keyboard, selections, select none.
Repeat the step on the Strip1, Strip 2 & Strip 3 layers, I used the same papers for these. Repeat again on the Bracket layer, Sweet Wordart layer, Flower layers & finally the Frame 1,2 & 3 layers using different papers of your choice.
On all the above layers add eye candy, gradient glow with the following settings :-
Glow Width - 3.00 .... Soft Corners - 25 .... Overall Opacity - 100 ... Settings - Fat .... Colour - White.
Now add a small dropshadow to all these layers.
Activate the Photo Mat layer, grab your magic wand from the tool palette and click one of the grey squares, paste your tube part as a new layer and resize as needed, place where you like it inside the marching ants then go to selections, select invert then hit delete on your keyboard, select none.
Do this with each square remembering to click back on the photo mat layer before selecting with magic wand. Now activate the photo mat layer one more time, go to adjust, select hue/saturation/lightness, select colourise and colour to match your tubes.
Now go to effects, select textured effects, select weave and use the following settings :-
Gap Size - 2 .... Width - 5 .... Opacity - 9 .... Weave Colour - to match your tube .... Gap Colour - same as weave colour .... Fill Gaps - Checked.
Now click on the bottom white layer, paste a paper from the kit, go to layers, load mask from disk and find the mask we loaded at the start (WSL #99). Make sure the following settings are set...
Fit to canvas - checked .... Source luminace - checked Invert transparency - unchecked .... Hide Mask - checked go to layers, merge group.
Repeat the mask step with a different paper, then go to image, select mirror.
Now click back to your top layer and add any elements you wish from the kit, resize if needed and dropshadow, i also added the gradient glow to my flower element.
Words I added in the rectangle bar is optional.
Now crop or resize if you want to in the usual way.
Add your name, artist info and copyright info.
Save as jpeg or .png. and we're done i think lol.
Thanks for trying my tutorial and i hope you enjoyed it would love to see your results, hippiedaze@hotmail.com